You will need…


Enter the search term and press "ENTER" .

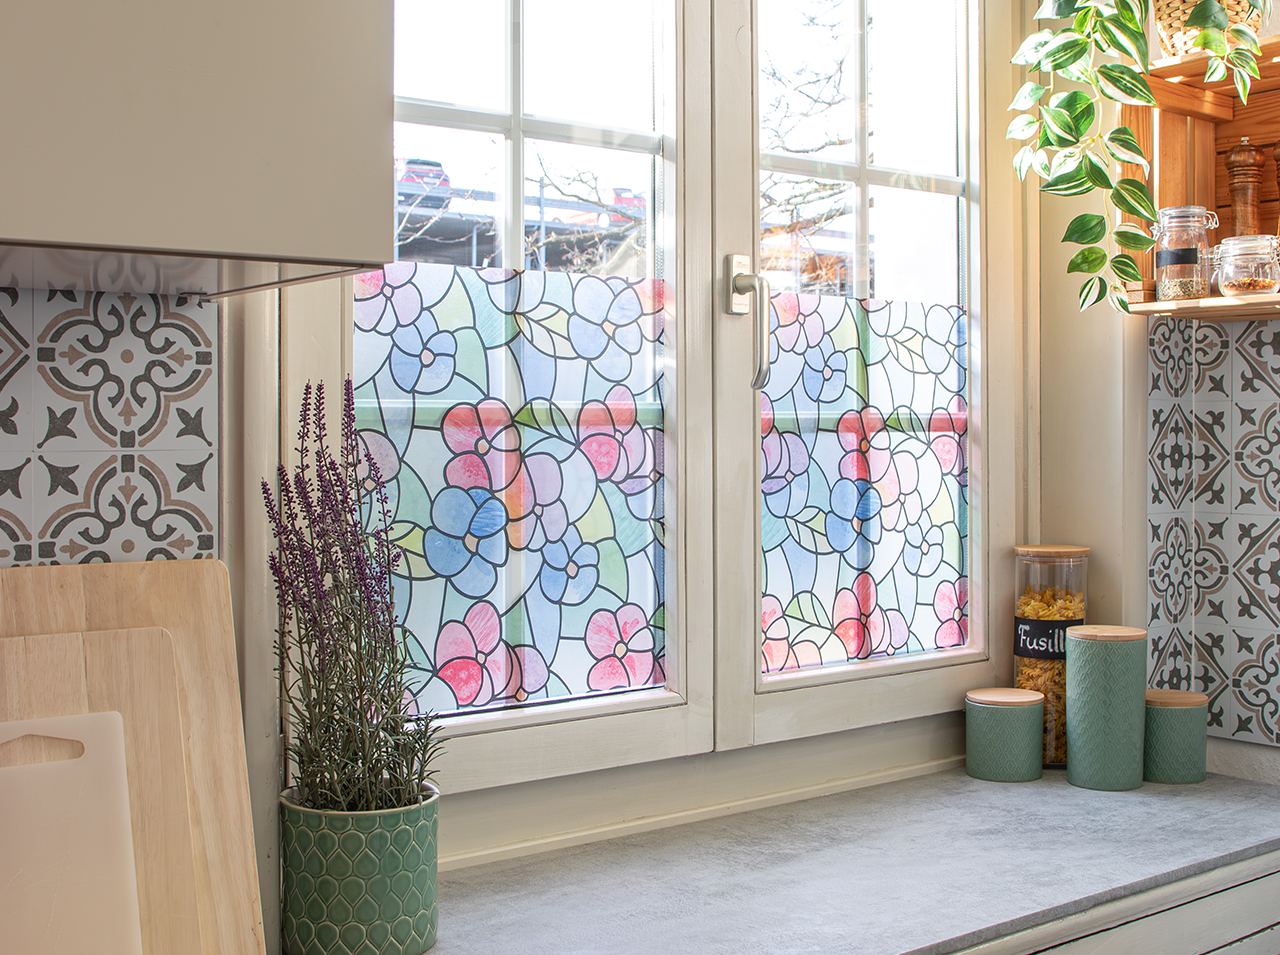
DIY sun protection: here come sunglasses for your window!
Project from Alex - 0 CommentsThe sun is our elixir of life and we are grateful for it — especially outdoors at the moment. But at home, sun can sometimes be irritating at windows, dazzling you in your home office or creating greenhouse-like temperatures through roof windows and large window areas in your rooms. Here comes your inexpensive DIY summer and sun solution, allowing you to deliver the right amount of sun yourself: just apply the self-adhesive d-c-fix® tinted film to the windows where you want to reduce the sunlight coming in.
You´ll feel relaxed and comfortable in your four walls, even at the height of summer!
- One roll of d-c-fix® tinted film
- d-c-fix® tool kit with doctor blade and cutting knife
- Metal rule
- Pencil
- Measuring tape
- Spray bottle with water
- Cloth
Let’s go
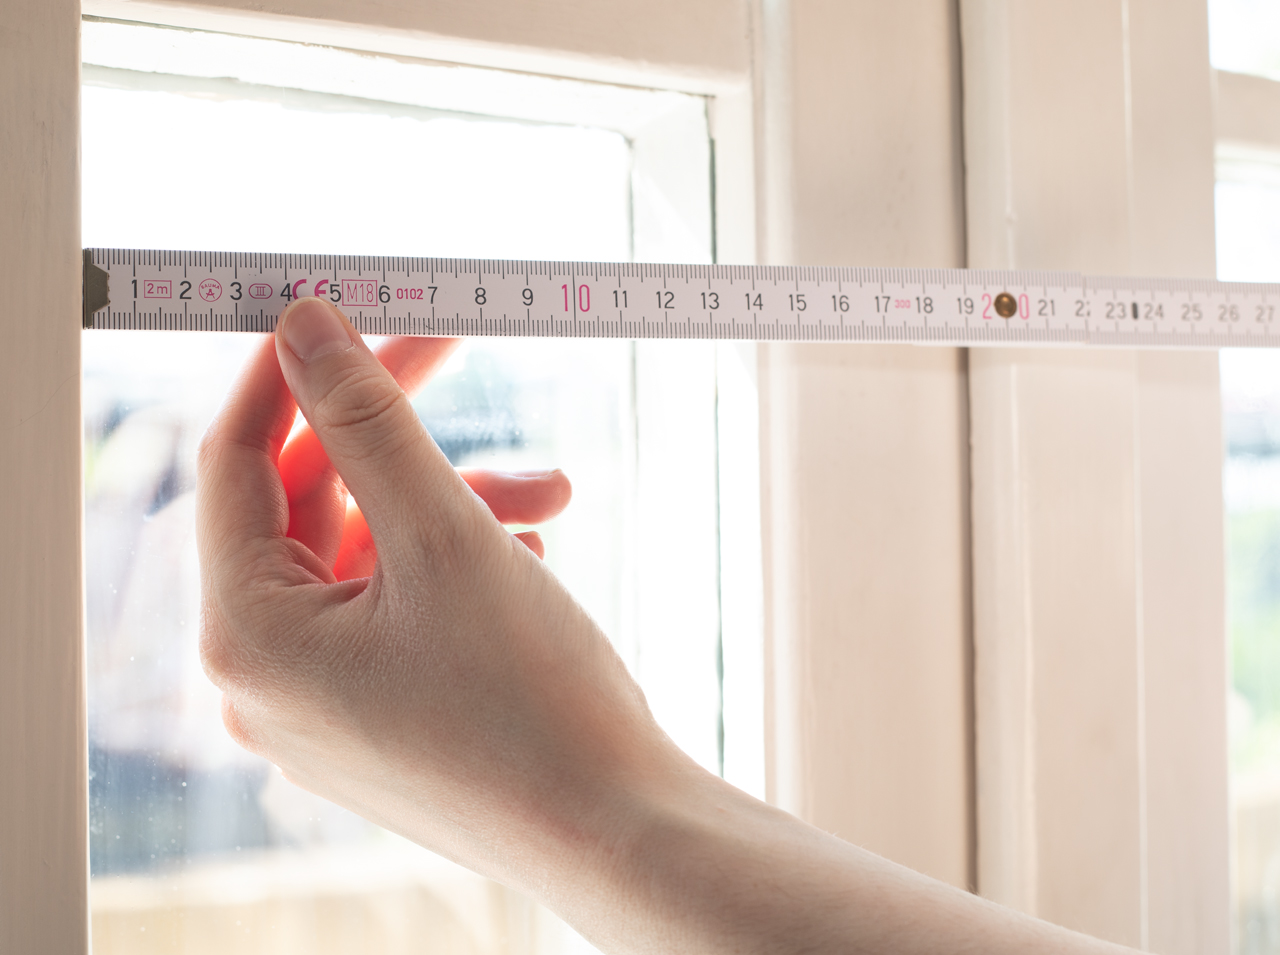 Step 1
First of all, you need to whip out your measuring tape and measure the window surfaces to be covered.
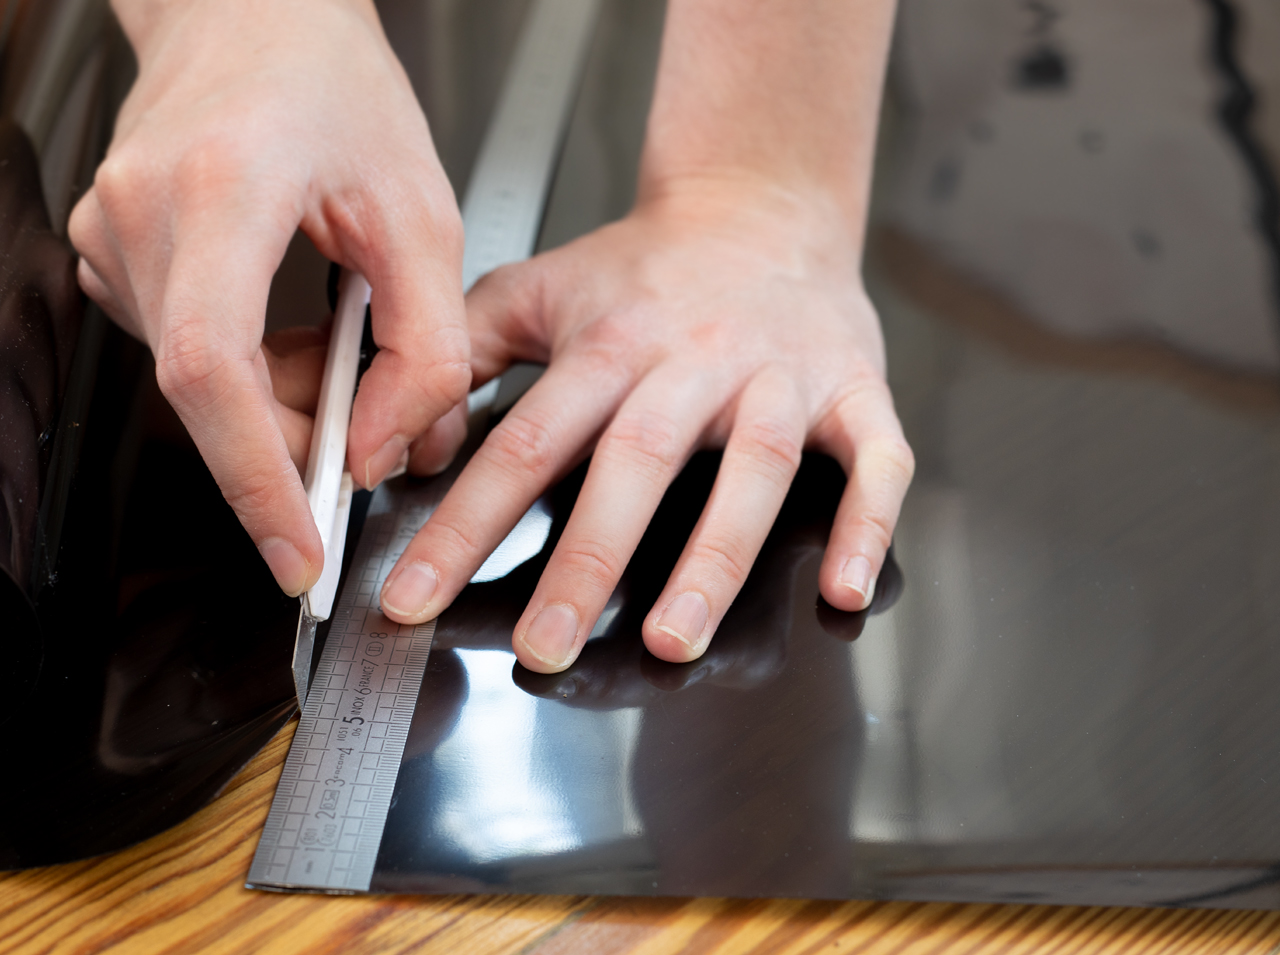 Step 2
Then transfer the dimensions to the back of the tinted film–and cut your film pieces 2 to 3 mm (1/8 inch) narrower than measured. When you have cut out all the film, you can get going. Ideally, you can get someone to help — with two people, it’s even easier and faster.
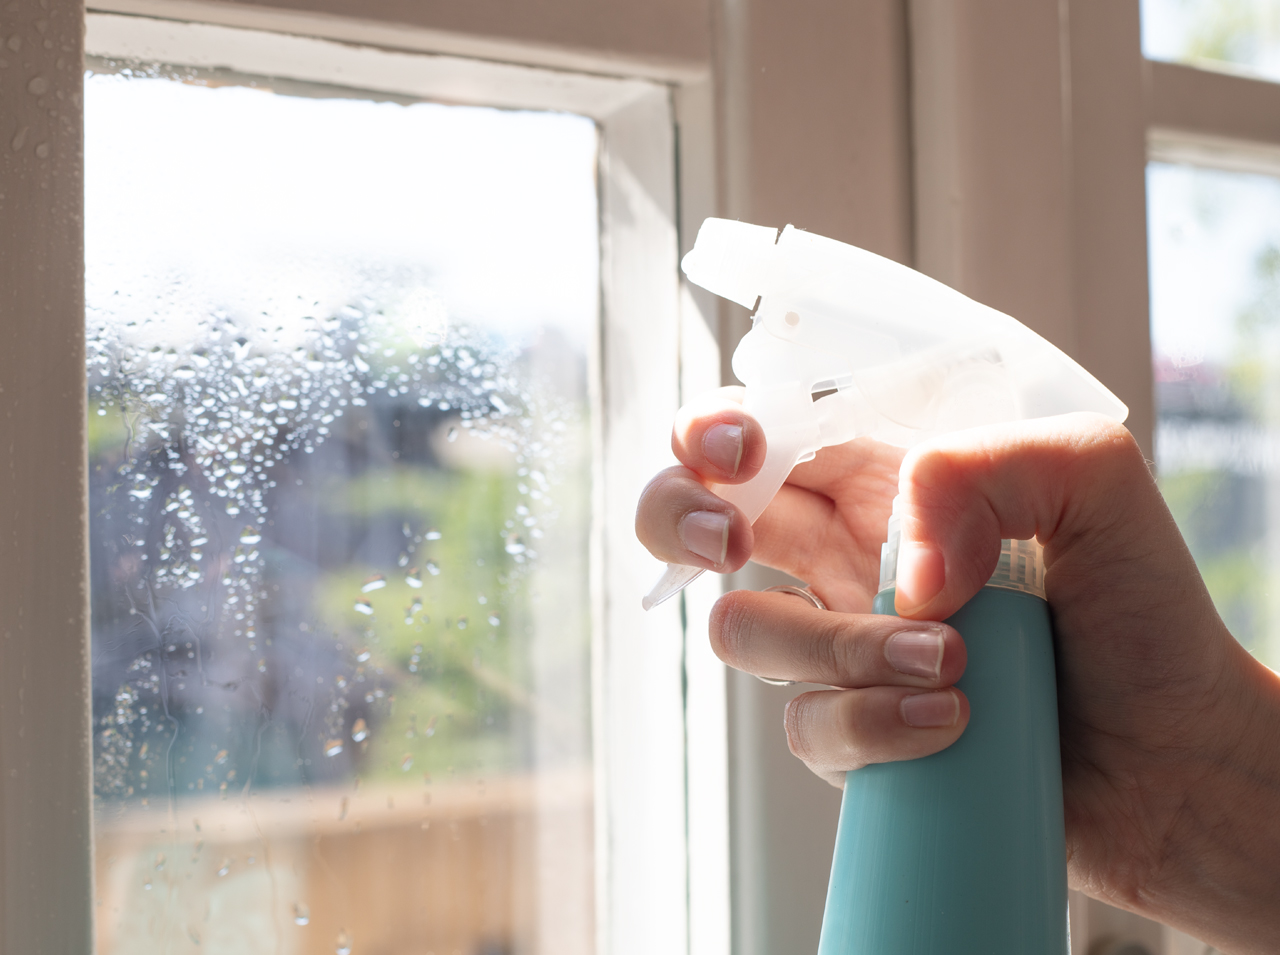 Step 3
Now spray a fine mist with the spray bottle on your first window surface. Hand the first film you cut out to your helper to hold–and gently pull off the thin protective film on the tinted film.
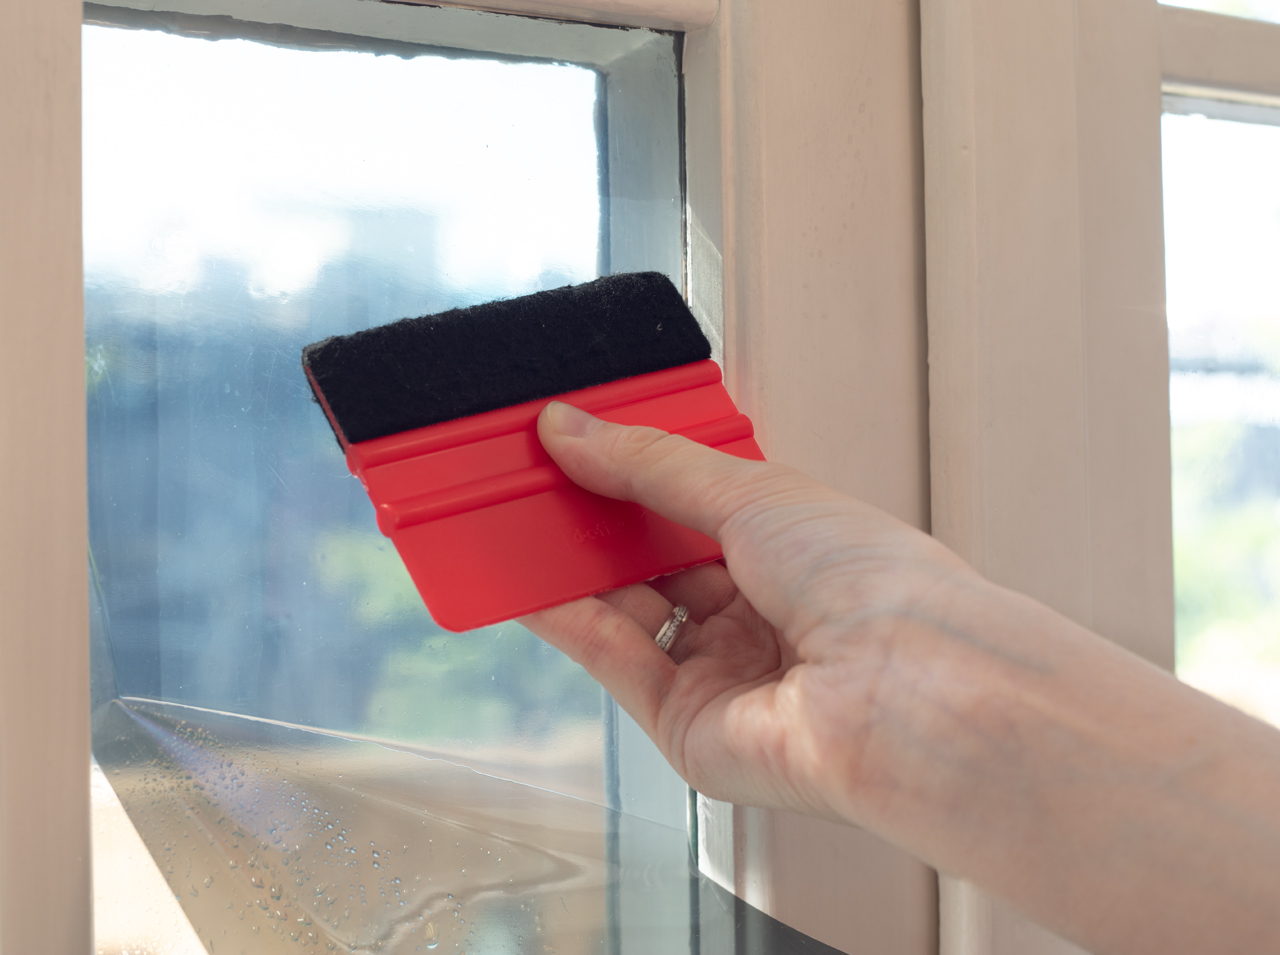 Step 4
You can now also spray the self-adhesive foil side that has been “released” and then attach it to the top edge of your window glass.
Then press it — working from top to bottom — and spread the tinted film from the center out to both edges with the doctor blade. To finish, use a soft cloth to wipe your freshly covered window surface smooth and dry – and you´re done!
You’re done!

Post A Comment
EXPERT ADVICE
Before using tinted film to give your windows “sunglasses,” it helps to thoroughly clean the glass surfaces beforehand -- so that no dirt or grease can spoil the perfect hold of the film.
Preparation time
10 min
Execution
30 min
Difficulty level
Advanced
Costs
medium
Projects you might like


No Comments