You will need …


Enter the search term and press "ENTER" .
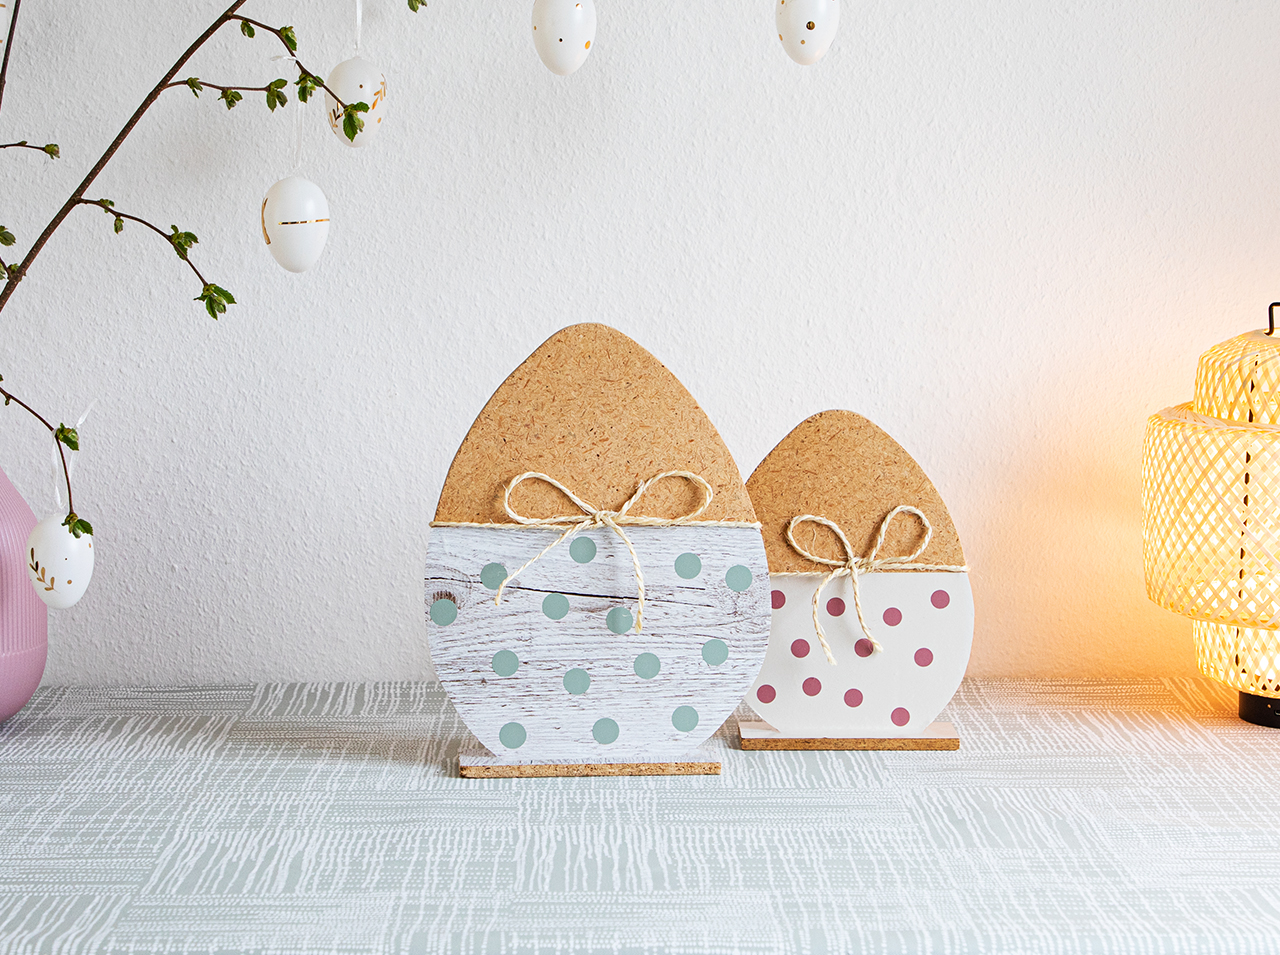
DIY decorative hack for the festivities: the Easter bunny is amazed!
Project from Cintia - 0 CommentsEven the Easter bunny is amazed! Because this decoration emanates spring mood and brings anticipation of Easter to your home. The large stand-up Easter eggs are styled half in wood look, half in sand color and decorated with dots in delicate pastel shades. How does it work? Quite simply with the four d-c-fix® adhesive foils Pino Aurelio light, Uni Matt sand, Uni Matt ash rose and Uni Matt sage green, which we have selected for you as a perfect match for this decorative DIY. The countdown to Easter is on: lay & glue away!
- d-c-fix® Pino Aurelio light adhesive foil
- d-c-fix® Uni Matt sand adhesive foil
- d-c-fix® Uni Matt ash rose adhesive foil
- d-c-fix® Uni Matt sage green adhesive foil
- d-c-fix® application kit with doctor blade & utility knife
- Pencil
- Scale
- Ruler
- String
- Wooden egg-shaped blocks
Let’s go!
How to style the decorative Easter eggs step by step:
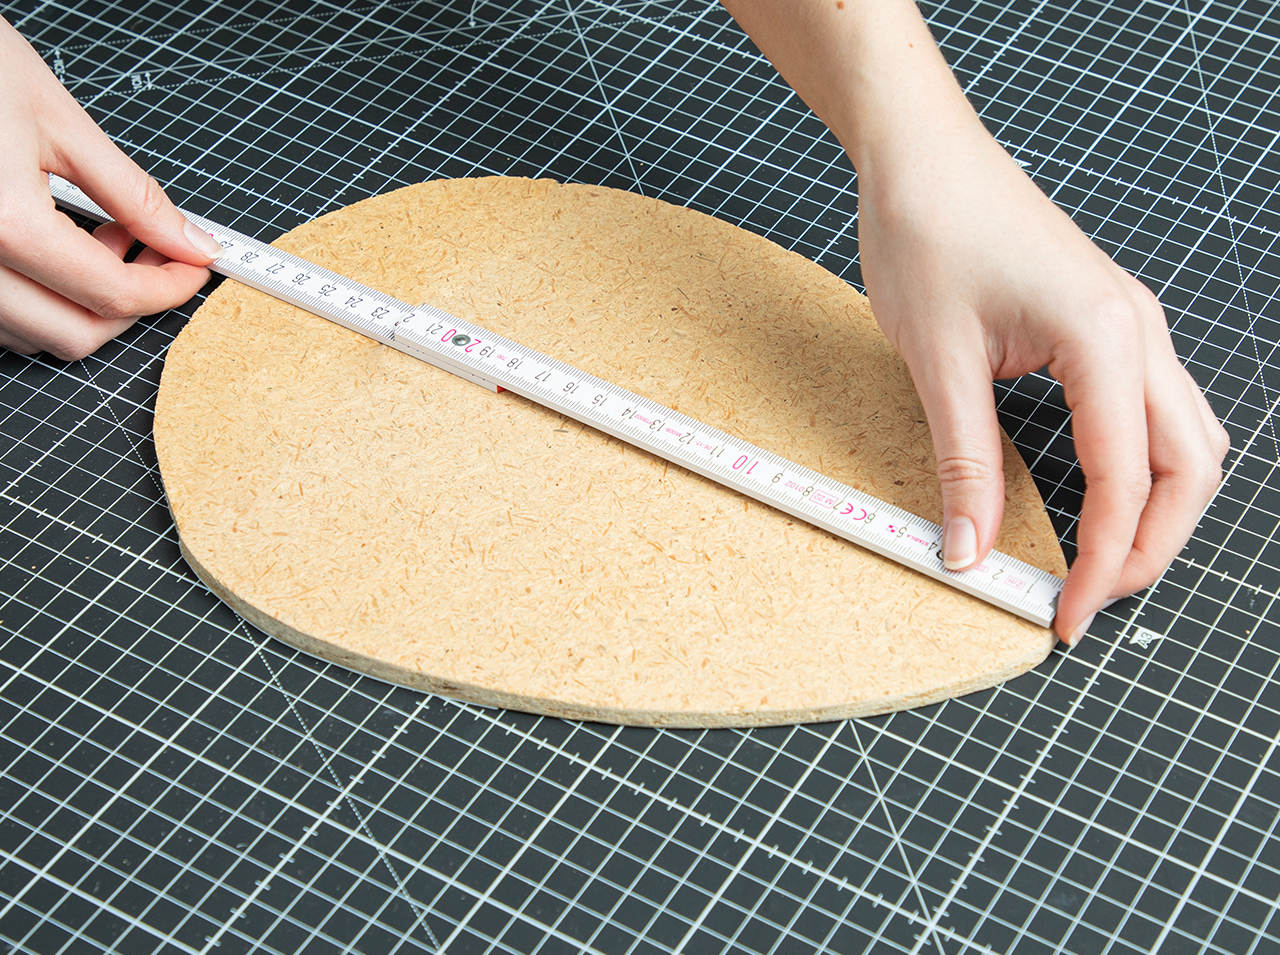 Step 1
Measure the dimensions of half of the wooden egg surface.
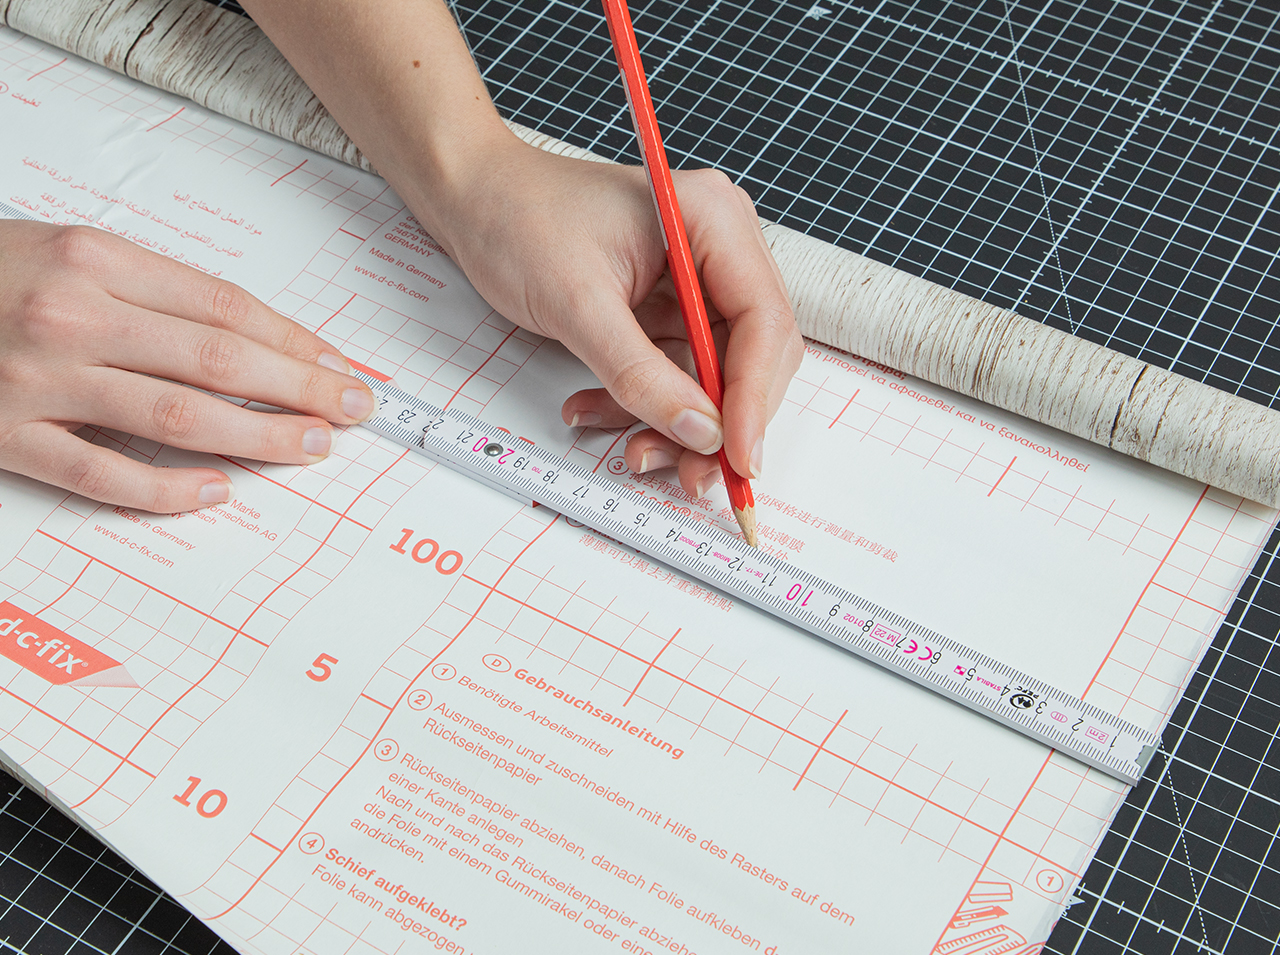 Step 2
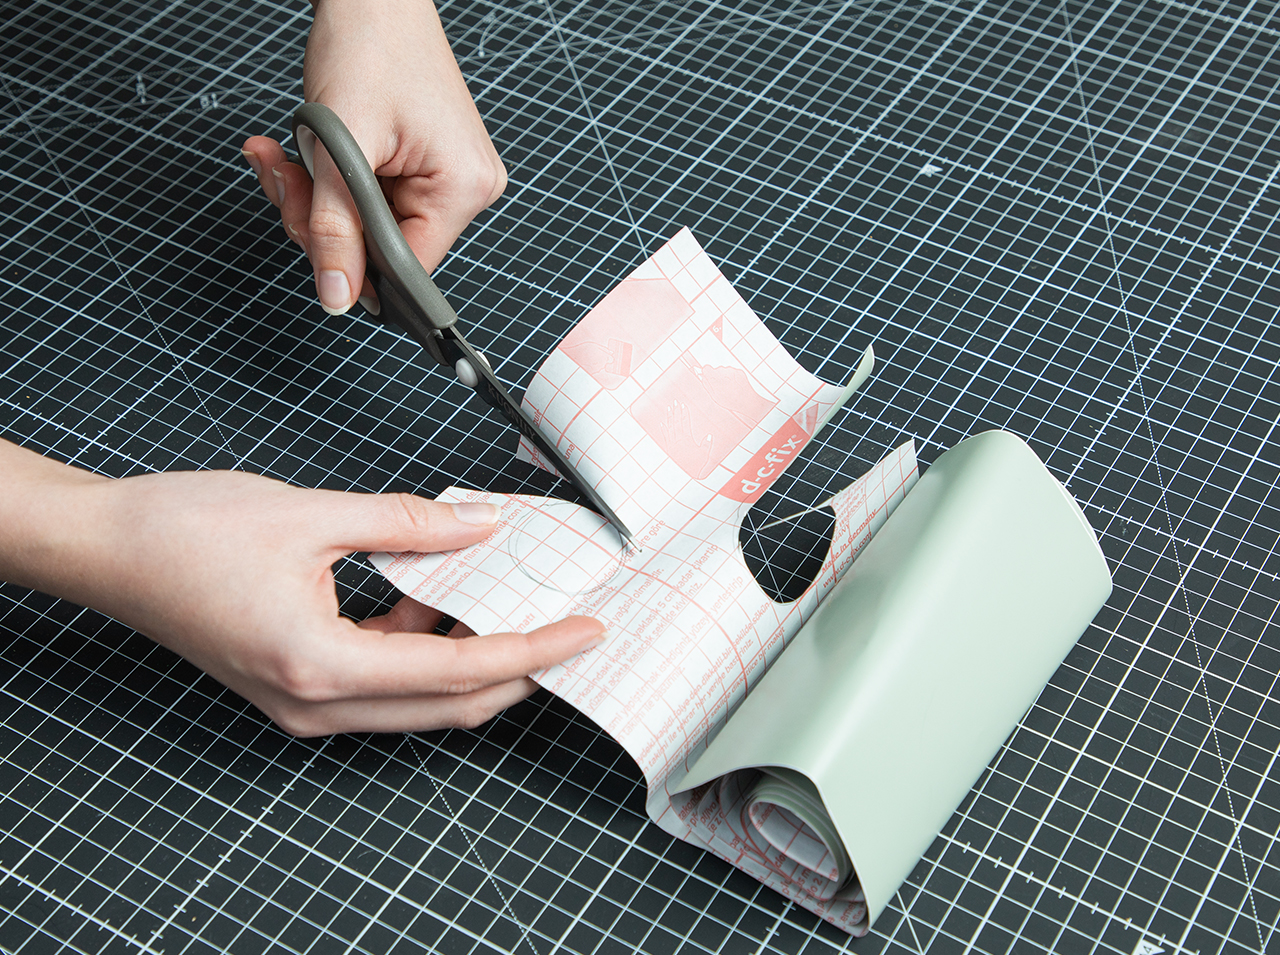
Transfer these measurements to the Pino Aurelio light adhesive foil and cut it out – do the same with the Uni Matt sand foil.
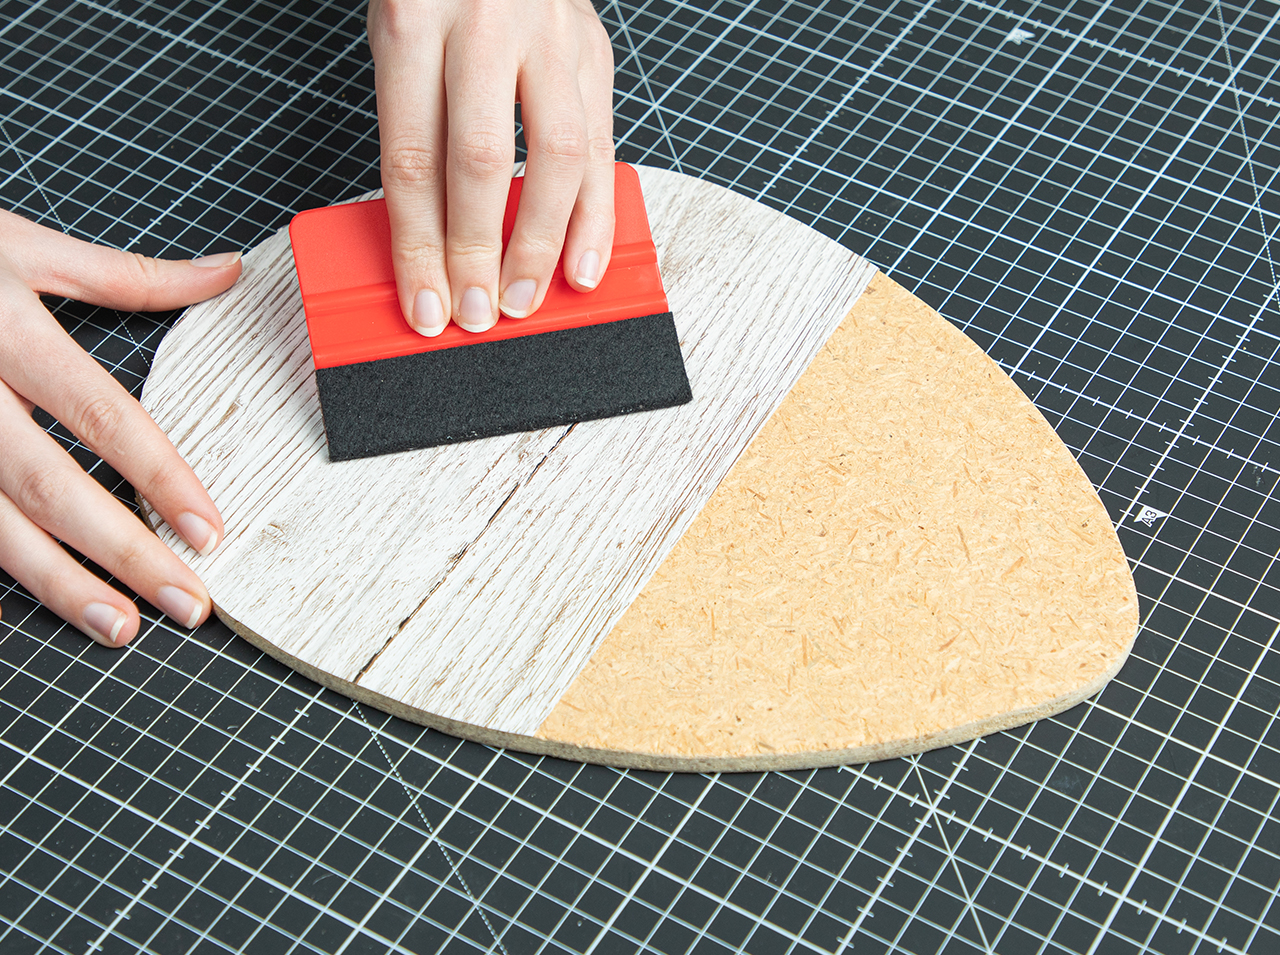 Step 3
Now use the doctor blade to smooth the foils onto the egg-shaped wooden block.
 Step 4
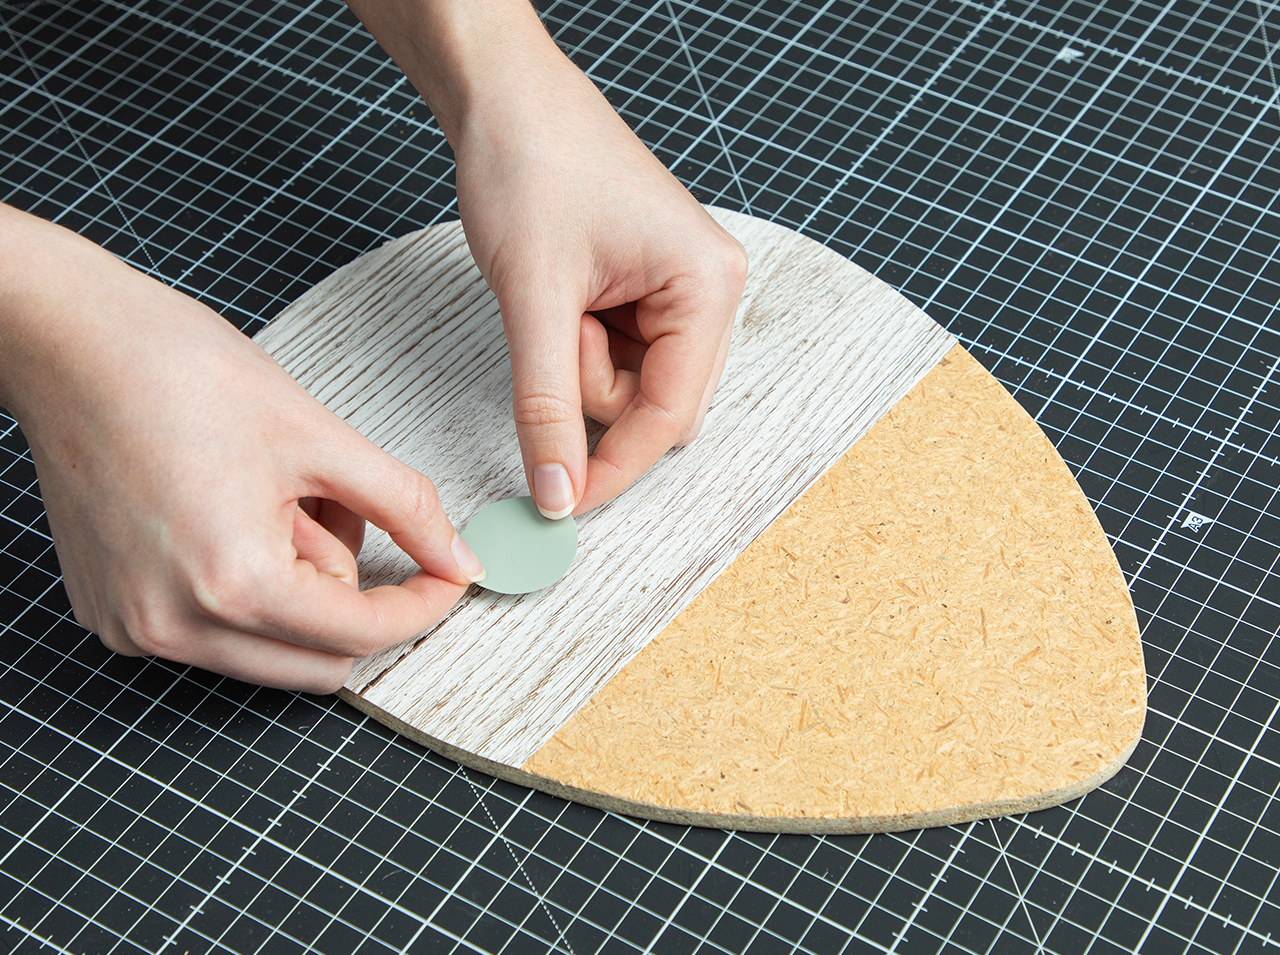
Cut out a few dots from the Uni Matt ash rose and Uni Matt sage green foils.
 Step 5
As a decorative finish, place the dots on the bottom half of the egg shape and smooth firmly into place.
 Step 6
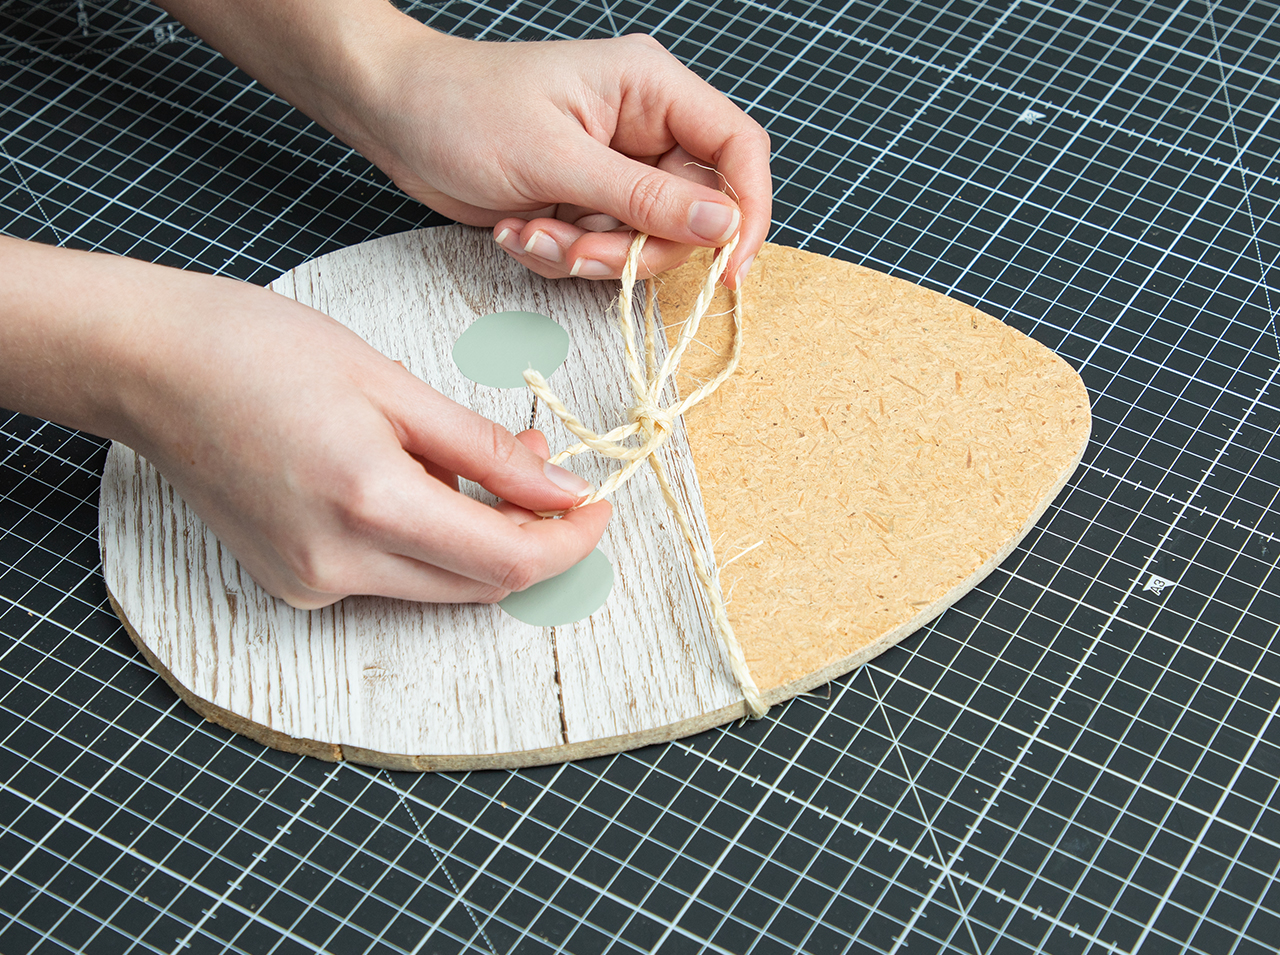
Attach the string to the middle of the egg – where the two foils meet – and tie it with a bow to the front.
You’re done!

Post A Comment
Preparation time
30 min
Execution
30 min
Difficulty level
Advanced
Costs
Average
Projects you might like

No Comments