You will need…


Enter the search term and press "ENTER" .
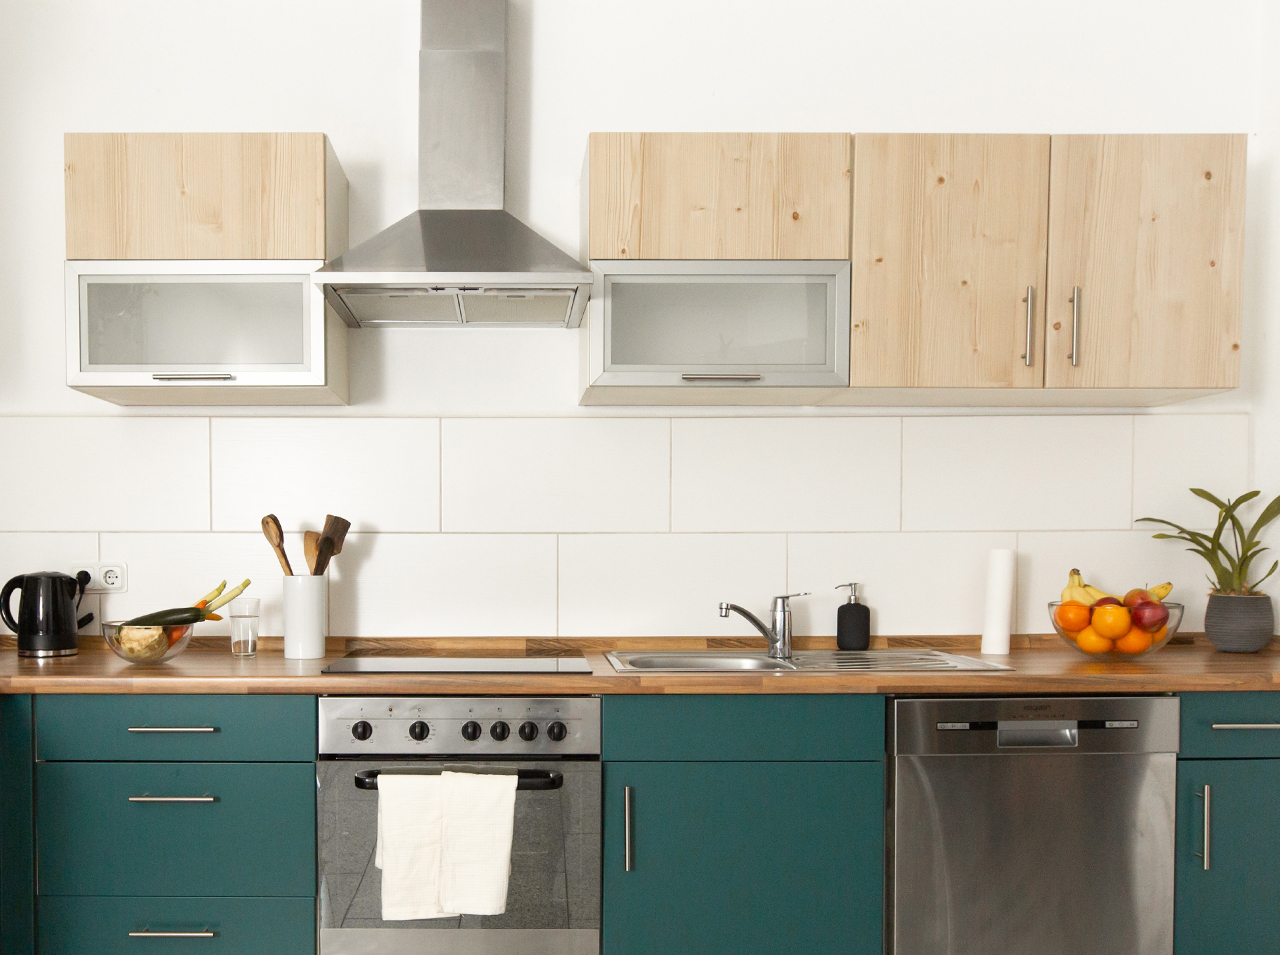
Kitchen makeover: a new love – your kitchen in Scandi wood look!
Project from Alex - 3 CommentsScandi chic: if you are not already a fan of this living trend, you will certainly have already heard of it. And since the beginning of the year is the perfect time for beautiful changes, we have a stylish makeover idea for your kitchen inspired by Scandinavian living.
If you would like to renovate your backsplash in addition to your kitchen, click here.
With the d-c-fix® adhesive foil Jura Pine, you bring the look of genuine, beautifully grained pine wood to the fronts of your kitchen units. You can usually only get a look like this with genuine natural wood, which of course would involve a lot of effort and high costs for a kitchen makeover. Ready to redesign your kitchen with a fantastic before-and-after effect and Scandi appeal galore?
- d-c-fix® adhesive foil Jura Pine
- d-c-fix® application kit with scraper & utility knife
- Pencil
- Scissors
- Ruler
- Measuring tape
- Screwdriver
- Cleaning products
Let’s go!
And here’s how to do the makeover for a real wood look
 Step 1
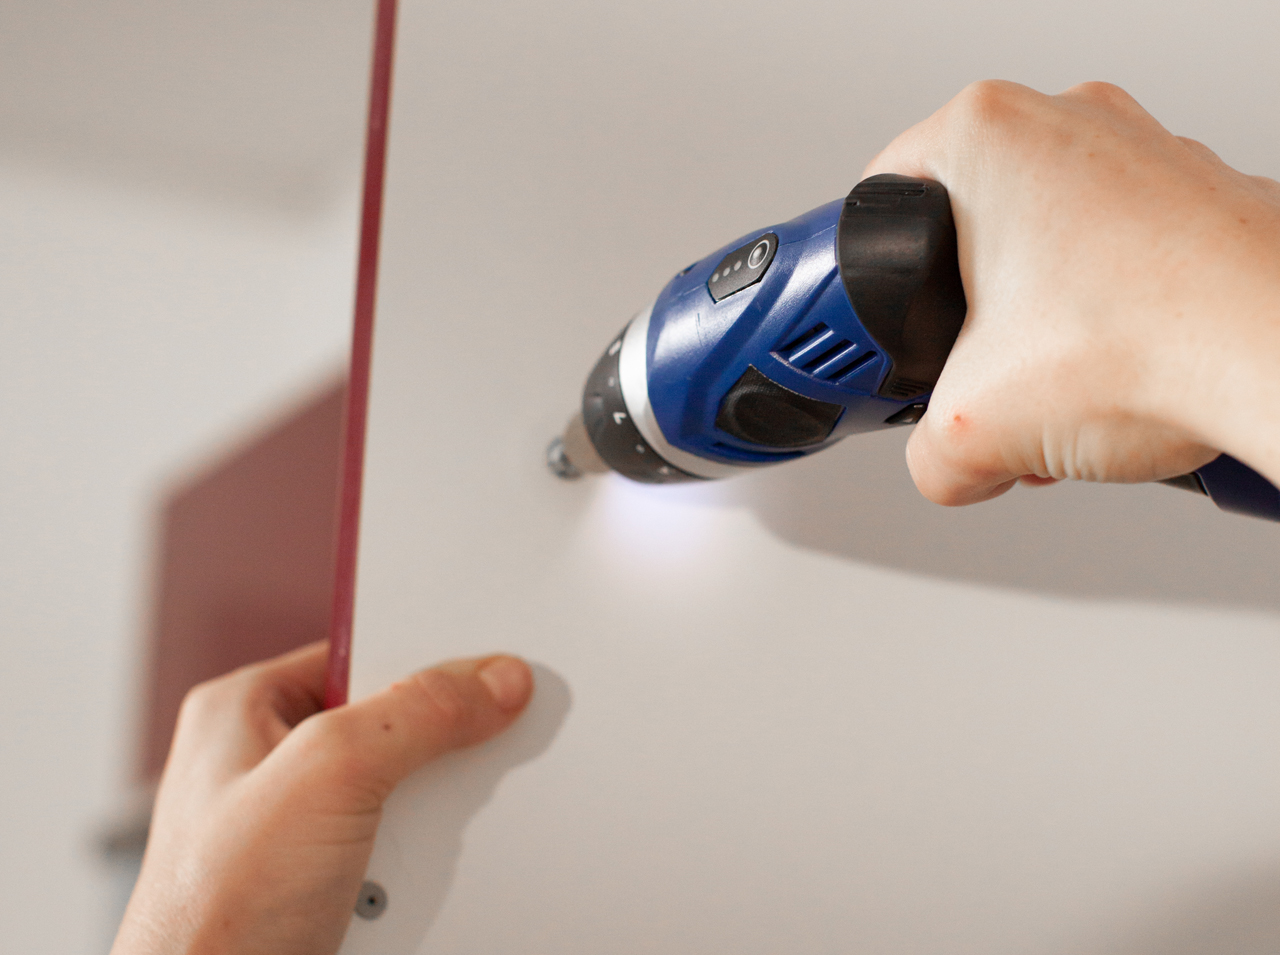
To begin the DIY work, remove the kitchen fronts and unscrew the door handles.
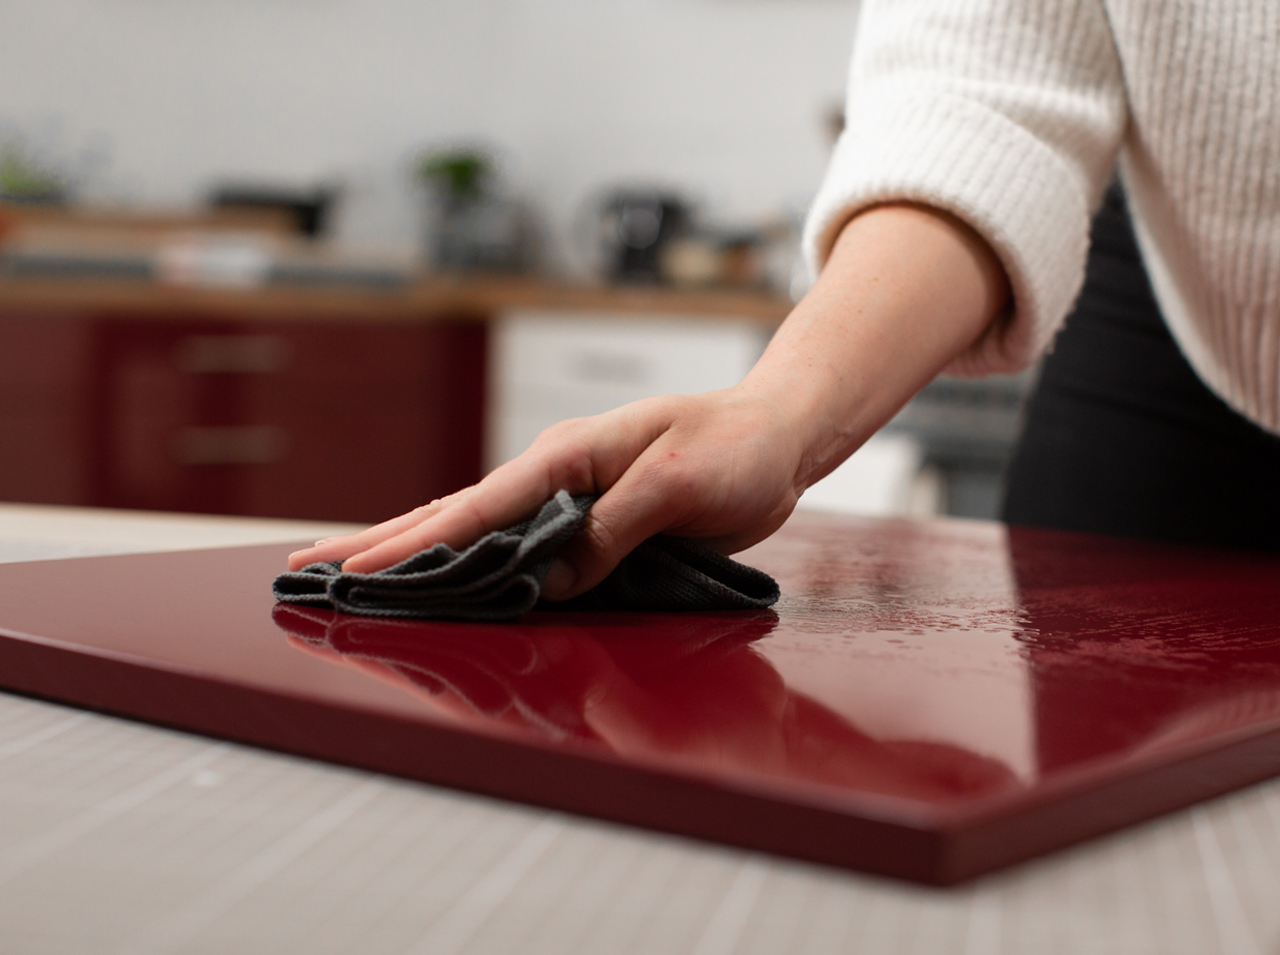 Step 2
Then thoroughly clean and dry the surfaces of the fronts.
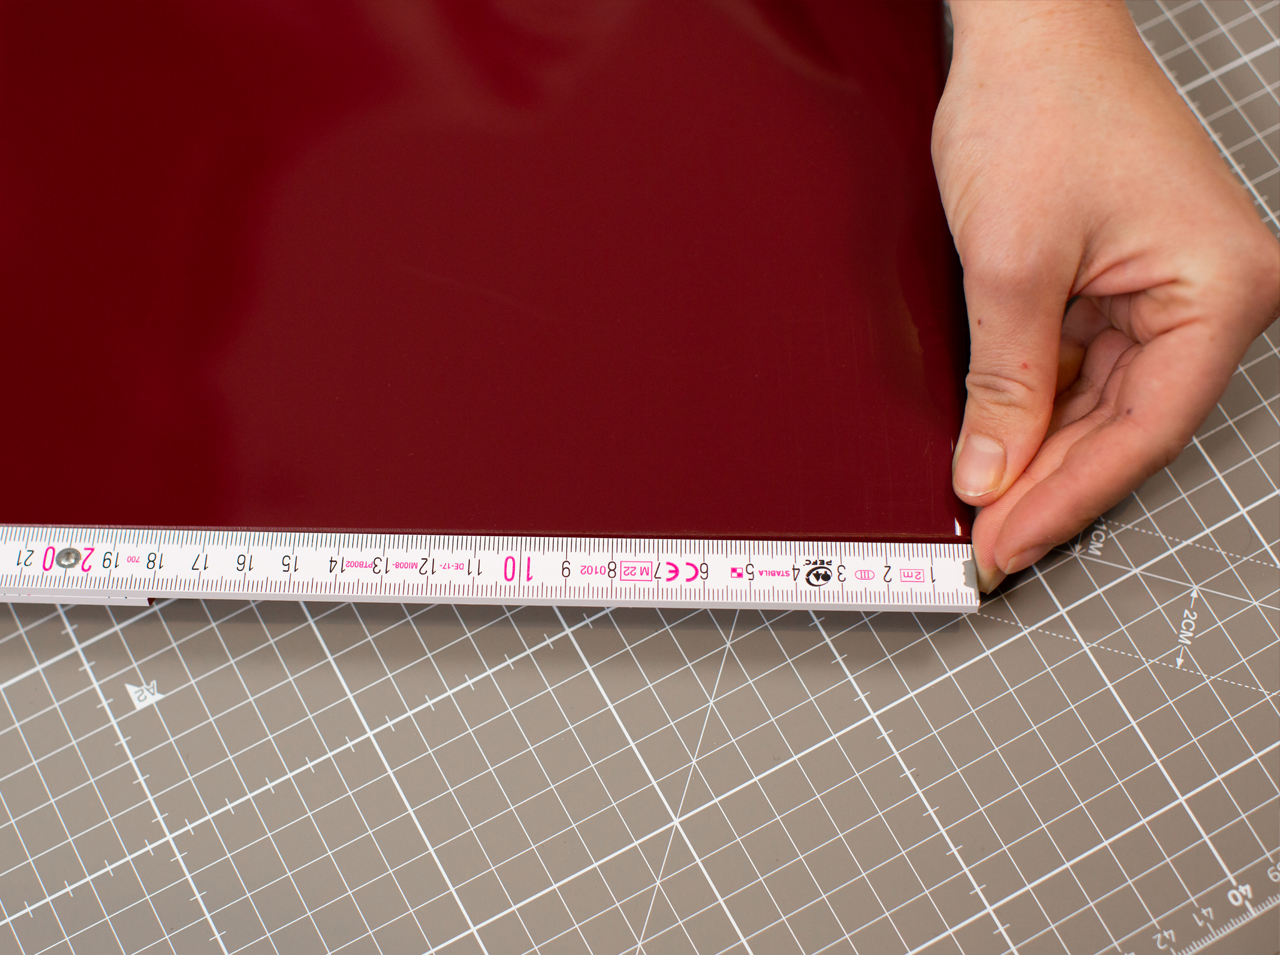 Step 3
Measure the surfaces of the kitchen fronts to be covered.
 Step 4
Using a pencil and ruler, transfer the measurements onto the backing paper of the Jura Pine adhesive foil.
 Step 5
Cut the foil to size with a pair of scissors. Tip: If a cutter knife is used for this, first place a cut-resistant base under the adhesive foil – and then start cutting.
 Step 6
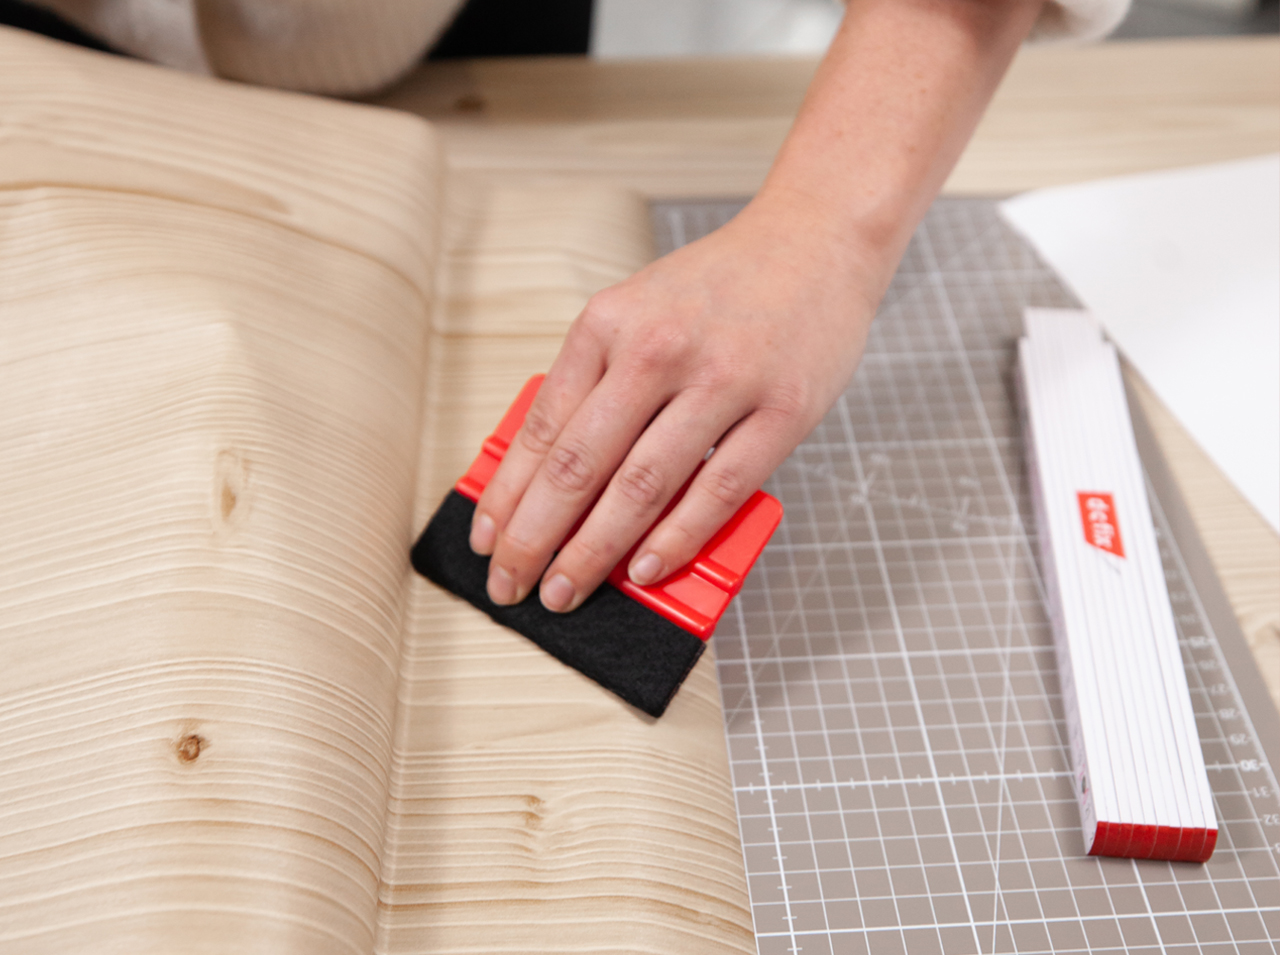
To stick the foil to the kitchen front, now peel off a little of the backing paper of the piece of foil and, with the help of the scraper, stick it on the edge and press it on firmly.
Have you not applied the foil correctly? Simply peel off the adhesive foil carefully, apply it again and press it on firmly with the scraper.
 Step 7
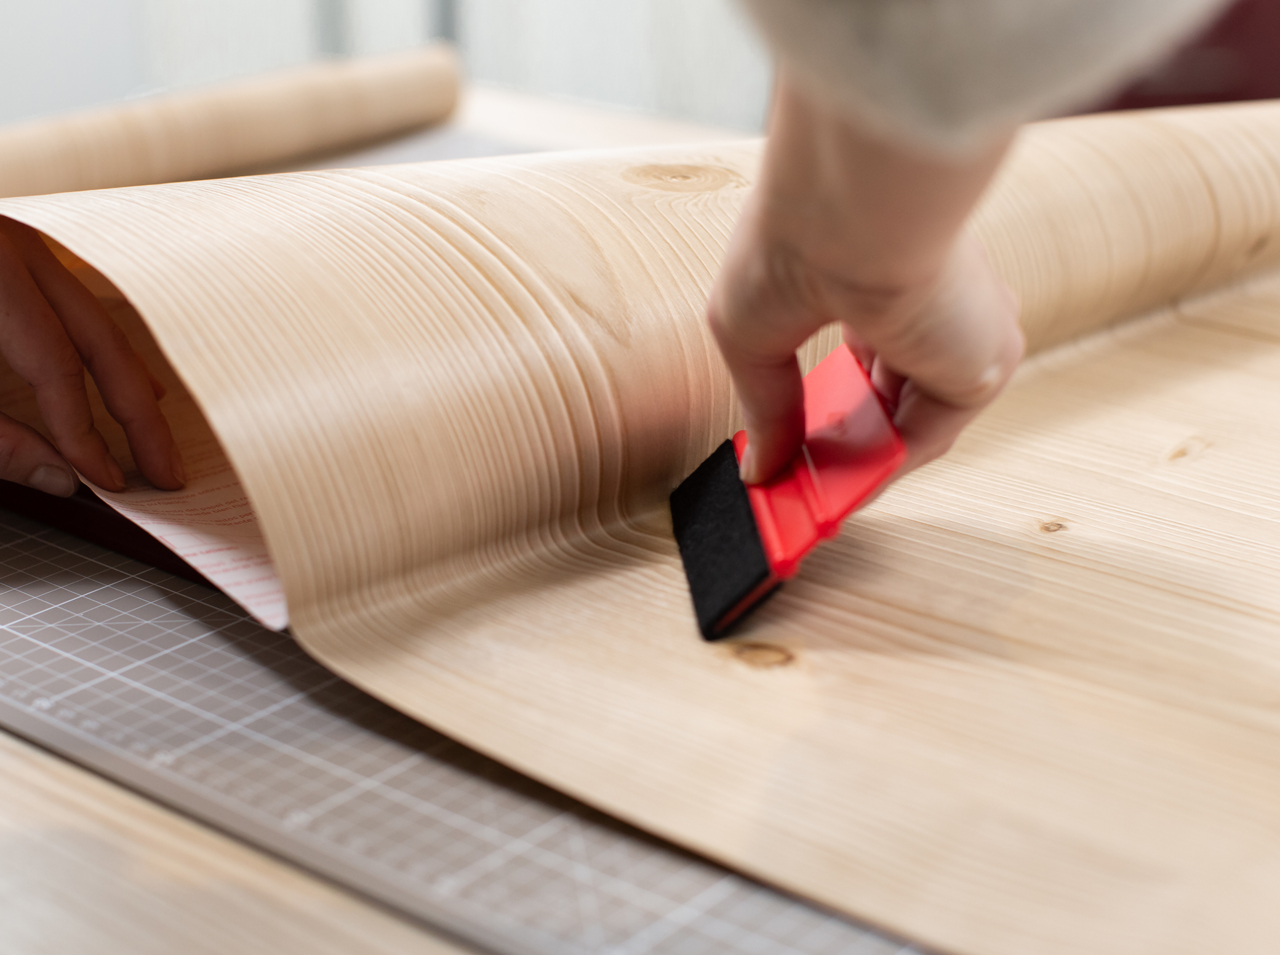
Now peel off the backing paper piece by piece and work with the scraper always about a hand’s width along the kitchen front and apply the adhesive foil.
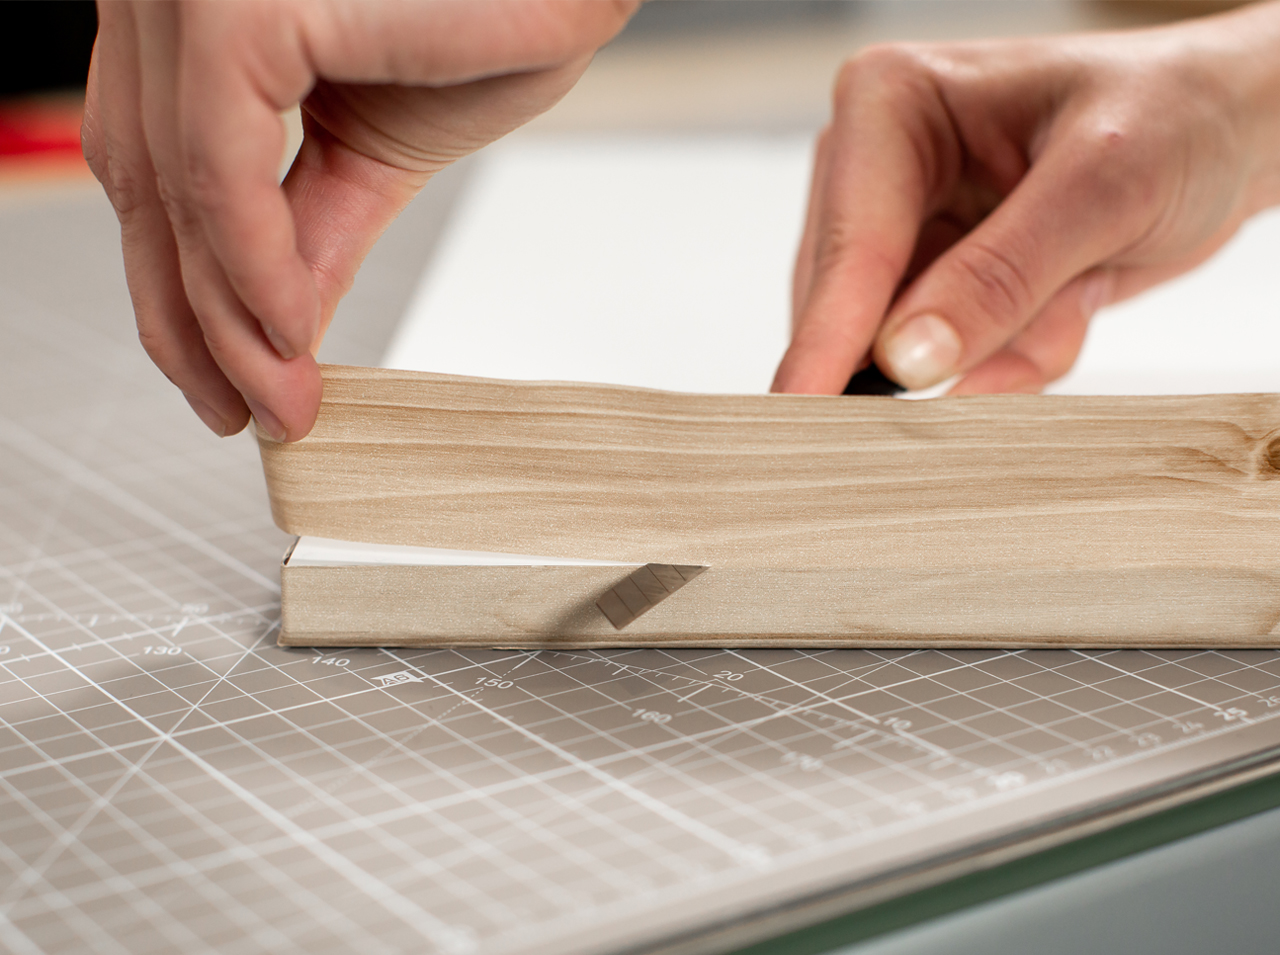
 Step 8
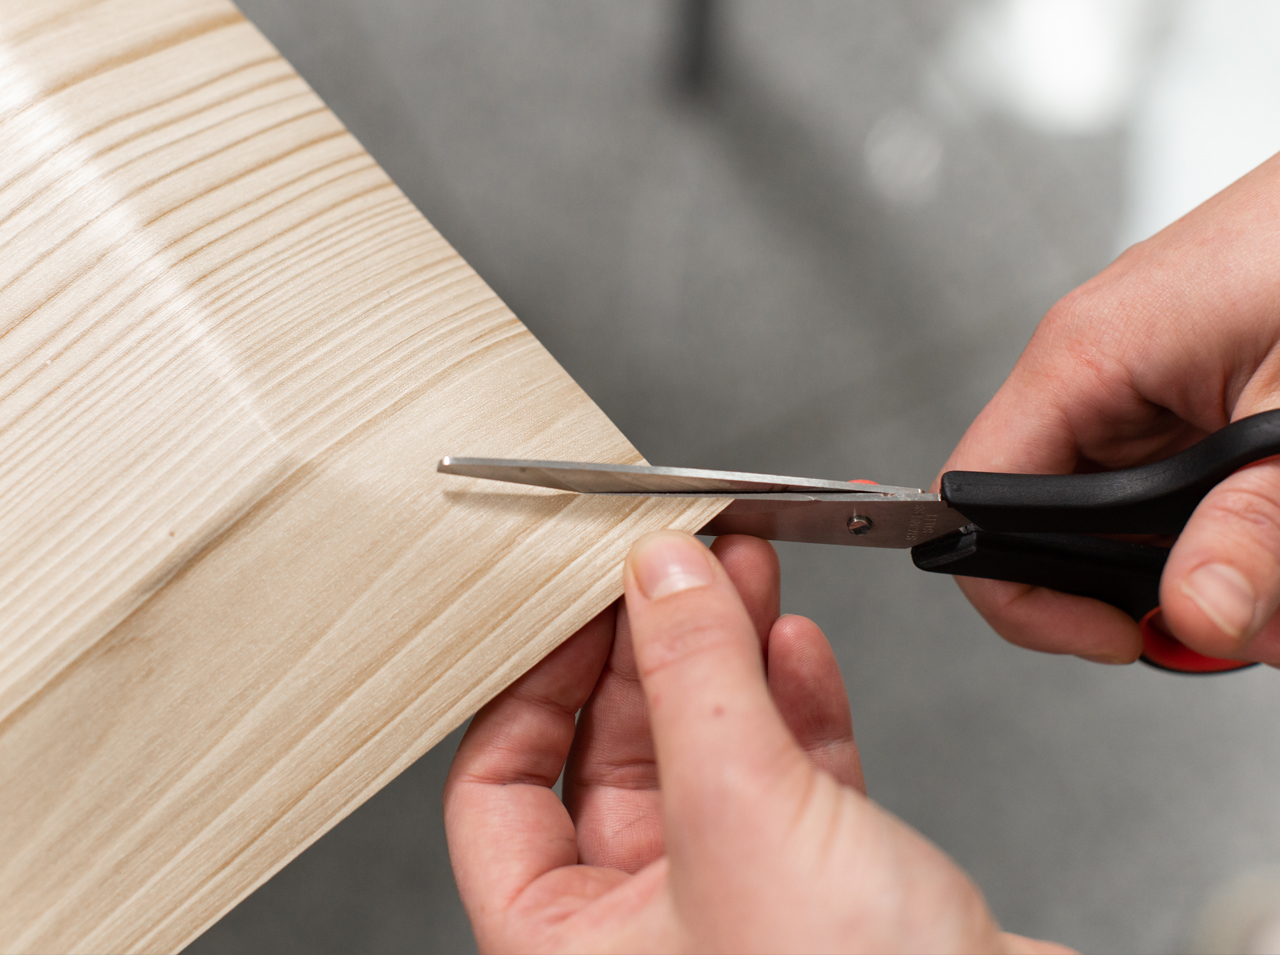
Then cut the adhesive foil diagonally at the corners with scissors.
 Step 9
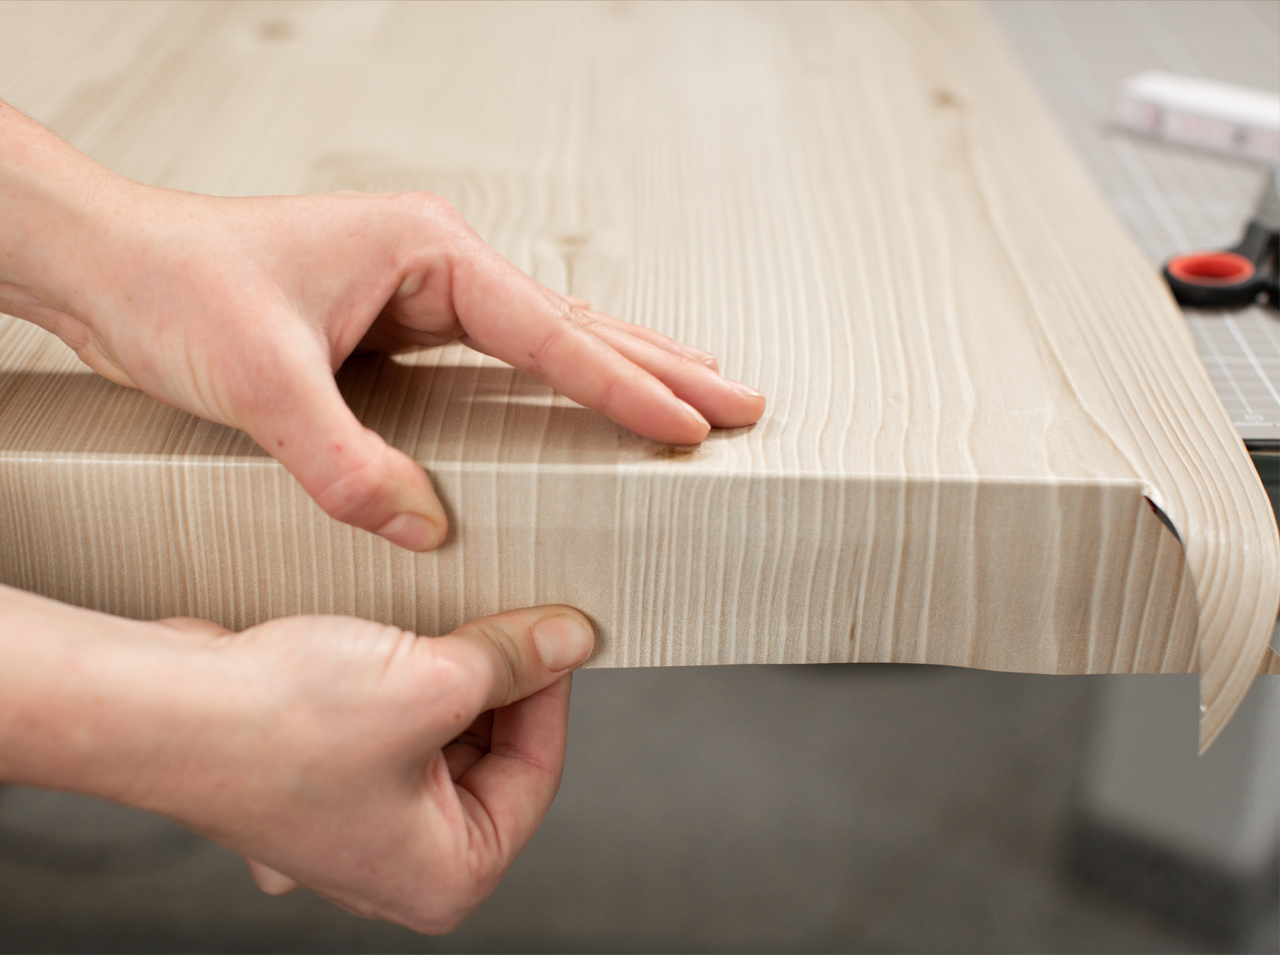
Pull the foil over the edge with your hands and carefully stick around the edge with the cut side.
 Step 10
Now also run the scraper over the edge side so that the foil is attached well there as well.
Then apply foil around the remaining edges also according to the above method.
 Step 11
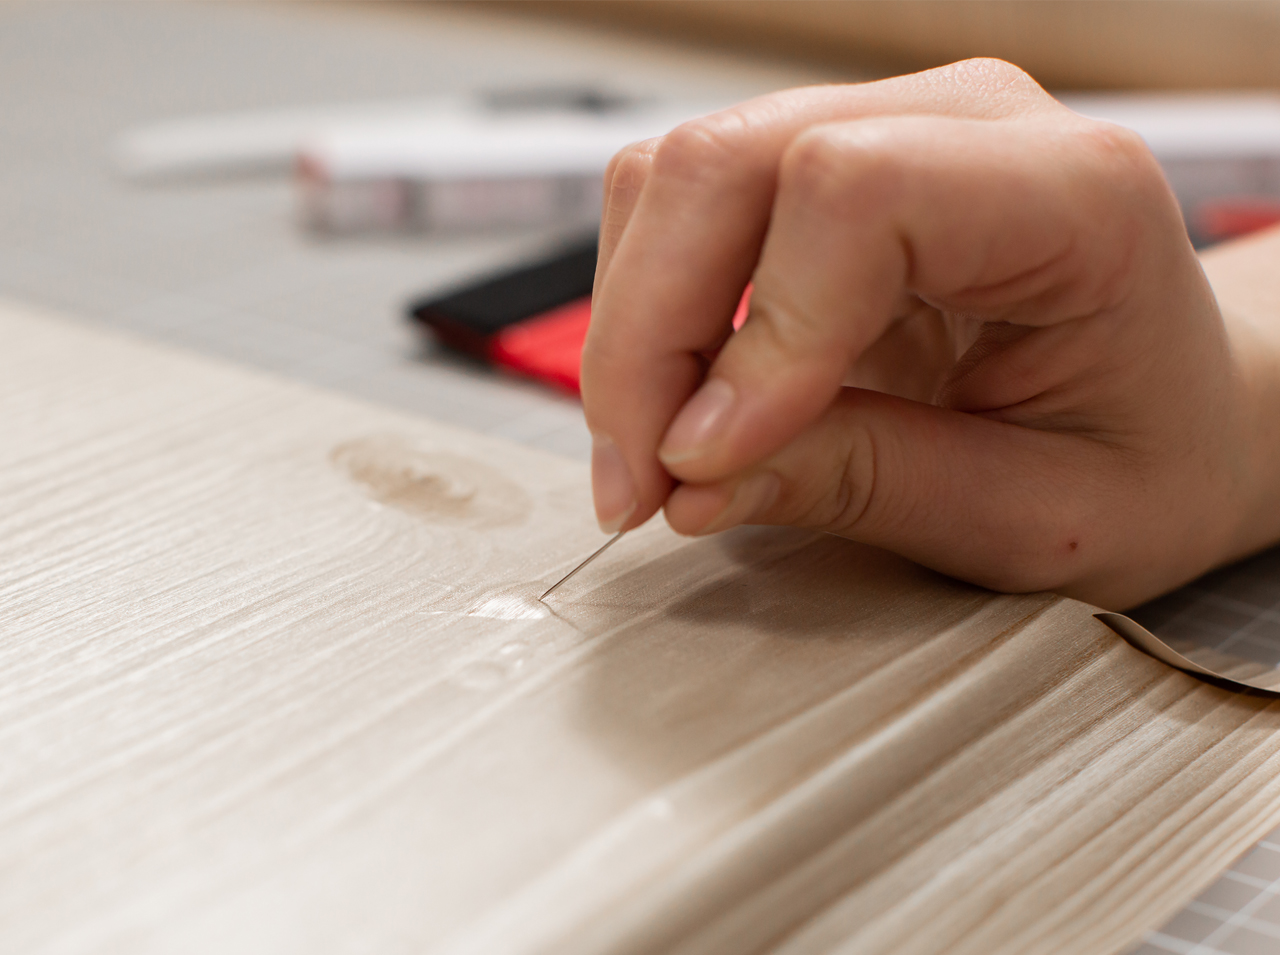
Have air bubbles appeared when applying the foil to the fronts?
No problem! Simply prick the air bubble with a needle and smooth the air out with the scraper.
 Step 12
Once you have applied Jura Pine to all the kitchen fronts, carefully cut off any excess adhesive foil with a cutter knife to finish.
Then mount all the handles on the fronts again and attach the doors to the kitchen units: Done!
Done!

3 Comments
Post A Comment
Preparation time
30 min
Execution
240 min
Difficulty level
Advanced
Costs
Average
Projects you might like


Sarah
Posted at 21:14h, 05 AprilHow do you cover kitchen door and drawer panels that aren’t a flat surface? ie shaker style. Thanks
Andrea
Posted at 09:15h, 06 AprilHi Sarah
You could heat the film with a hairdryer to make it easier to glue the edges, or you could cut the foil so that you glue the individual “layers” one by one. We will soon publish a DIY for this. 🙂
your d-c-fix Team
Sarah
Posted at 20:48h, 12 AprilThank you! I’ll keep an eye out for the DIY.