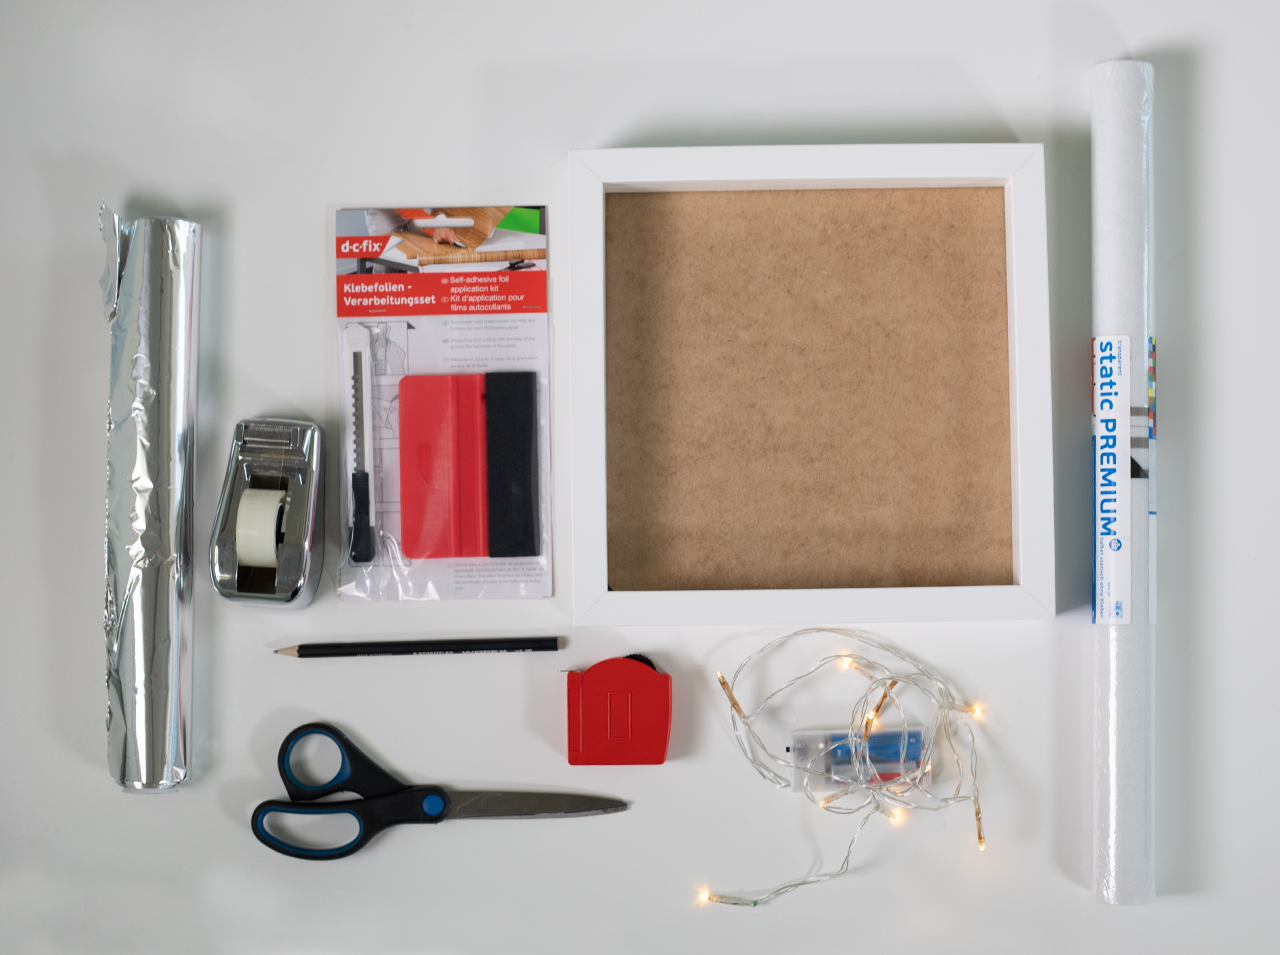
You will need…


Enter the search term and press "ENTER" .
No way around these lightboxes!
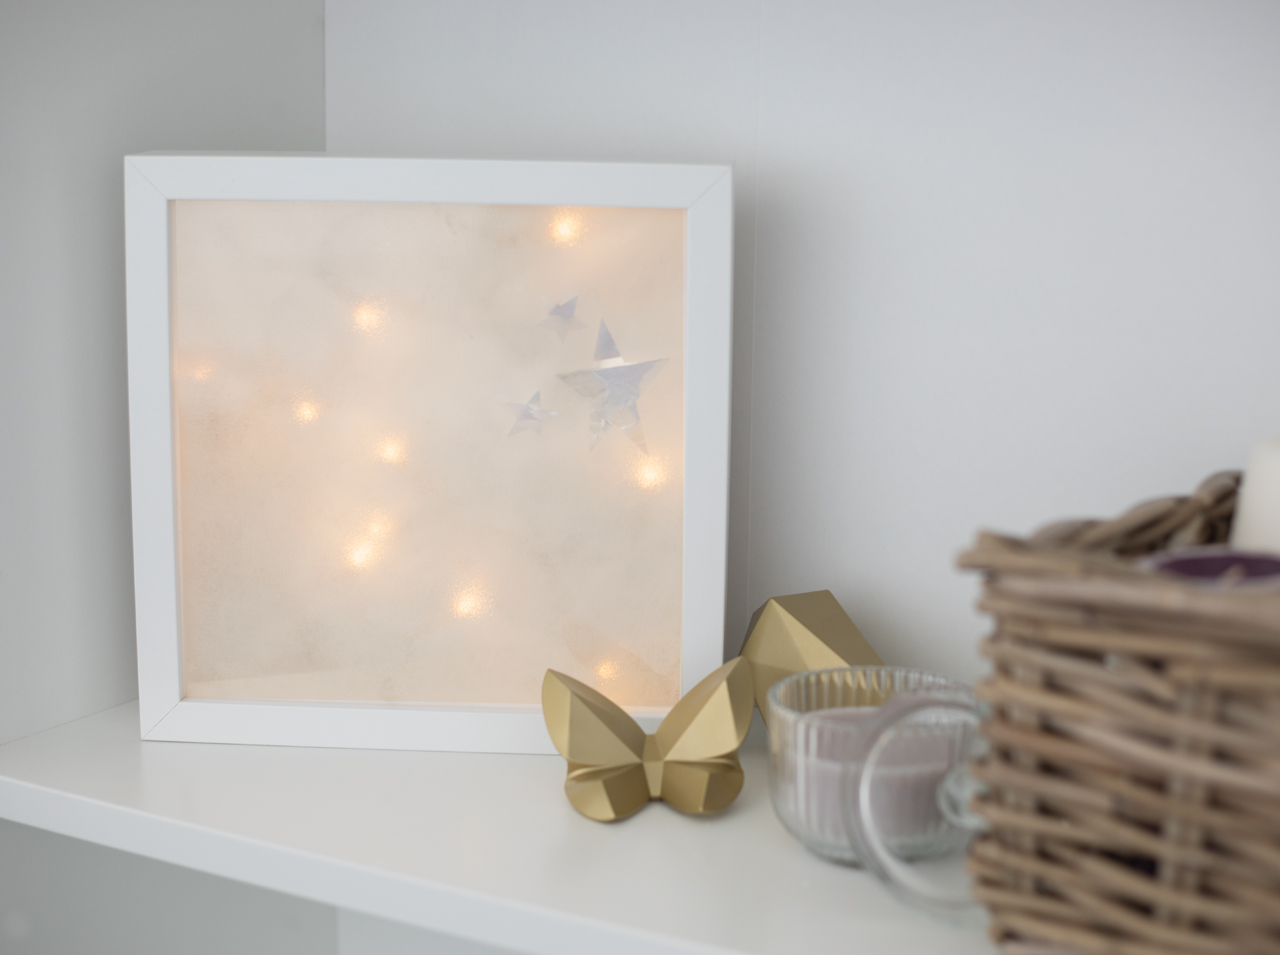
Project from Eva - 0 CommentsIn just a few steps we show you how to simply turn an IKEA frame and a LED copper chain of lights or every other chain of light into a trendy and modern lightbox.
- One roll of d-c-fix® self-adhesive transparent film Milky
- d-c-fix® application set with cutter and squeegee
- IKEA frame Ribba
- LED chain of lights with batteries
- Aluminium foil
- Tape
- Scissors
- Pencil
- Measuring tape
Let’s go!
Your own individual lightbox for nice sayings and cool lighteffects to easily do it yourself!
Step 1
Prepare your materials.
 Step 2
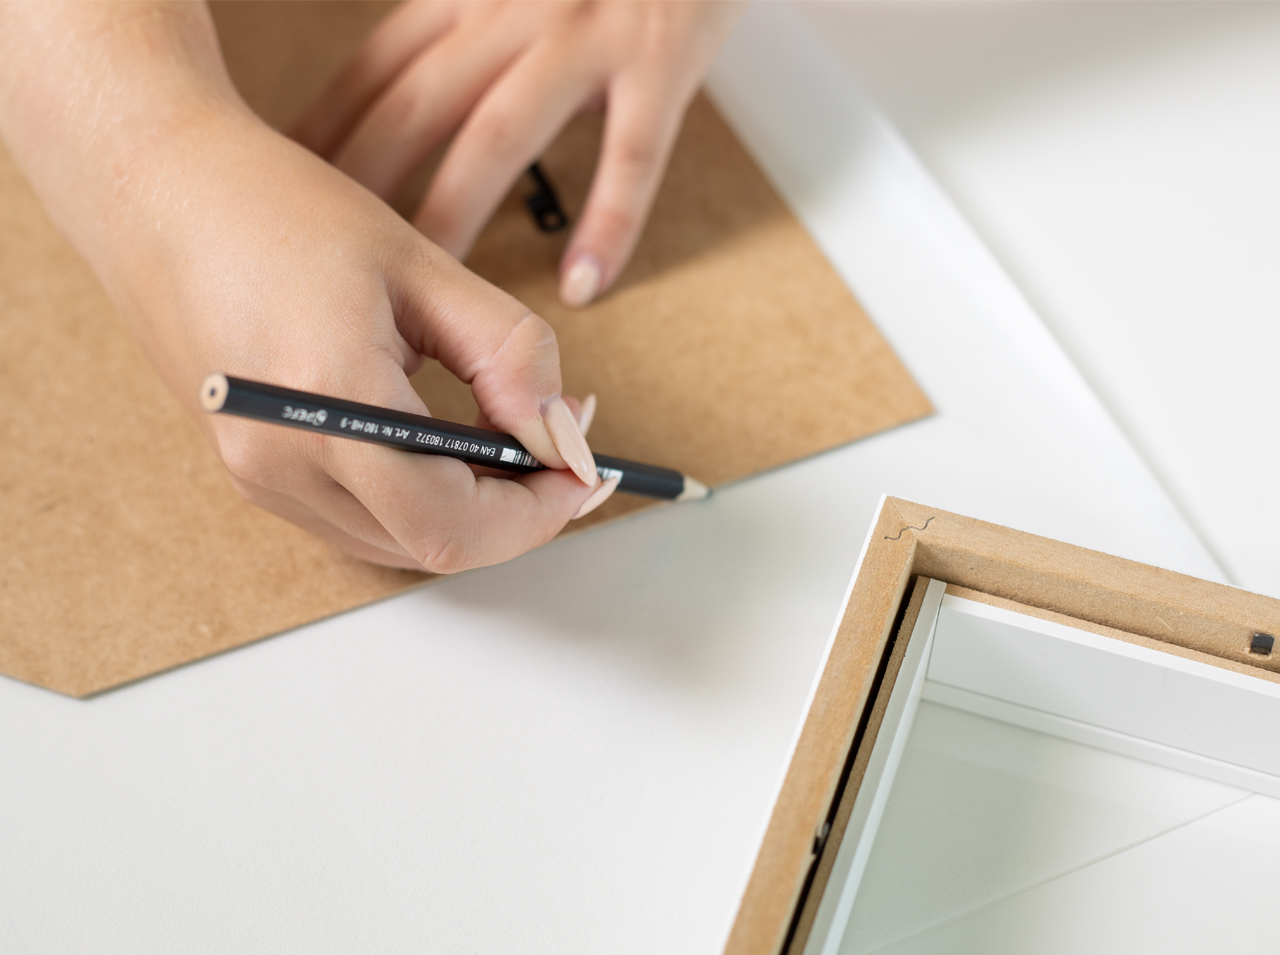
Take the frame apart and draw the outline of the frame’s back on the paper oft he film. Cut the film to size.
 Step 3
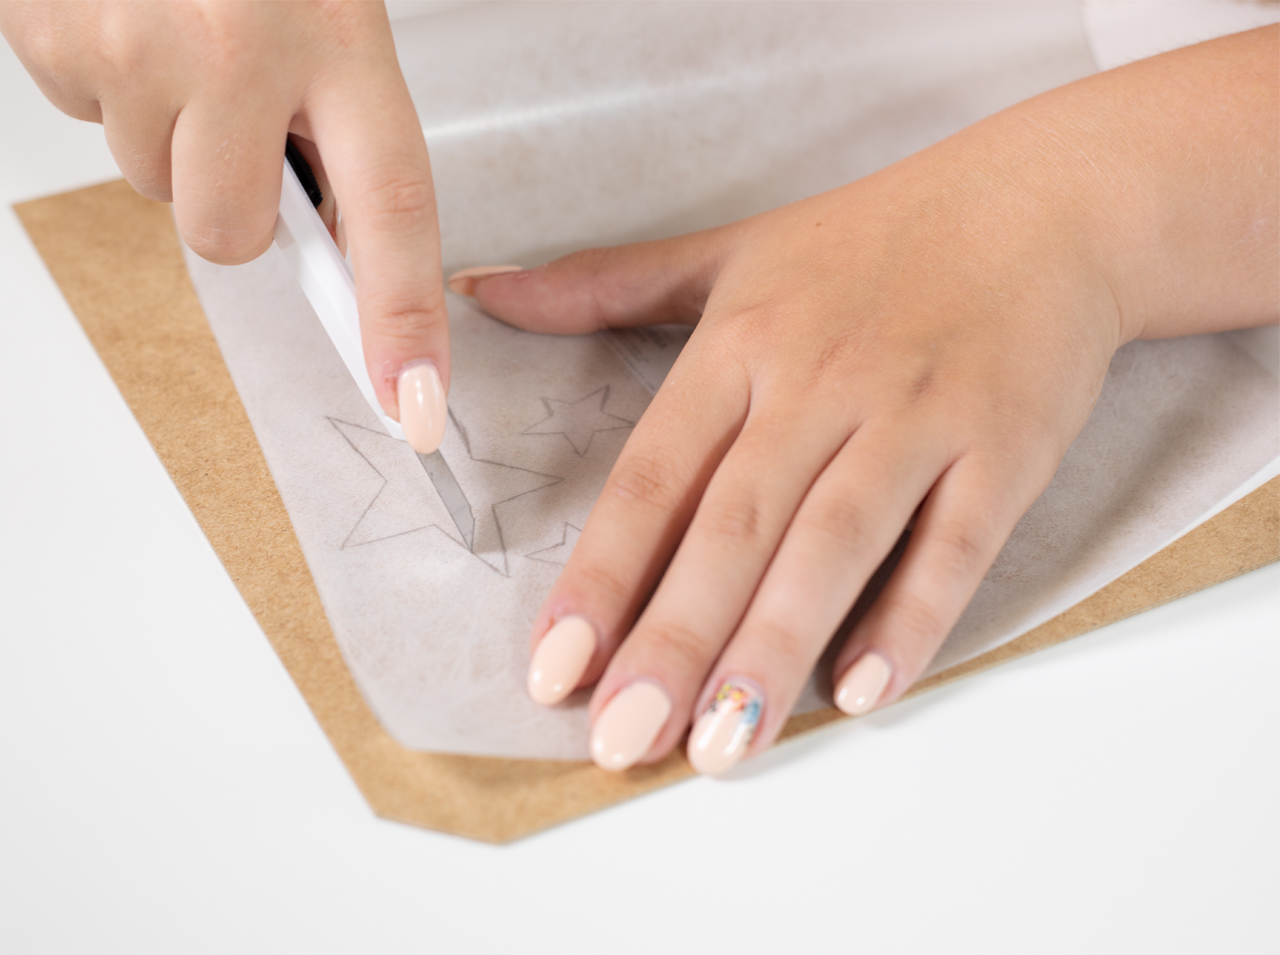
Attach the cut self-adhesive film with tape on your cutting mat. Draw stars in different sizes onto it and cut them out with your cutter knife.
 Step 4
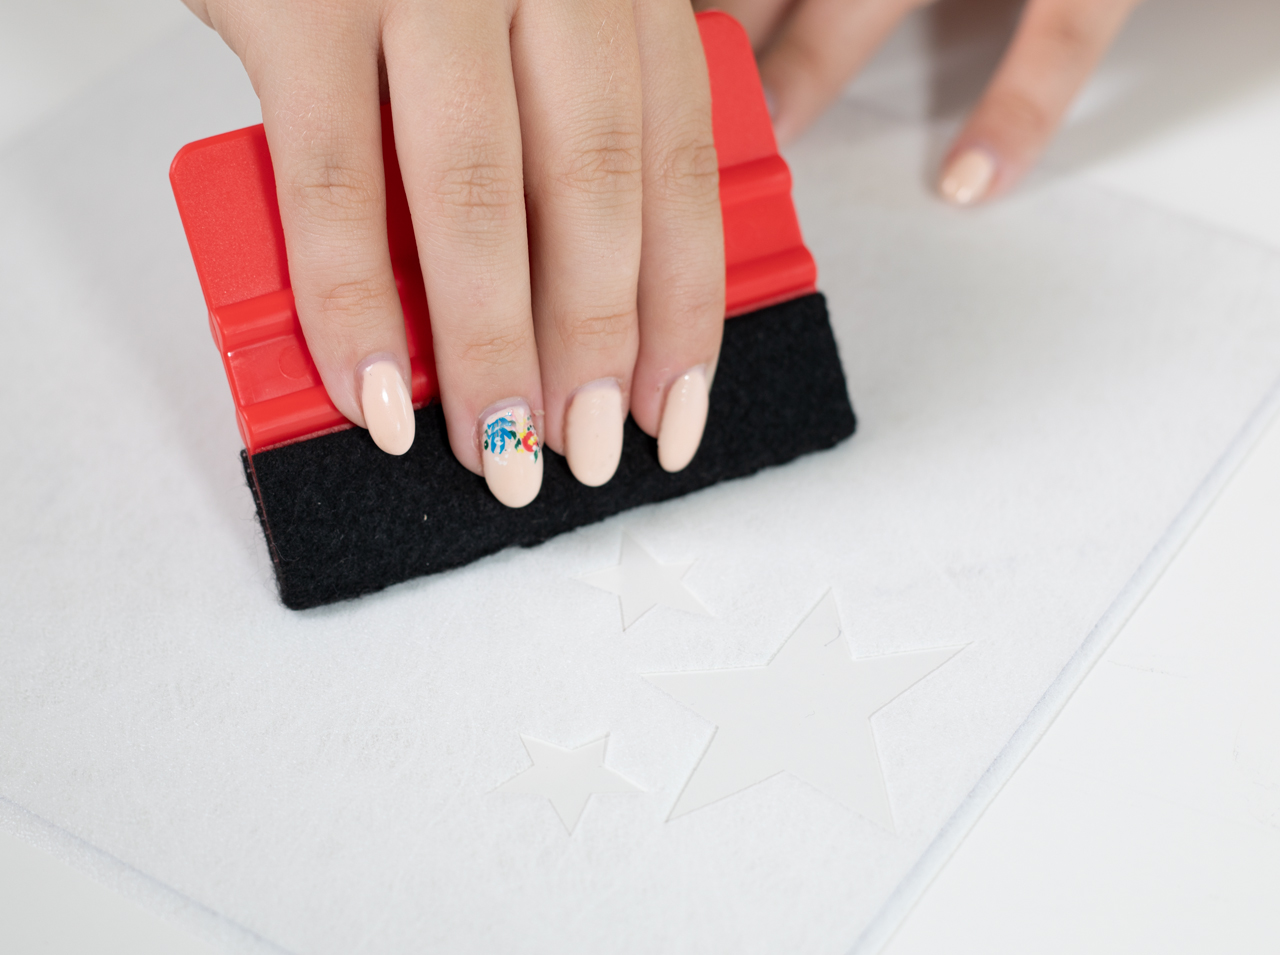
Pull off the backer of the film and attach it on the frame’s glass. Smooth it repeatedly with a squeegee to avoid bubbles.
 Step 5
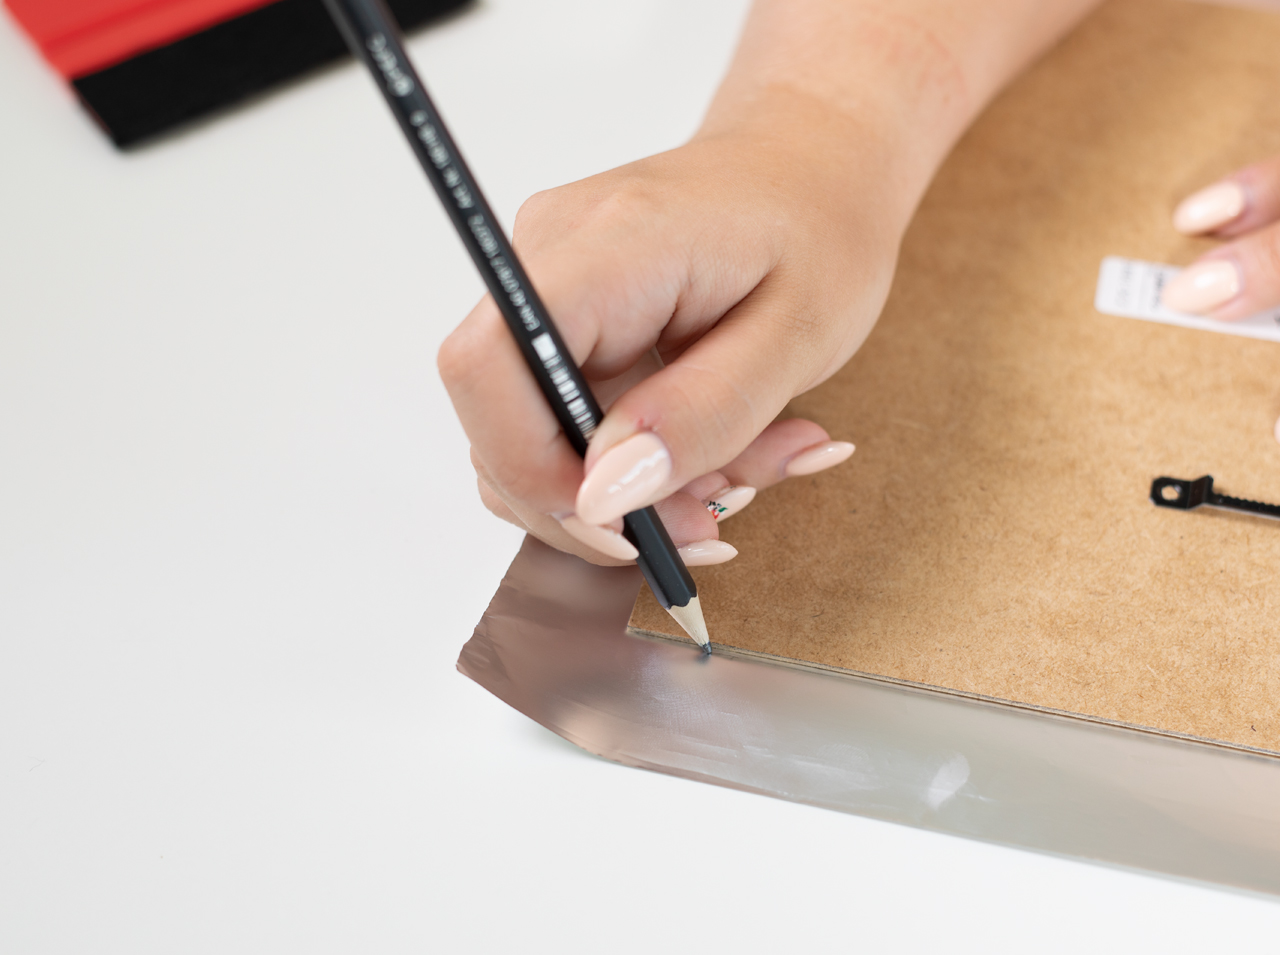
Draw the outline of the frame’s back onto the aluminium foil and cut it to size. Use some glue to attache the aluminium foil on the back.
 Step 6
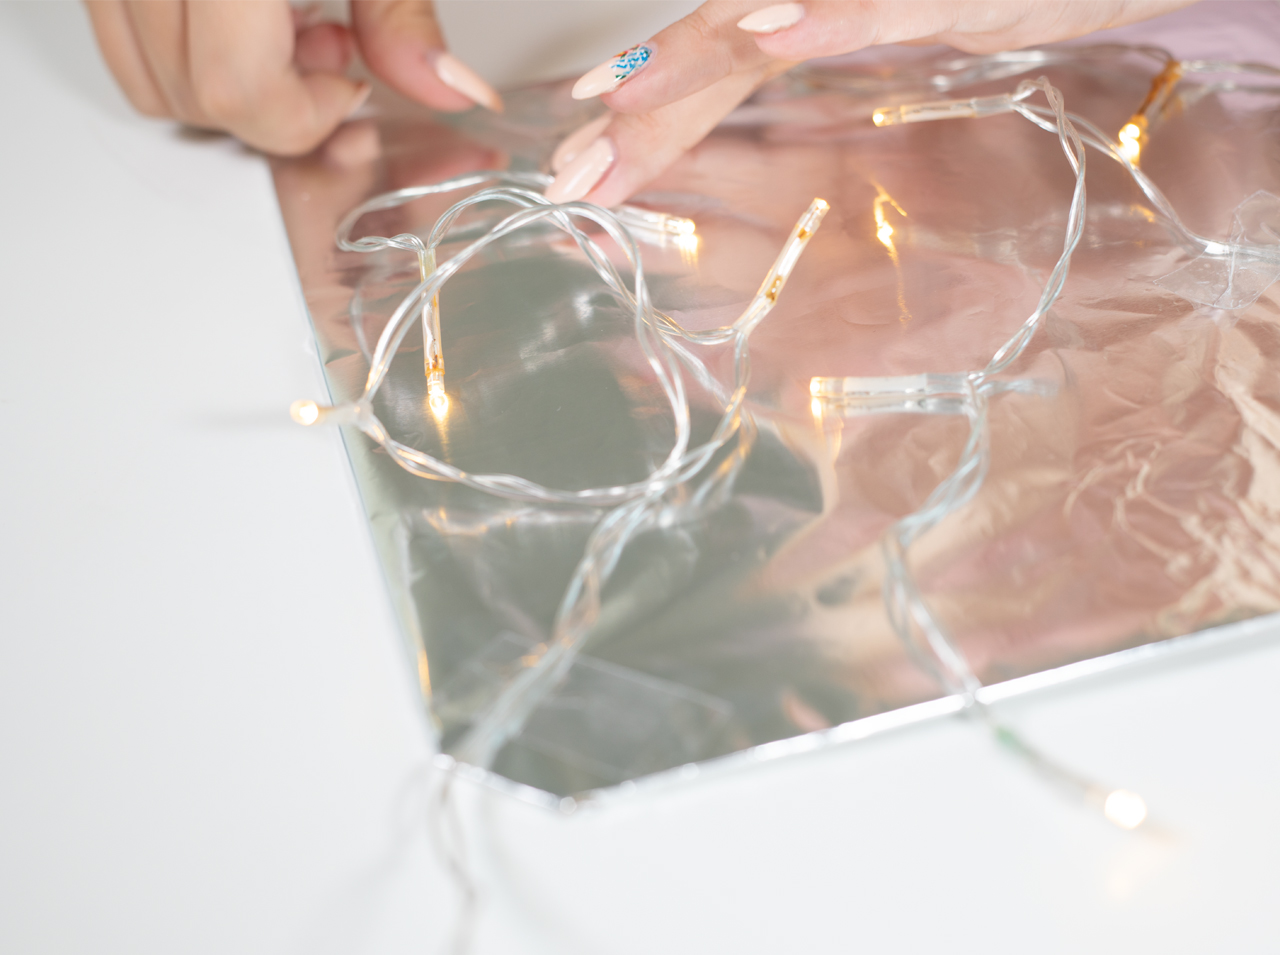
Set the chain of lights with some tape on the aluminium foil. The box with the batteries should be outside oft he frame.
You’re done!

Post A Comment
EXPERT ADVICE
A LED chain of lights with batteries is the best to choose. You can place the cable outside on the small opening.
Preparation time
5 min
Execution
15 min
Difficulty level
Beginner
Costs
Low
No Comments