You will need…


Enter the search term and press "ENTER" .

DIY photo wall: Now you can bring your most beautiful moments into the limelight!
Project from Angelina - 0 CommentsWinter comes and goes – and spring with its colorful surprises is not yet in sight. Perfect timing for a new, creative DIY project that brings a breath of fresh air and good vibes into your home. More specifically, onto your favorite wall – with your new DIY photo wall, with a light wood effect and the trendy Scandi chic look. With the DIY photo wall, you have the option to rearrange your favorite photos, memorabilia and decorations over and over again. This way, you can always bring good energy and motivation to your everyday life with these beautiful moments and memories. Just a glance at your new photo wall – and you’ll find yourself smiling, we promise!
Ready for your DIY photo wall?
- Wall tiles, tile art plank, decor: Pino Aurelio
- A white wooden board
- Ruler
- Boxcutter
- Pencil
- Measuring tape
- Brush
- Adhesive
- Hammer and nails
- String
Let’s go
 Step 1
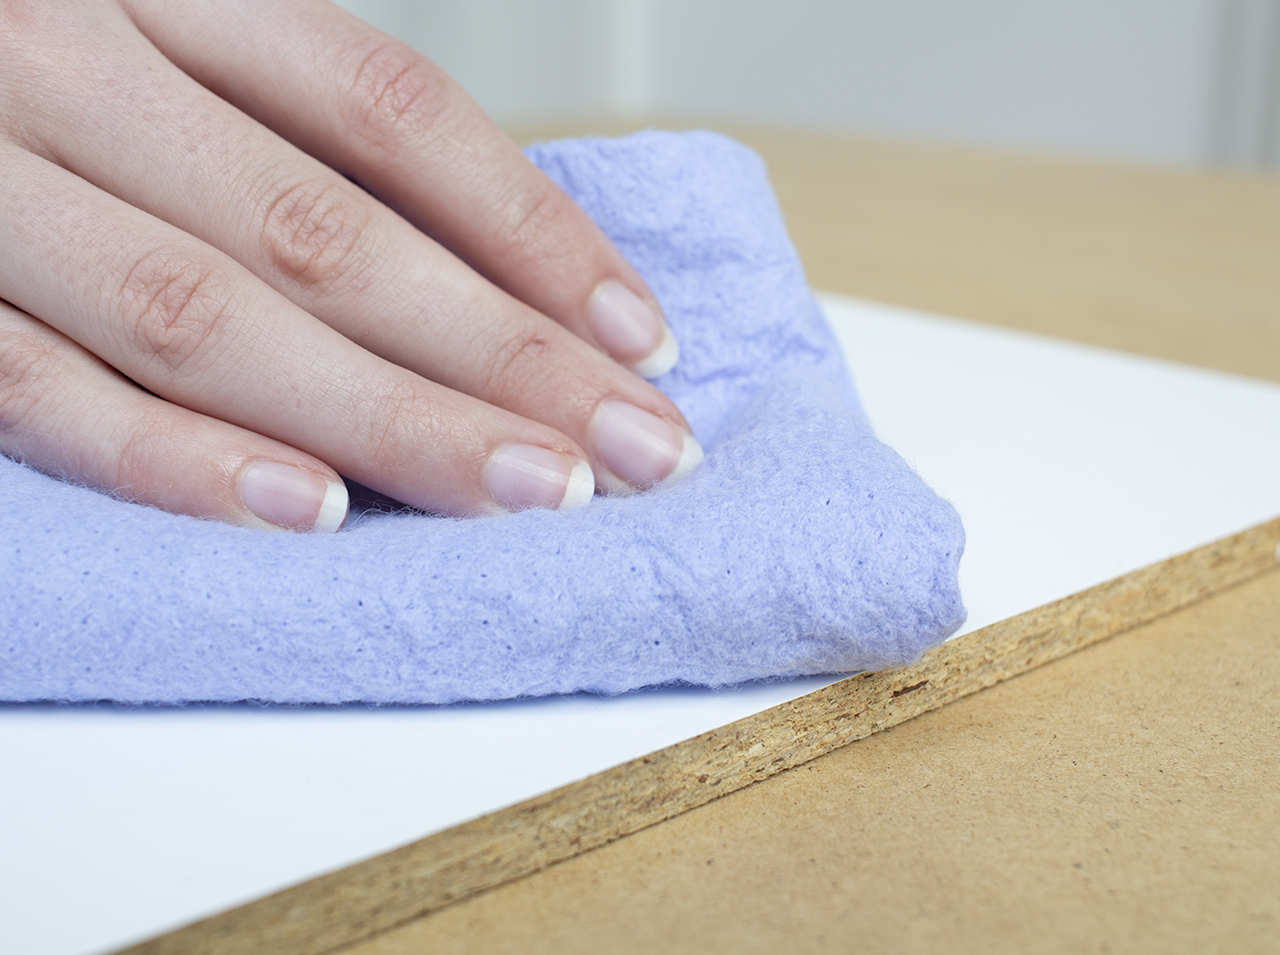
First, clean the wooden board you’ll be using as the basis for your photo wall, to remove any dirt, dust or similar. It must be load-bearing – i.e. completely dry, clean, even, free from dust, oil, and grease.
 Step 2
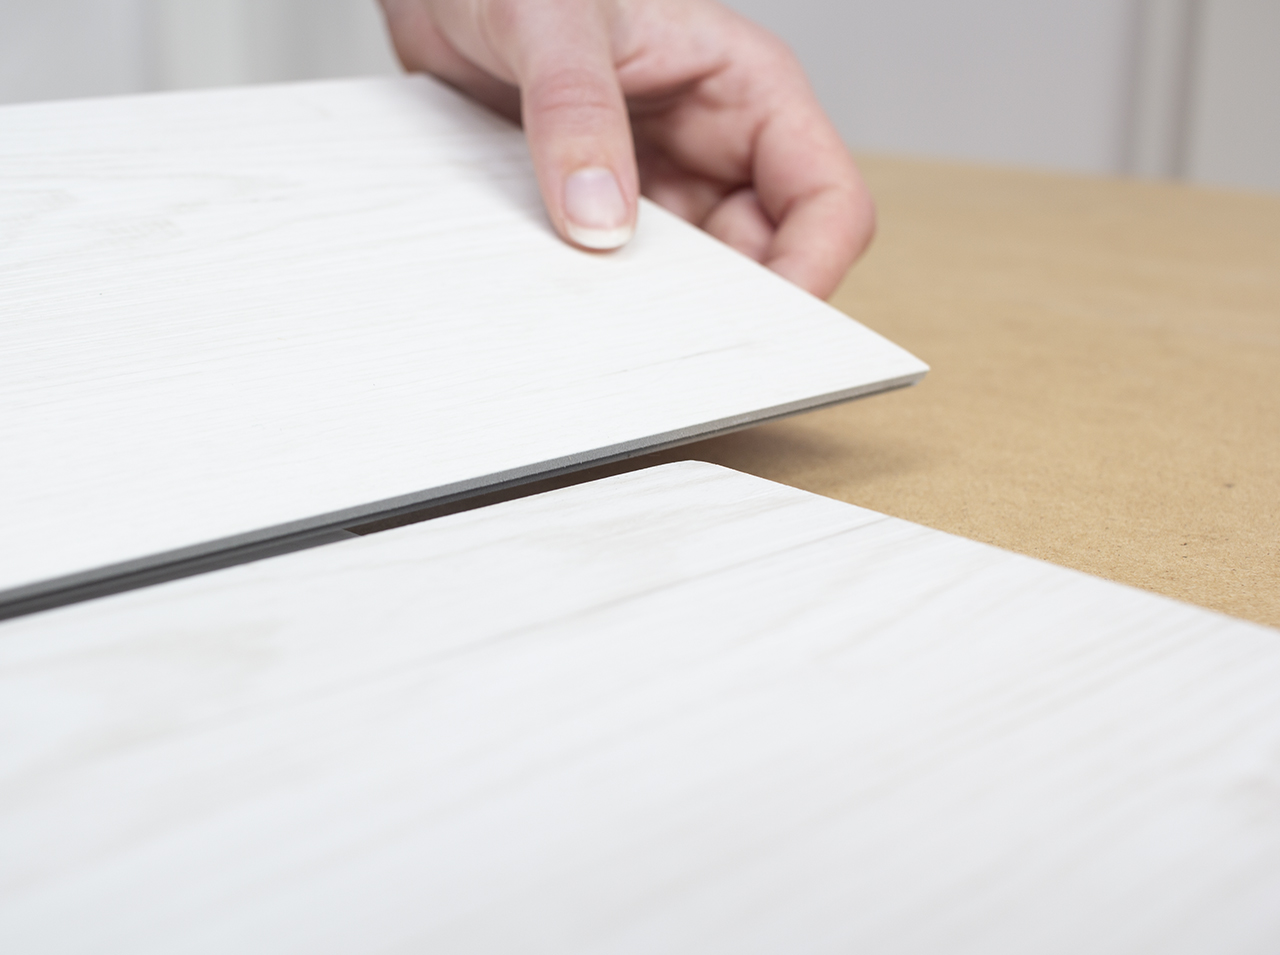
Lay out the Tile Art wall tiles you need for the base plate face down. Then apply a commercially available dispersion adhesive evenly and, if possible, so that it covers the entire rear side of the wall tiles.
 Step 3
Now stick the wall tiles onto the wooden base plate. While doing so, ensure the wall tile is pushed firmly into the groove of the previously attached wall tile from top to bottom. It’s also important to stagger the tiles in a wooden plank effect so that the design of the “wooden planks” can be shown to best effect, making your photo wall look wonderfully vibrant.
 Step 4
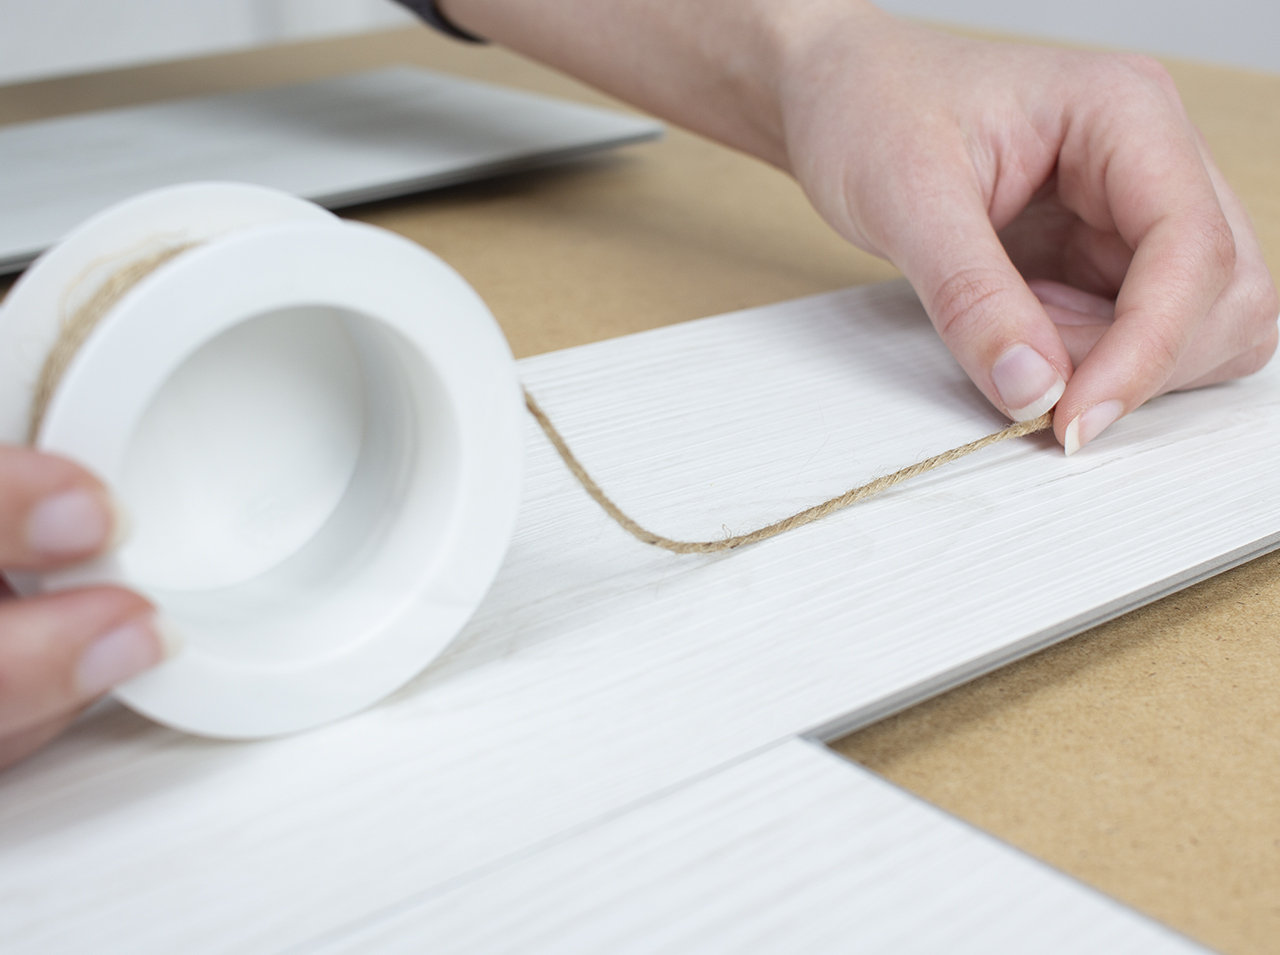
To finish, decide on the length of the “planks” in your photo wall and cut several correspondingly long pieces of string to size.
 Step 5
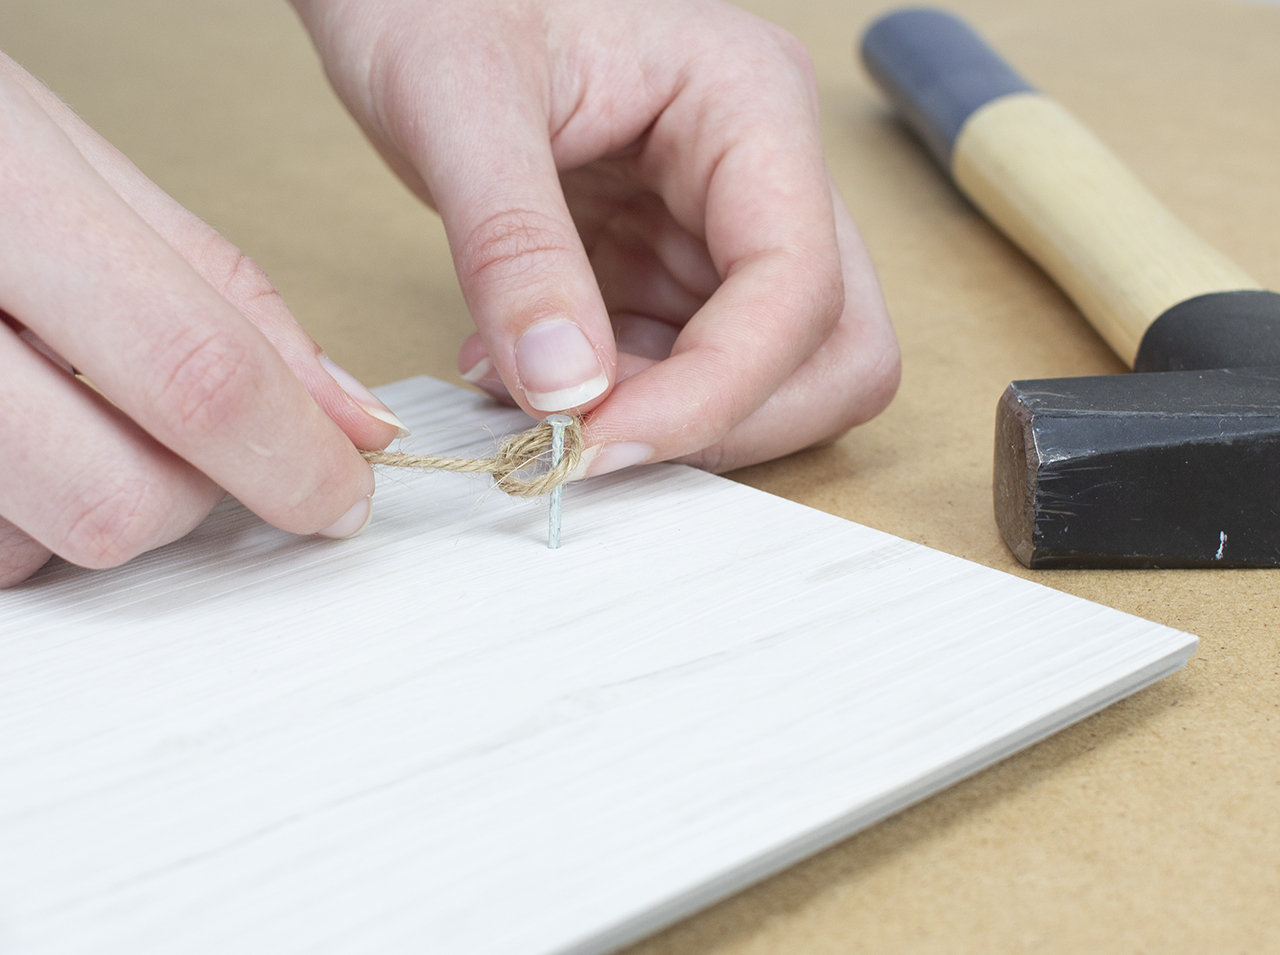
Insert a fine nail at the left and right end of each plank row and attach the pieces of string to it, row by row.
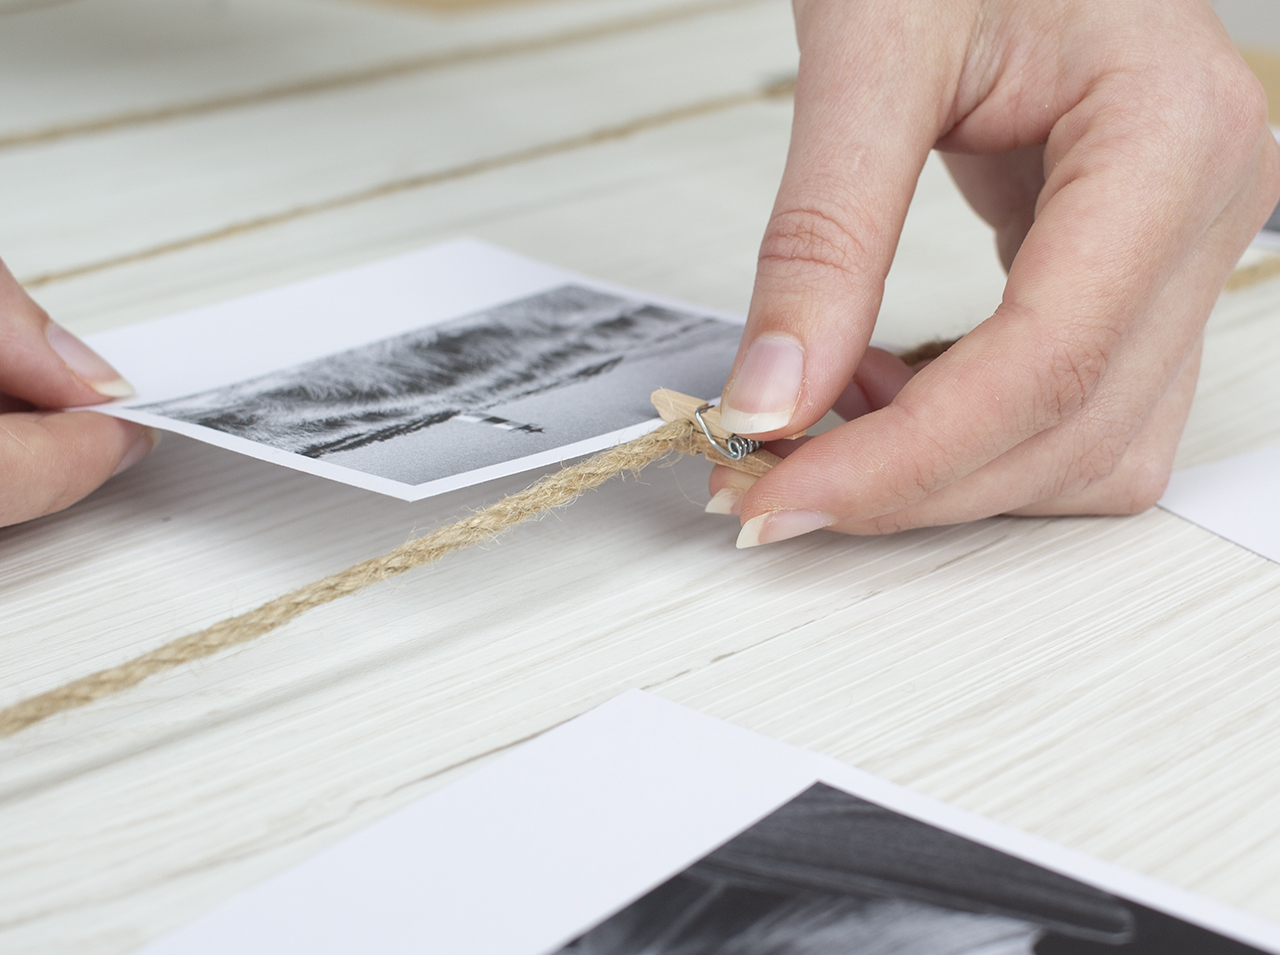 Step 6
And now you can bring your chic DIY photo wall to life by attaching images, postcards or other souvenirs to the string.
You’re done!

Post A Comment
EXPERT ADVICE
You can attach your photo wall to the wall with “classic” dowels and screws. The photo wall looks particularly stylish and modern when you set it up on a sideboard, chest of drawers, dining table or worktop in the kitchen, “just” leaning at an angle to the wall.
Preparation time
10 min
Execution
20 min
Difficulty level
Beginners
Costs
Medium
Projects you might like

No Comments