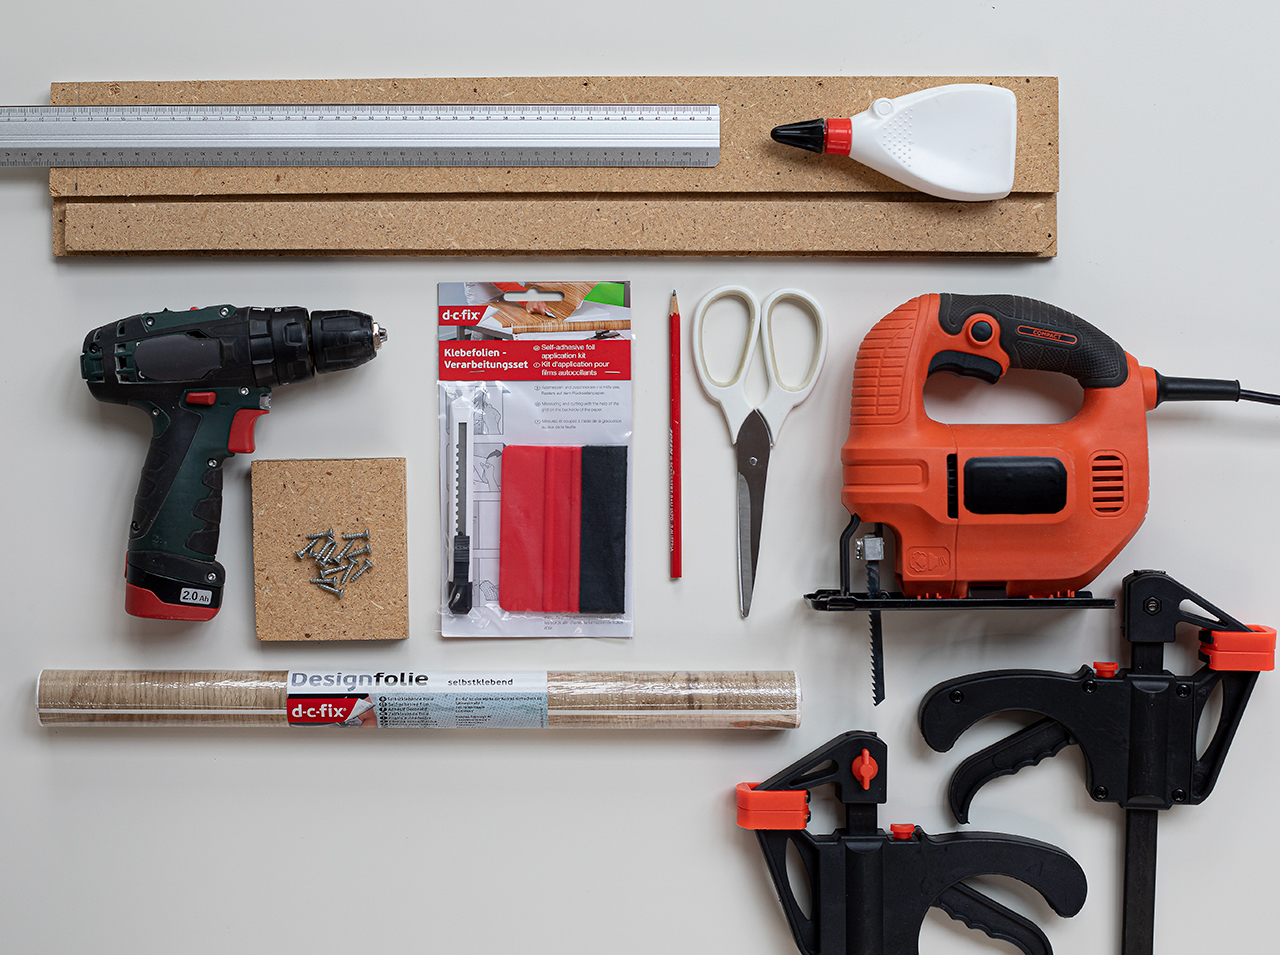
You will need…


Enter the search term and press "ENTER" .
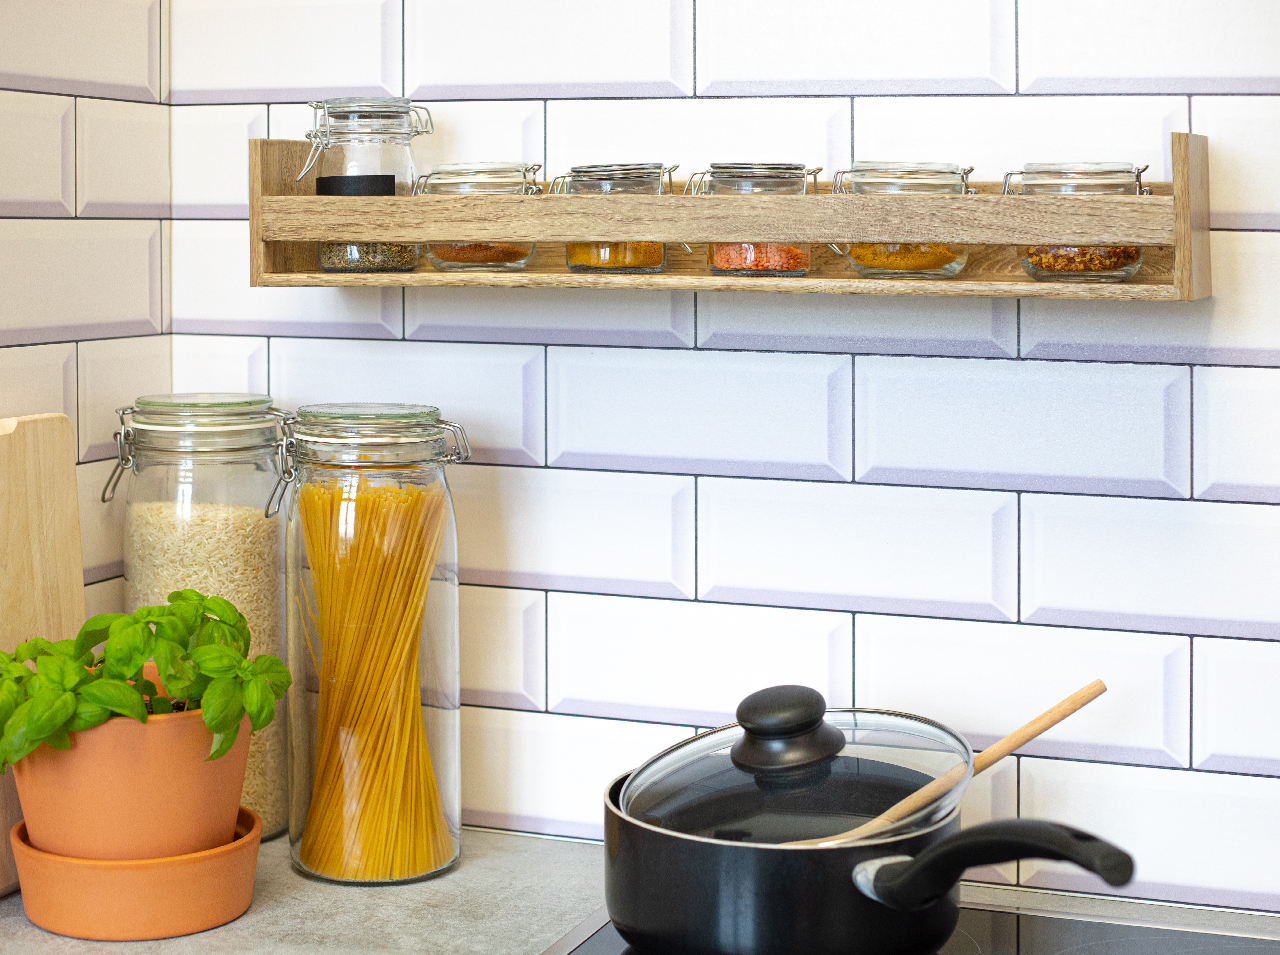
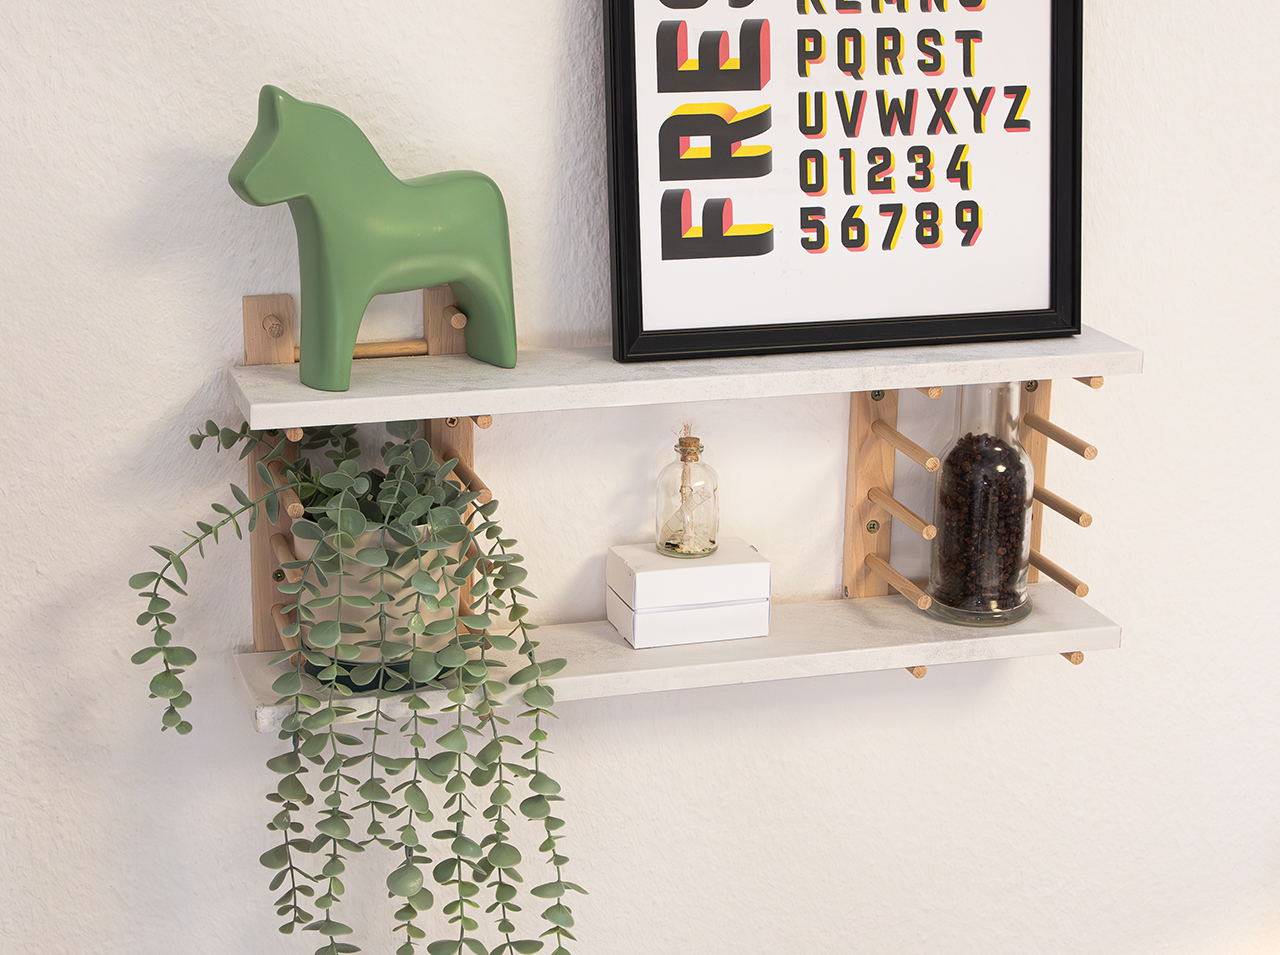
DIY kitchen rack: Spices at hand in a chic setting!
Project from Lucy - 0 CommentsHonestly, as a DIY fan: You enjoy cooking – and with lots of delicious spices. And it’s best to have them at hand and not buried in drawers or cabinets, where chaos reigns. We have just the solution for you and your spices: A chic open DIY rack for the kitchen, in which all spices can be stored neatly and within easy reach – in a trendy solid oak effect with d-c-fix® Ribbeck Oak adhesive foil. Have some practical DIY fun and treat your spices to a stylish upgrade for perfect order!
So beautiful. So practical – the DIY rack for the kitchen!
- d-c-fix® Ribbeck Oak
- Wood:
- 2 pieces 9 x 11 cm
- 1 piece 11 x 60 cm
- Wooden rod 60 cm
- Ruler
- Pen
- Scissors
- Utility knife
- Doctor blade
- Screws
- Cordless screwdriver
- Wood glue
- Clamps
- Saw
Let’s go
 Step 1
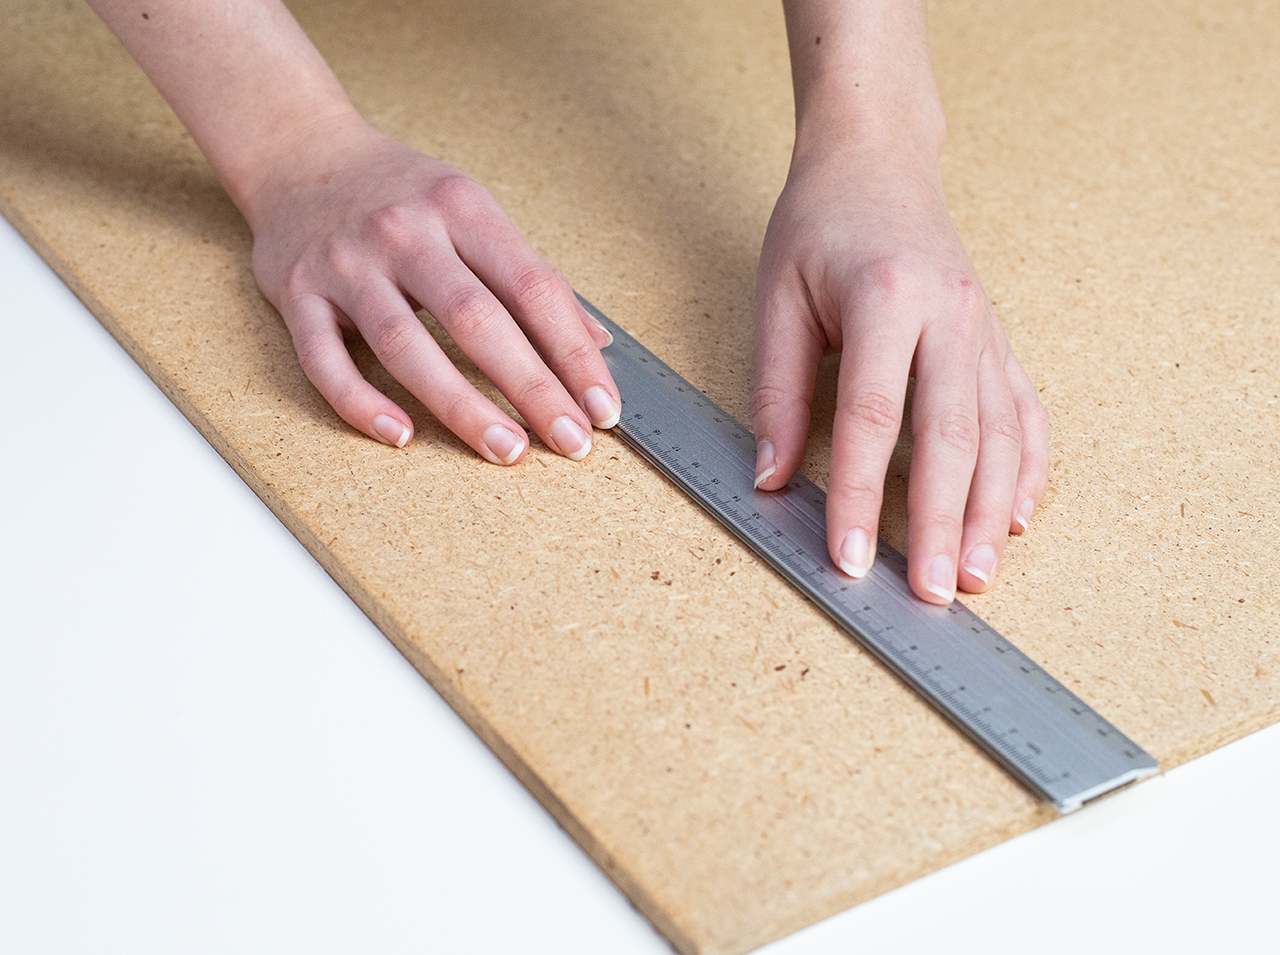
(If cutting from a single piece of wood) Mark the dimensions for the three pieces of the rack on the wood.
 Step 2
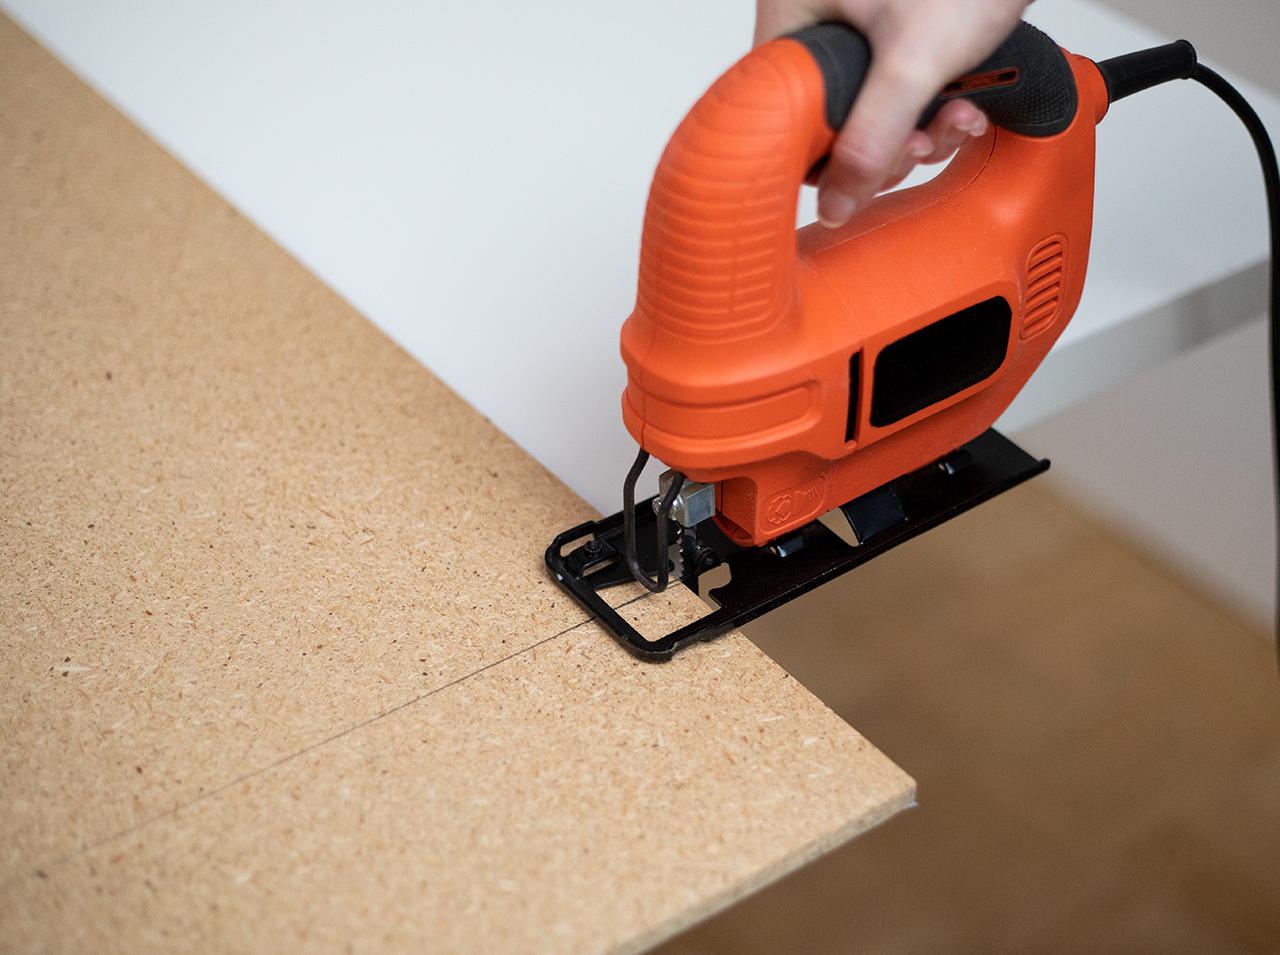
Cut the wooden pieces.
 Step 3
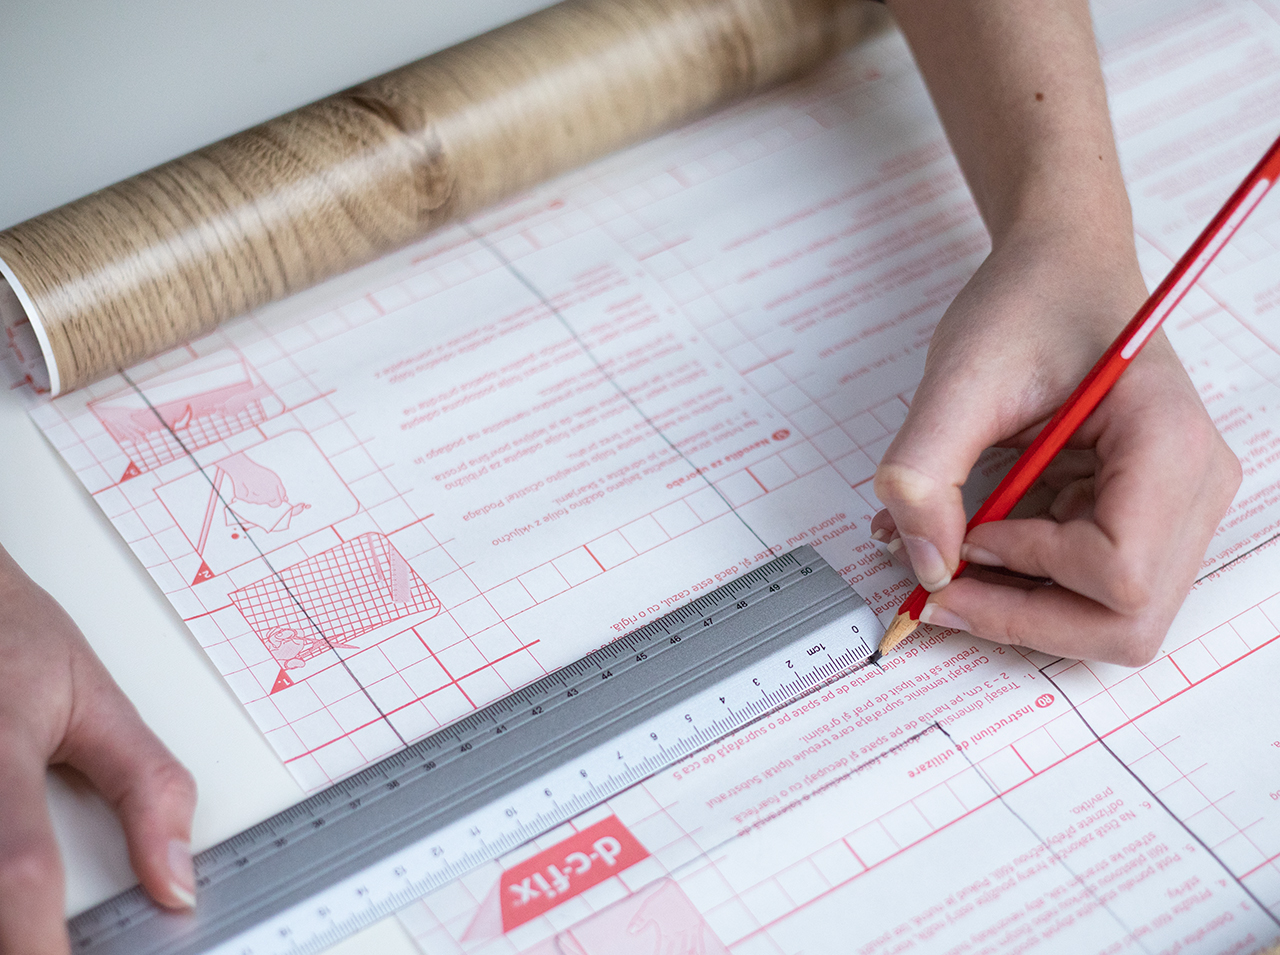
Draw the dimensions of the rack parts on the back of the adhesive foil, allowing for a little extra.
 Step 4
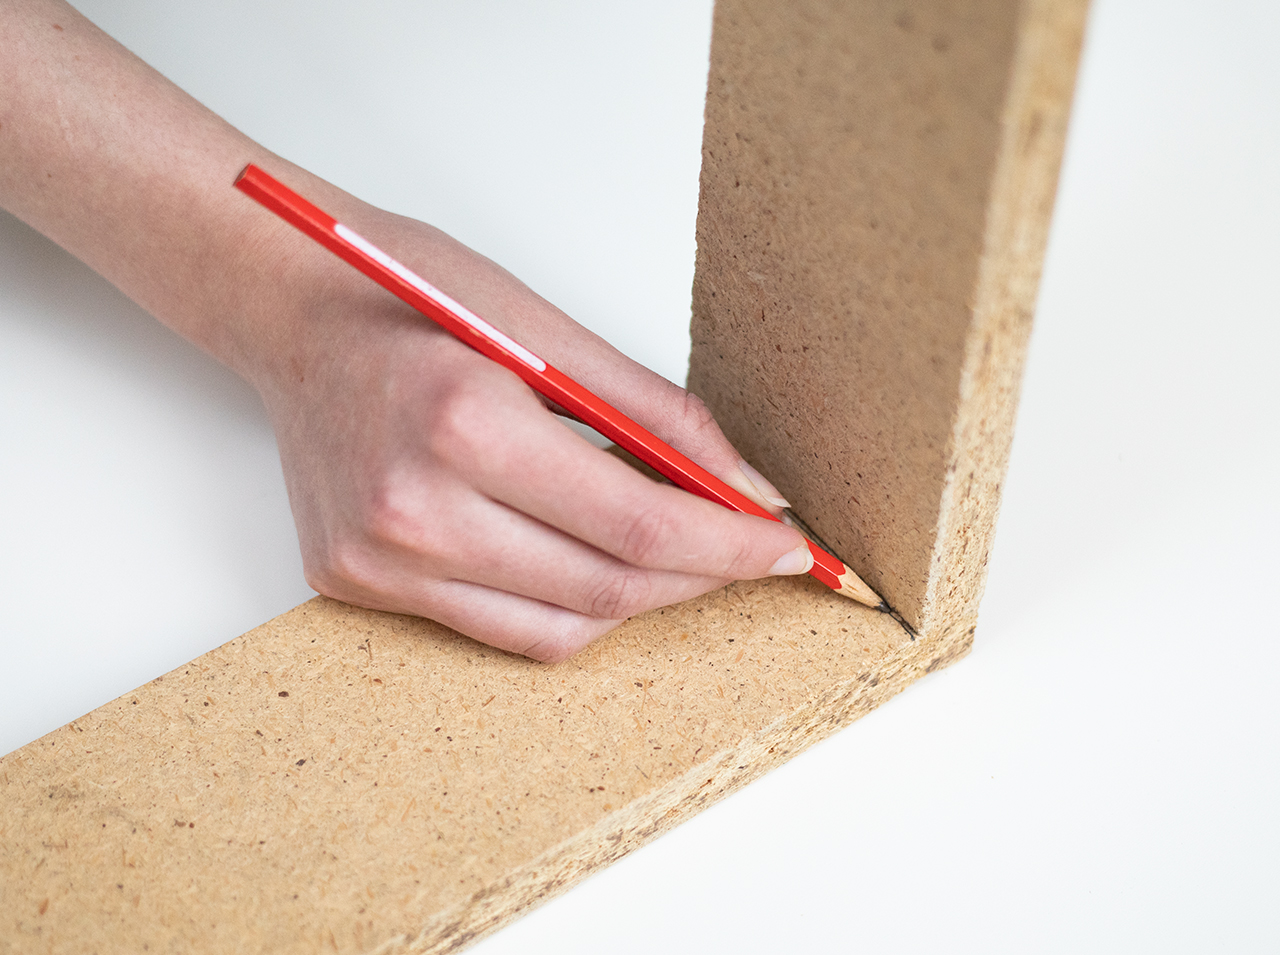
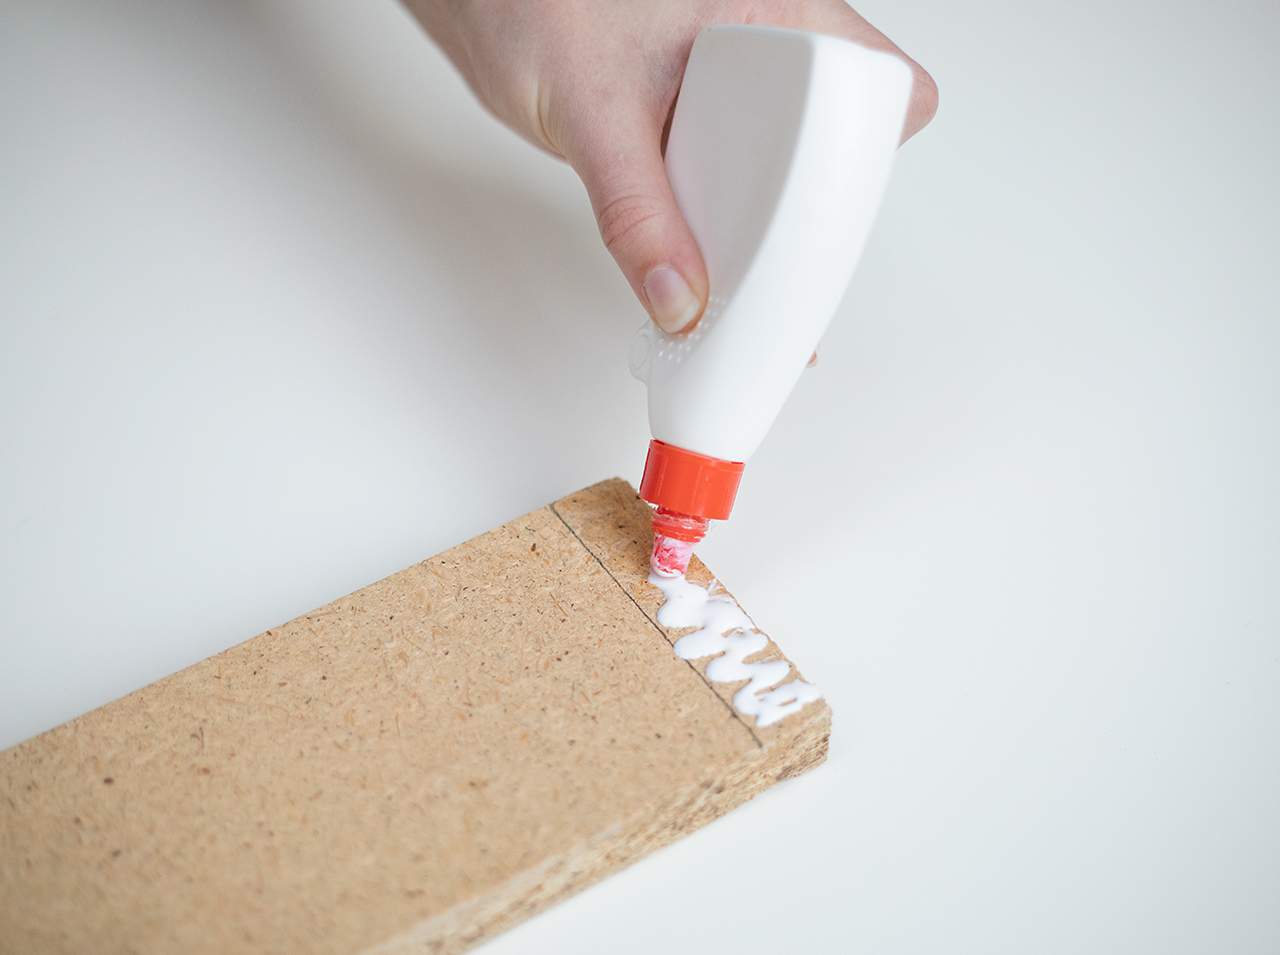
Place the sides on the bottom piece flush with the outer edge and draw lines on the inside edges. Apply some wood glue in the marked area.
 Step 5:
Then spread wood glue on the bottom of the sides and clamp them to the bottom piece.
 Step 6:
Now position the wooden rod between the side walls at the desired height, level it – and tighten the clamps firmly.
 Step 7:
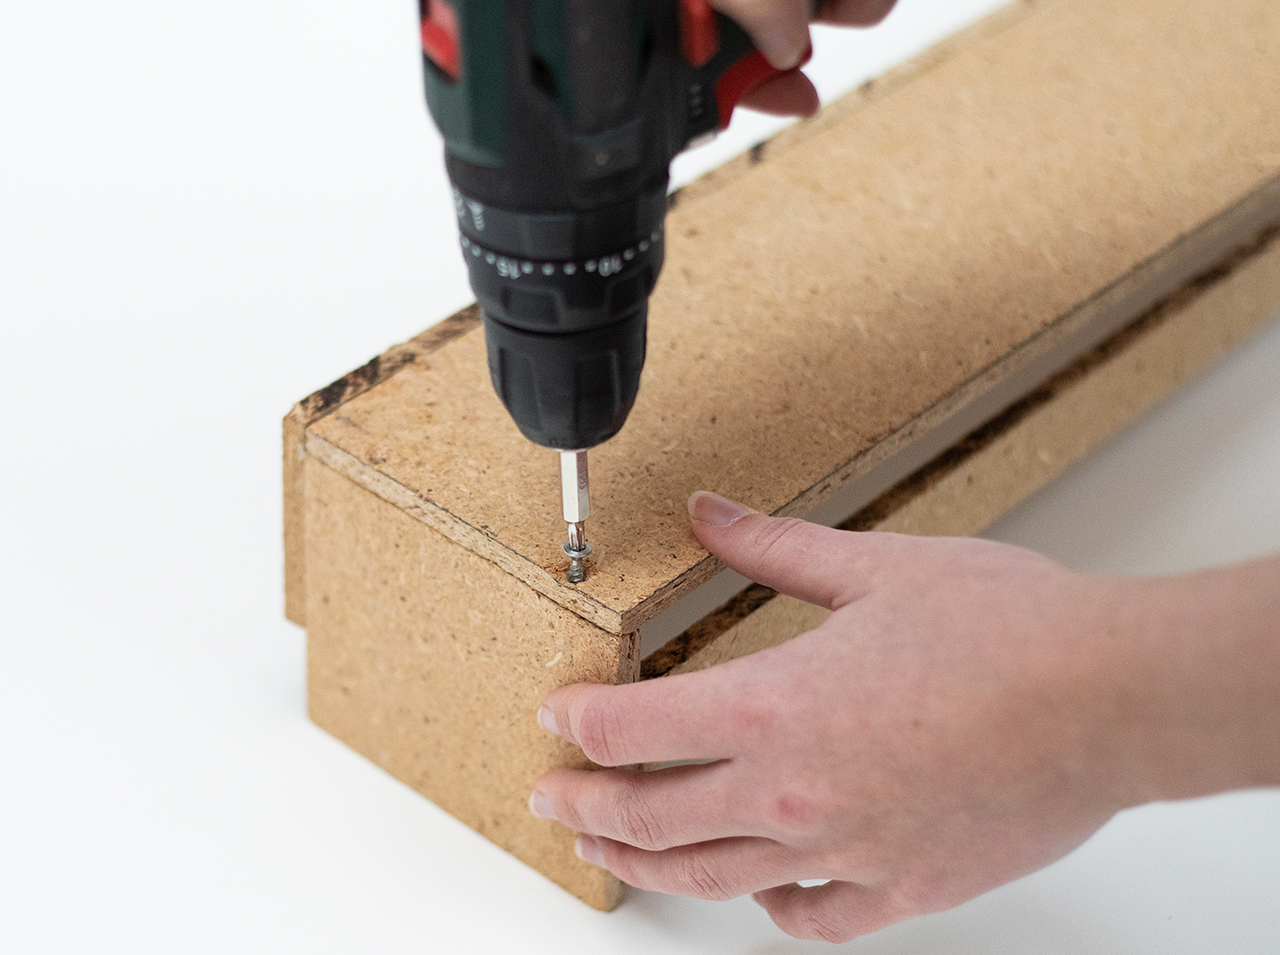
Let the whole piece dry for 24 hours. Screw the bottom firmly to the sides.
 Step 8:
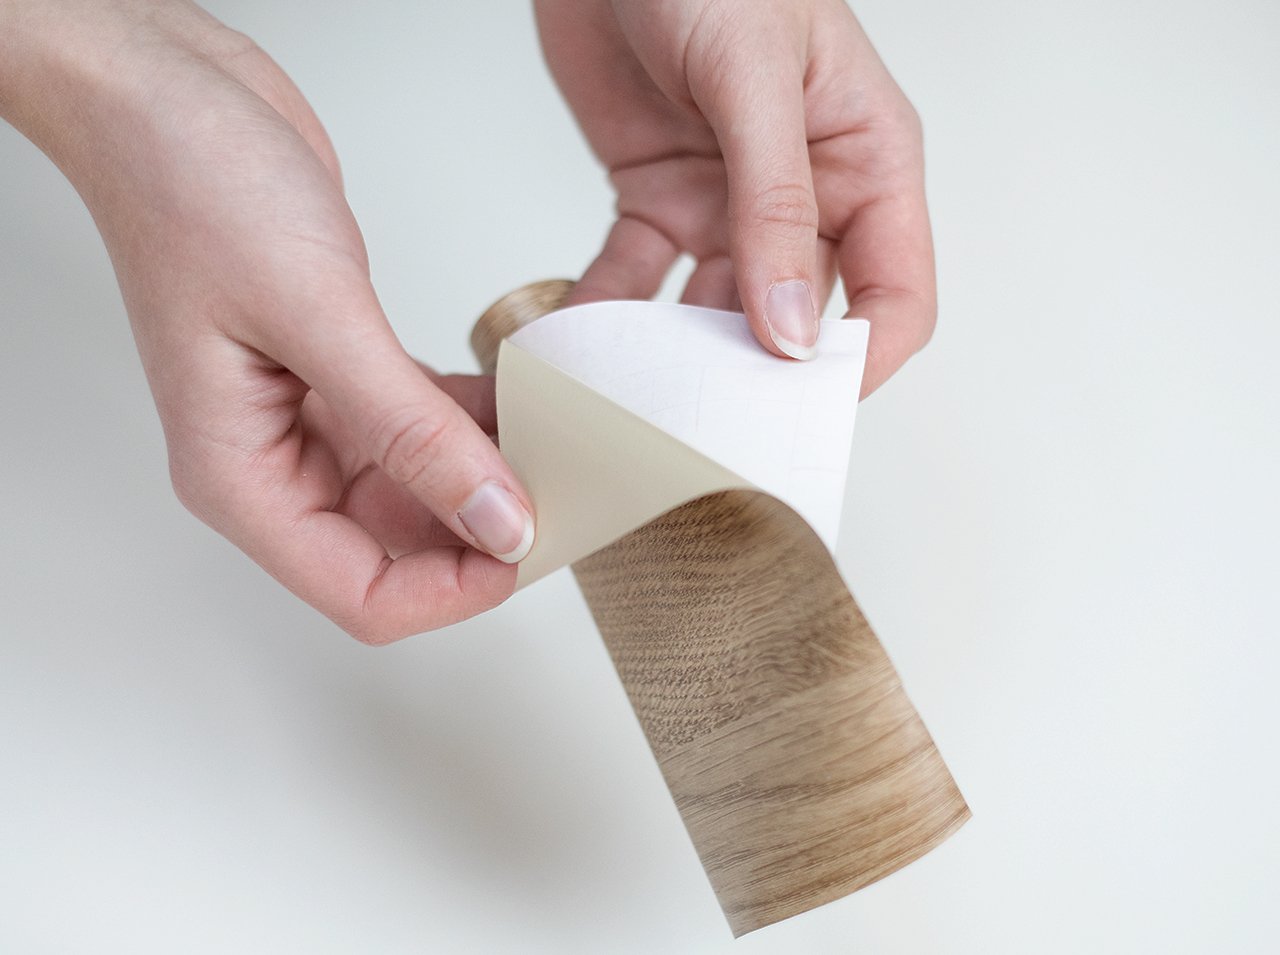
Cut the adhesive foil to the dimensions taken previously for the shelf and wooden rod. Remove the backing paper from the first section of foil.
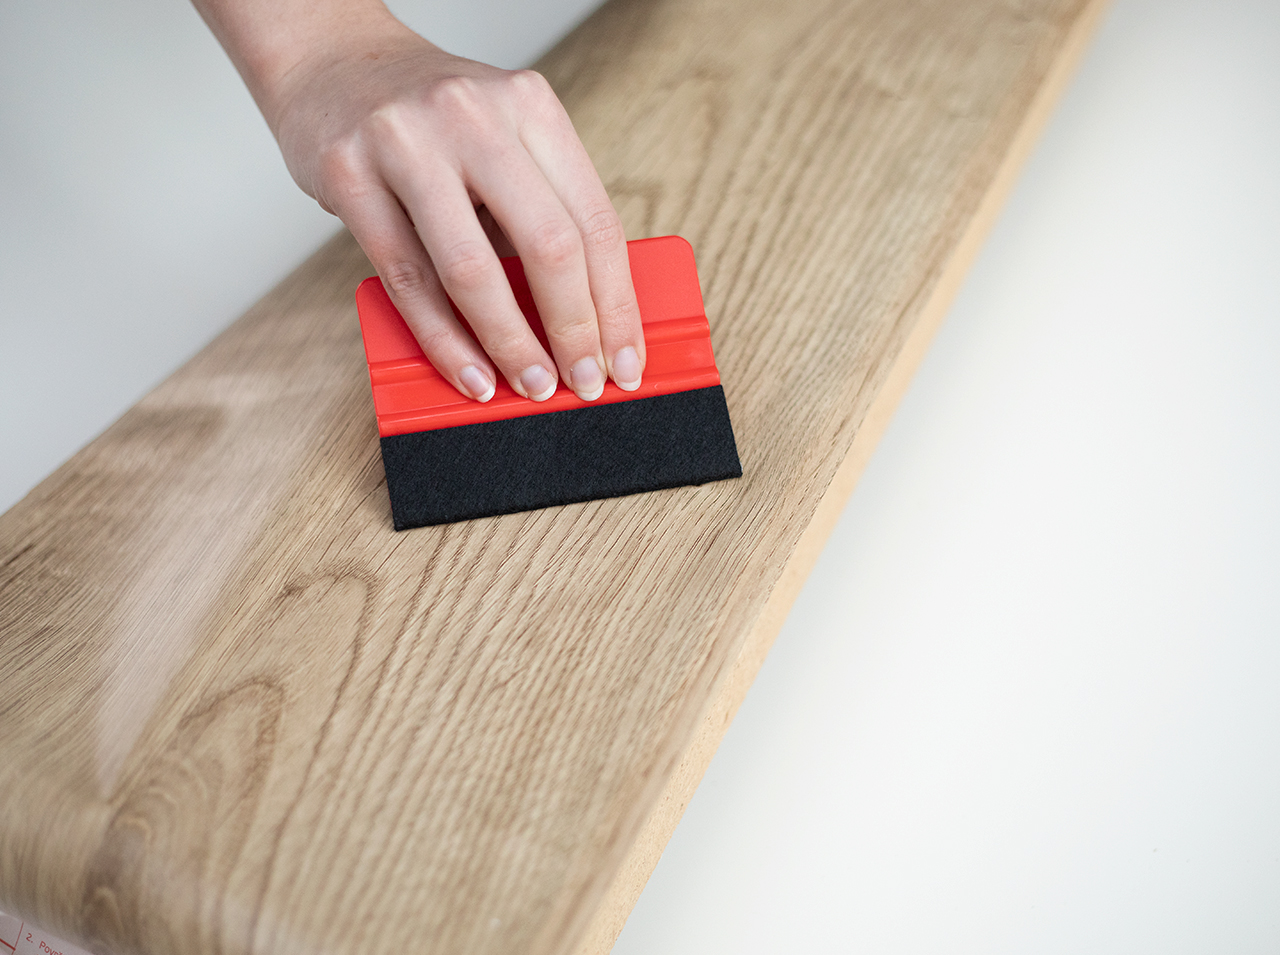 Step 9:
Apply the foil to the surface of the rack and use the doctor blade to press it down firmly. Do this for the whole rack.
You’re done!
Post A Comment
EXPERT ADVICE
Want even more great DIY effects for the kitchen? Then treat your kitchen to a stress-free makeover with the brilliant DIY d-c-fix® Ceramics Subway Tiles. A perfect match for a solid wood look with the trendy Ribbeck Oak decorative foil!
Preparation time
20 min
Execution
45 min
Difficulty level
Advanced
Costs
Medium
Projects you might like


No Comments