You will need…


Enter the search term and press "ENTER" .
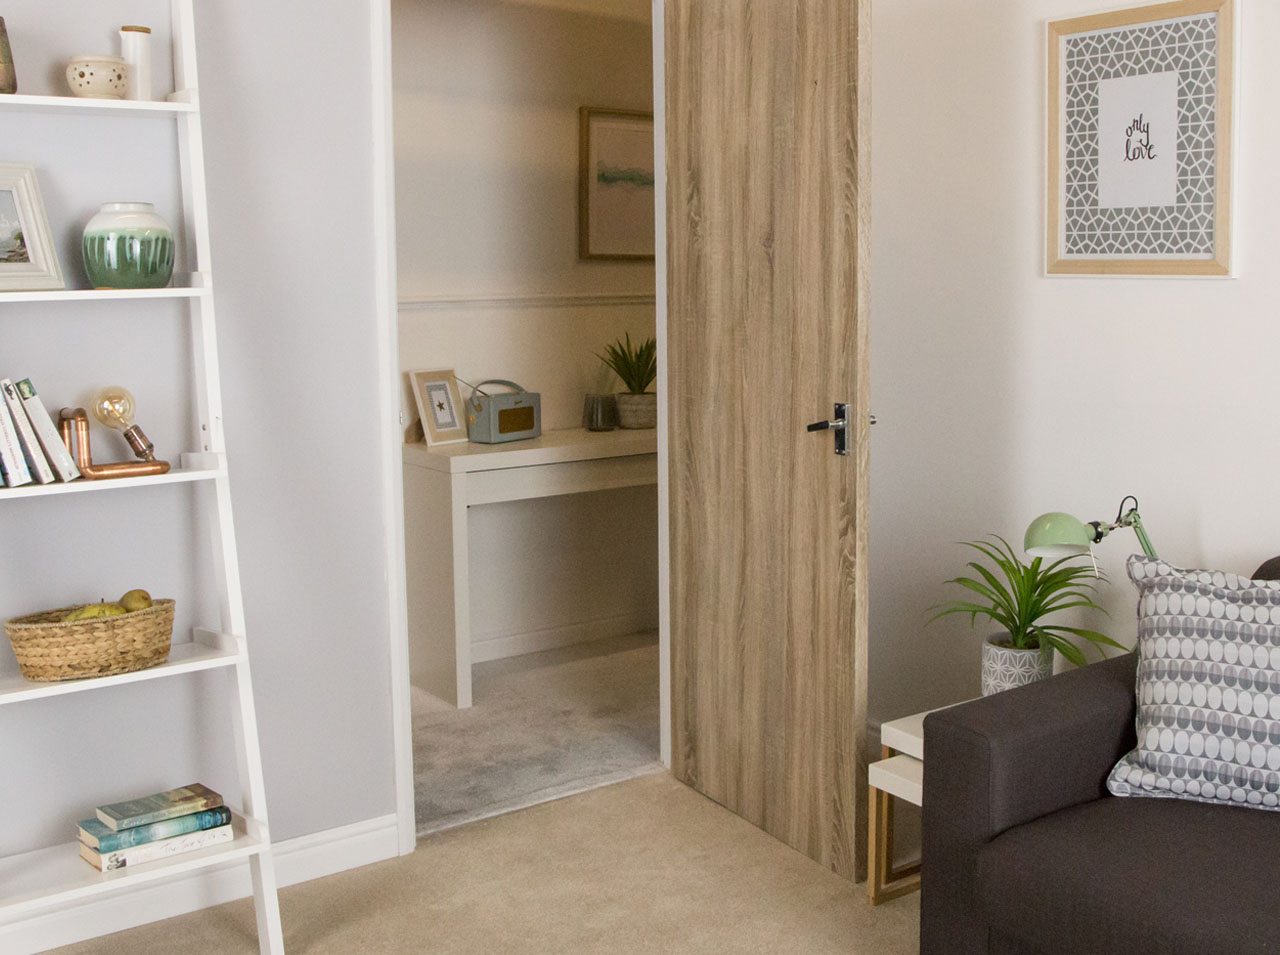
Attractive restyling for your door?
Project from Eva - 0 CommentsDo you want a new look for your door? You can give the doors in your home a new look with very little effort. The following do-it-yourself tutorial explains how you can give your home environment a natural wood look.
- d-c-fix®-adhesive film with the desired wood décor
- Scissors
- Film squeegee and cutter knife from the d-c-fix® film application kit
- Tape measure
- Cloth
Let’s go
Step 1
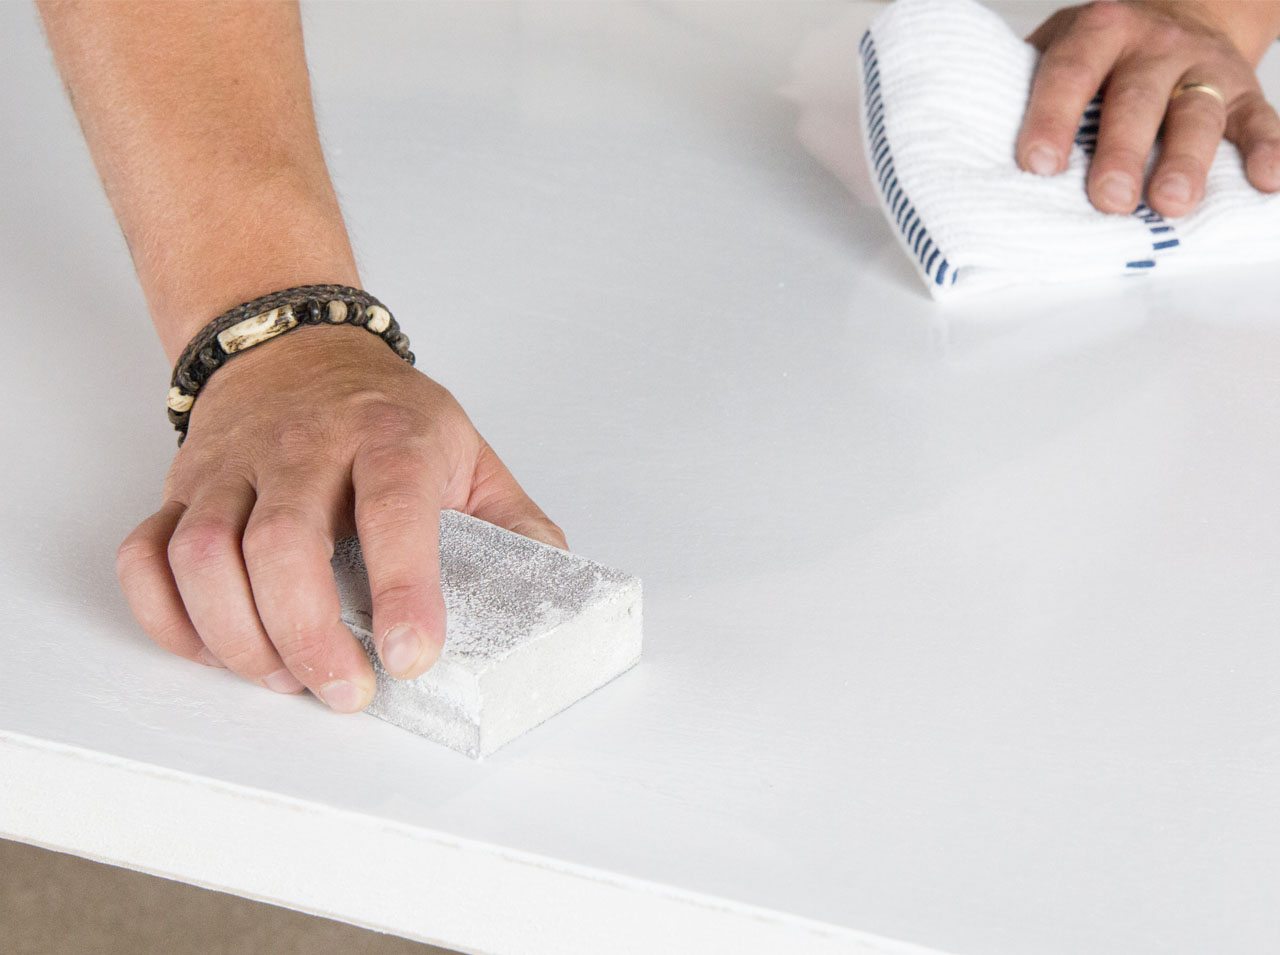
We recommend that you unhinge the door, remove the door handle and place the door horizontally before cleaning it. This simplifies the procedure for when you subsequently apply the film. Now thoroughly clean the door with a cloth to remove any residues, dust or grease. You should also remove large uneven areas, e.g. with sandpaper. Then measure the surface of the door to which you want to apply the film. You should add 2-3 centimetres on all sides so that the adhesive film is larger than the surface to which the film is to be applied. You can then cut it very easily with scissors.
Step 2
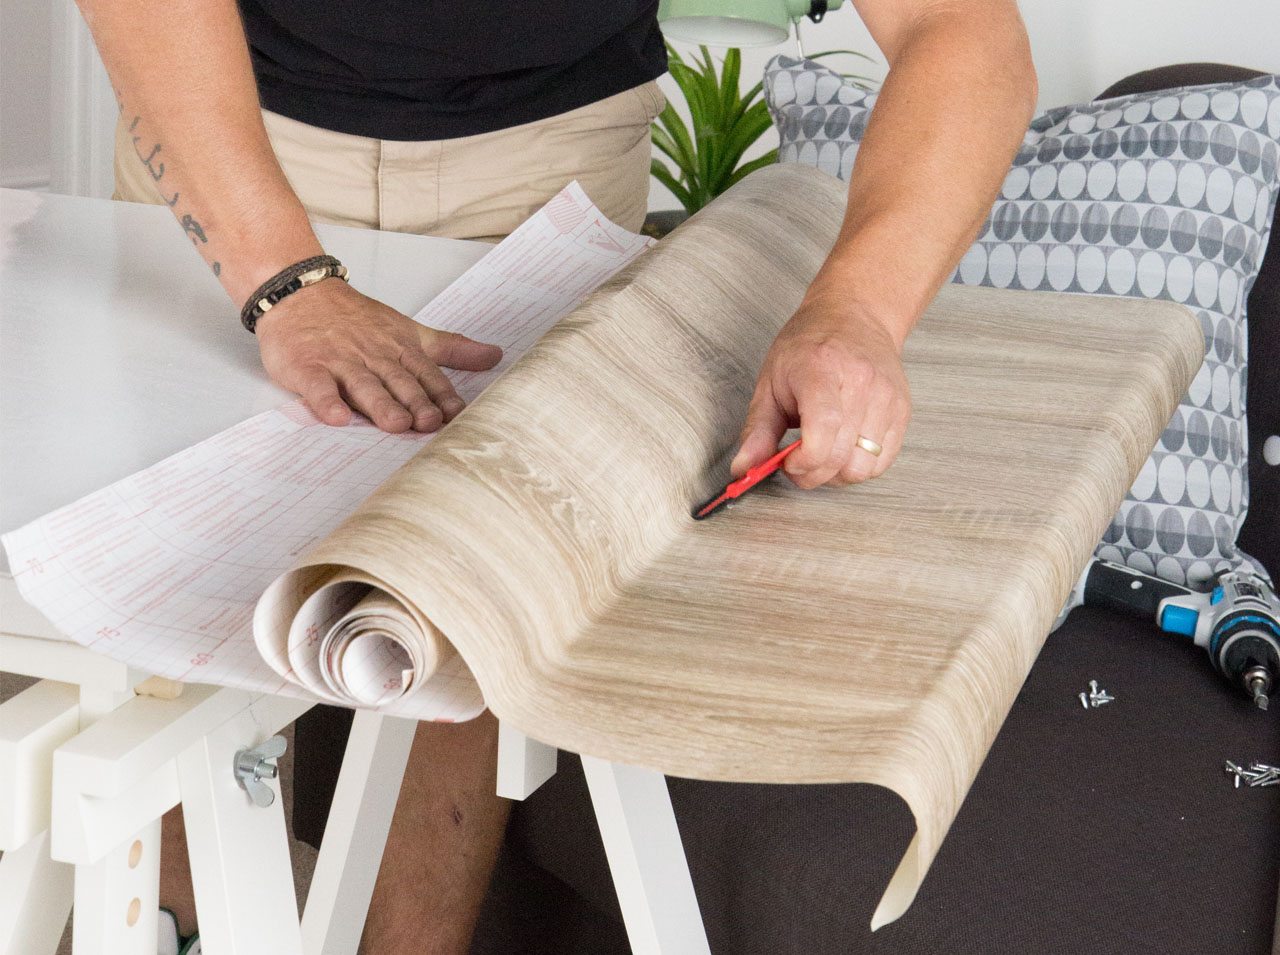
Now start to apply the film to the door: First detach approx. 5 cm of paper from the back of the film and fold it over so that only a small section of the adhesive surface is exposed. Then place the exposed surface of the adhesive film at one end of the door and align the film over the whole surface of the door. When the film is in the correct position, press it onto the surface. Remove more of the backing paper with one hand in order to apply the film to the rest of the surface and, at the same time, press the film on bit by bit with the film squeegee in your other hand. Using the squeegee slowly and meticulously helps to avoid any air bubbles forming.
Step 3
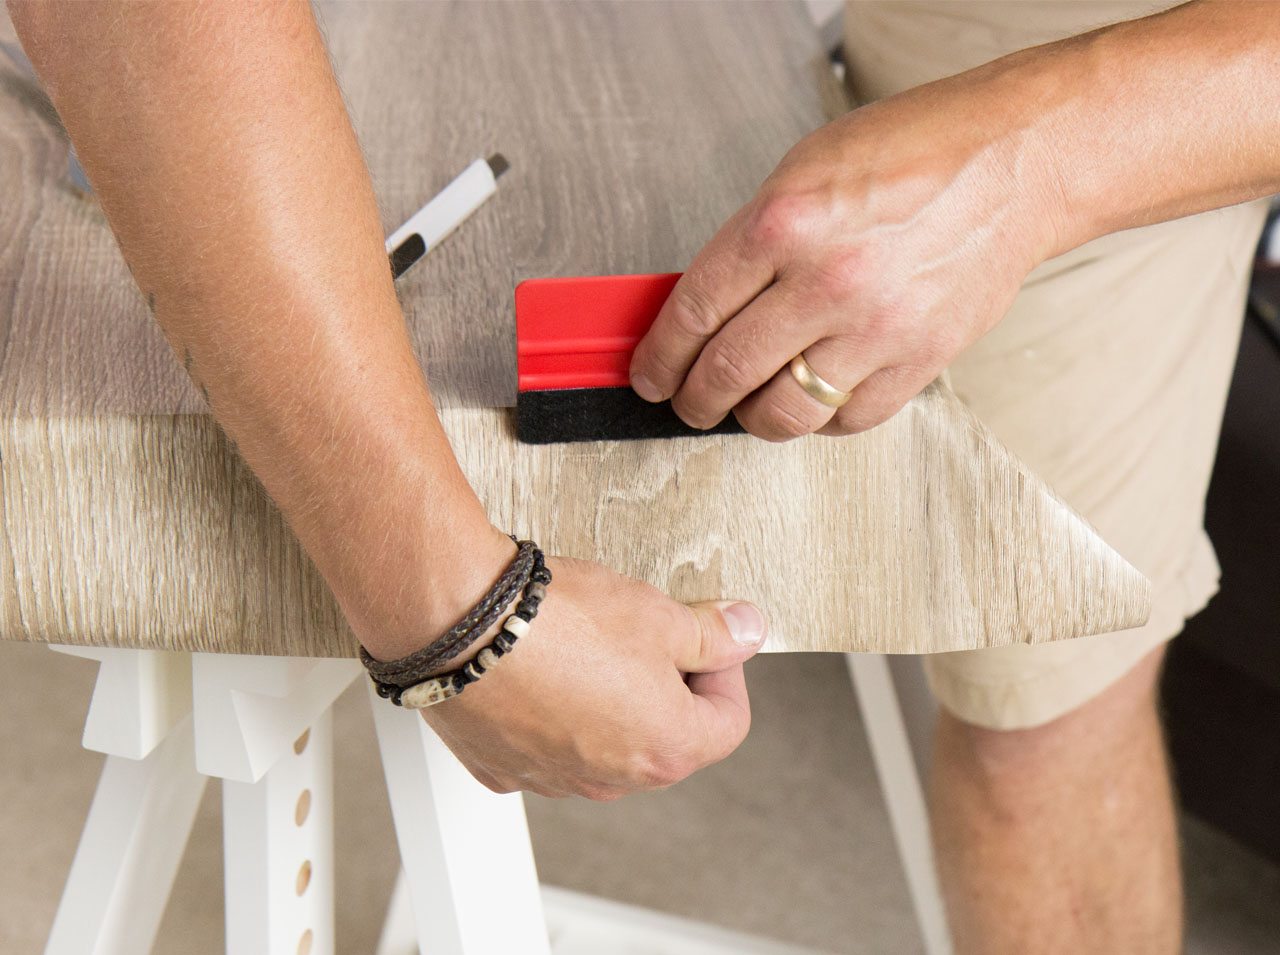
The sides come next once you have applied the film to the large door surface. First press the film tightly around the edge with your thumb so that it is attached well and no air is trapped. Then take the film squeegee and press the film firmly onto the entire side of the door.
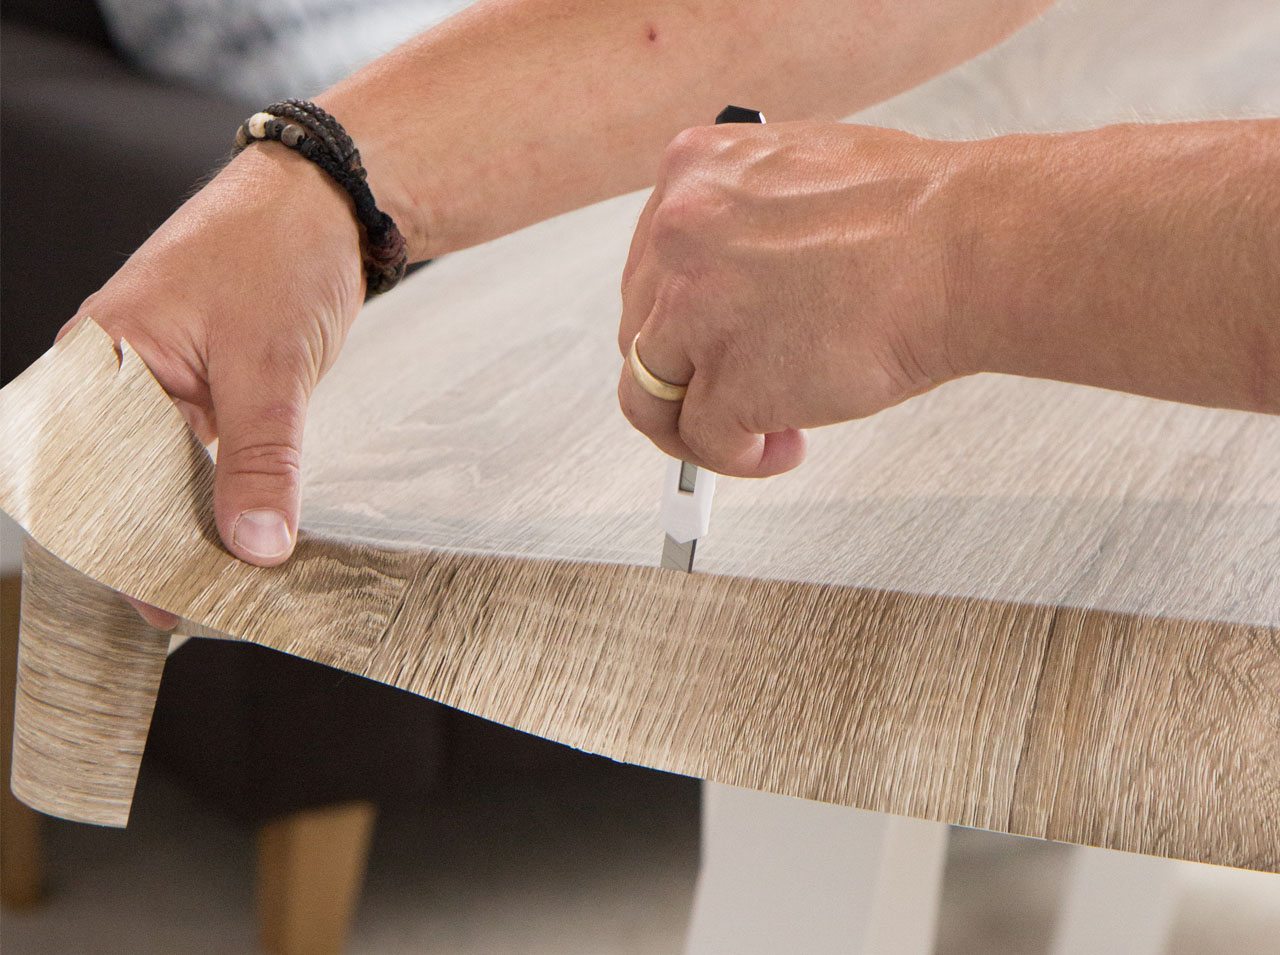
Step 4
When the film has been applied to all the door surfaces, use the cutter knife to remove the excess pieces of film. Pull the knife blade slowly and carefully along the edge of the door to cut off the film. This way you get straight, clean edges.
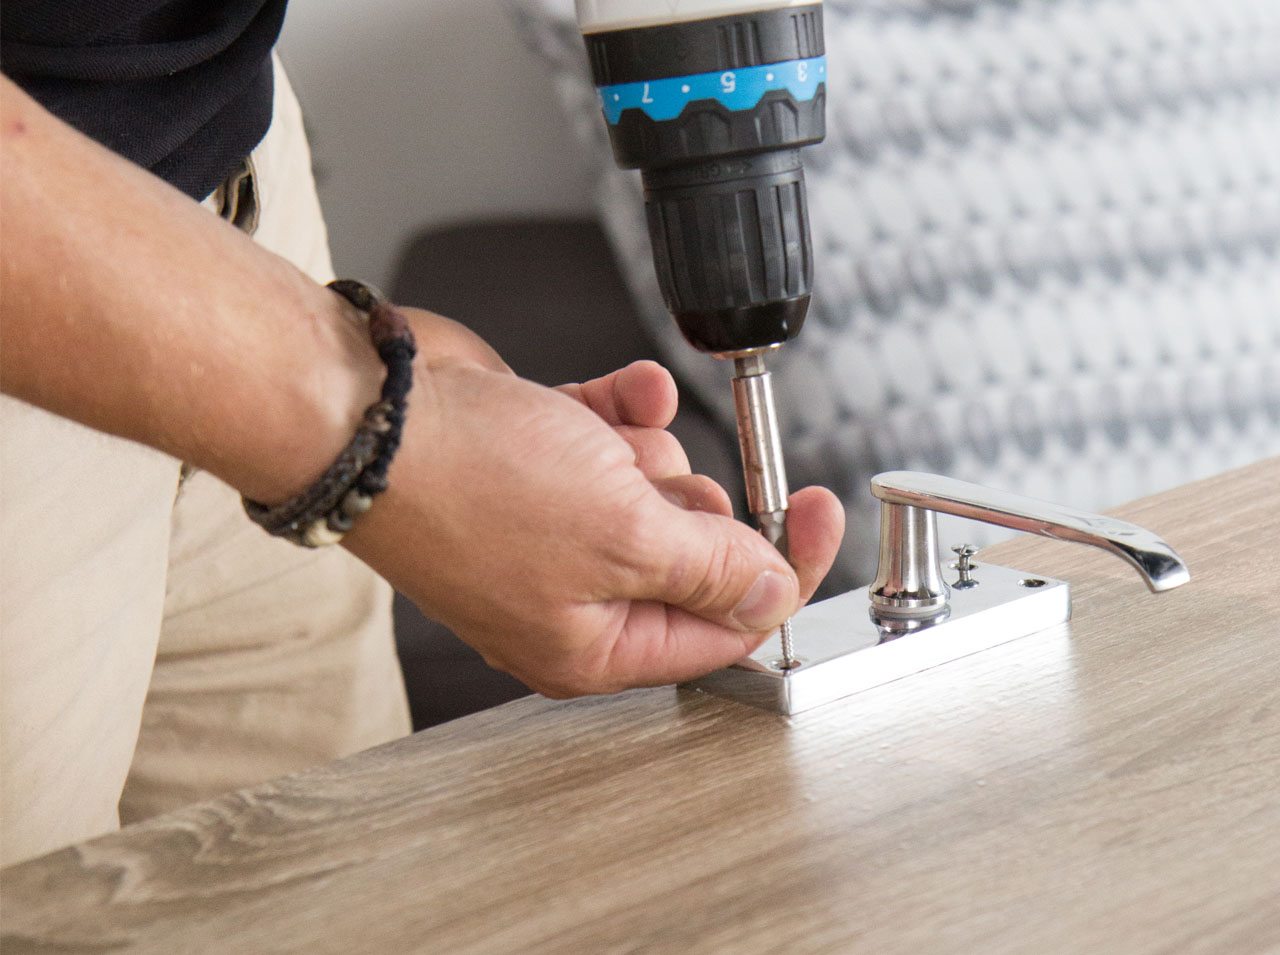
Step 5
Your new door is finished when you have applied all of the film and removed the excess pieces around the edges. Now you can screw on the handle again and hang the door.
You’re done!

Post A Comment
EXPERT ADVICE
With large surfaces, such as doors, we recommend laying the cut film over the entire surface once to check whether the size fits and that the film is in the right place at the outset or whether you need to adjust the film before all the film is applied. In addition, do not remove too much backing paper at once when applying the film so that you can press on the exposed area slowly and meticulously with the film squeegee without any air bubbles forming.
Preparation time
5 min
Execution
25 min
Difficulty level
beginner
Costs
low
No Comments