You will need…


Enter the search term and press "ENTER" .
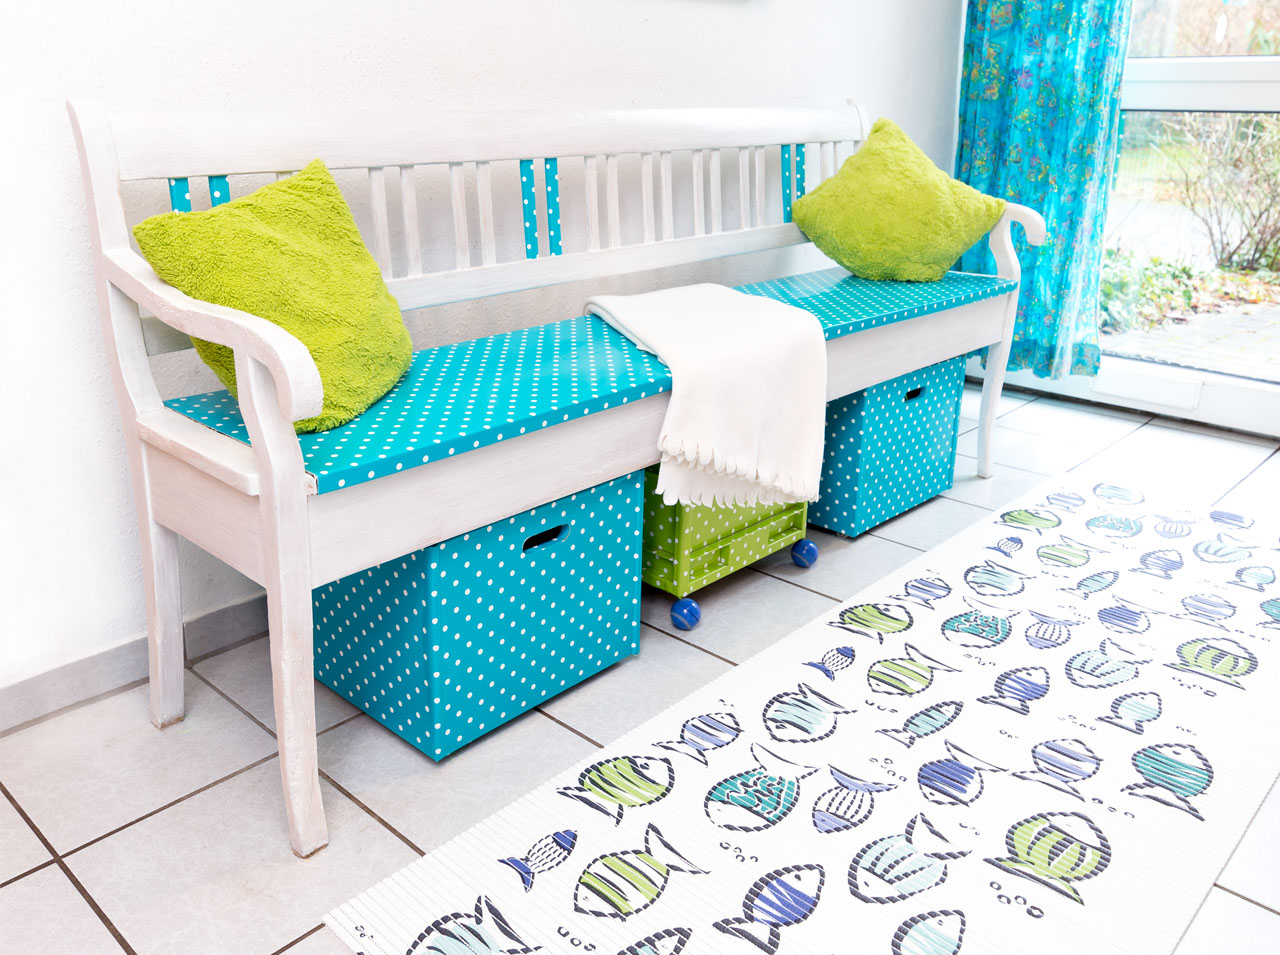
Transform your drab wooden bench into a colourful living experience with our DIY step-by-step tutorial
Project from Cintia - 0 CommentsTransform your old wooden bench not just into a refreshing oasis of well-being, but also into another eye-catcher that complements your room in just a few simple steps with creative DIY ideas. The refreshing blue and green colours impress in all aspects and provide the necessary touch of colour to your own four walls.
- A suitable bench and wooden box
- Two rolls of d-c-fix® Petersen blue adhesive film (F3460628) 45 cm x 200 cm
- 1 roll of d-c-floor comfort 65 cm x 200 cm (here: Design Nizza)
- Scissors
- d-c-fix® application set (squeegee and cutter)
- Hair dryer
Let’s go
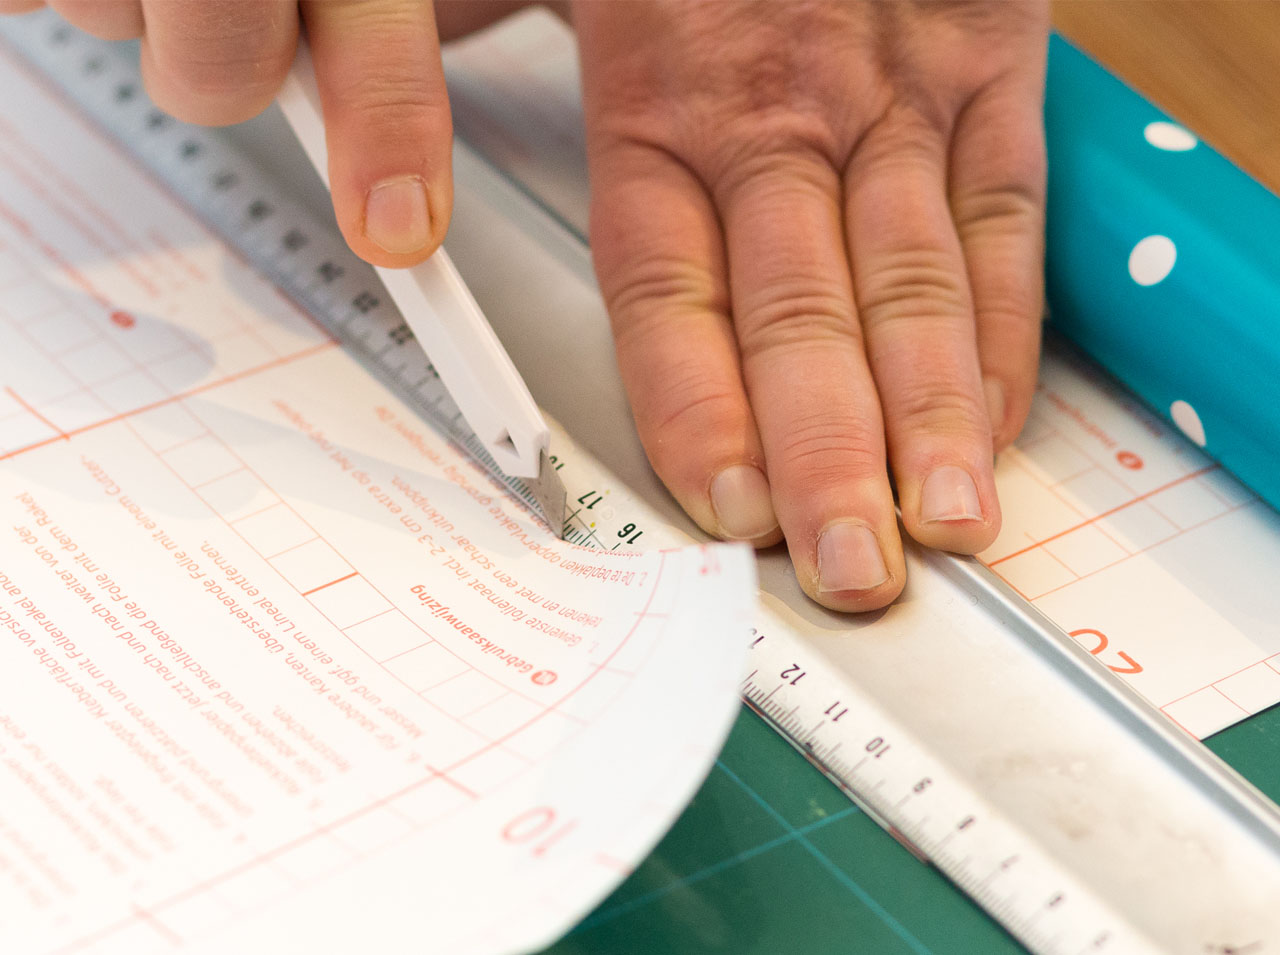
Step 1
Measure all sides of the box to which you want to apply the adhesive film. Then cut the appropriate pieces of film with a little overlap on the sides of each.

Step 2
First apply the adhesive film to the individual surfaces. To do this, remove a piece of the backing paper and then position it on one edge. Now slowly remove the backing paper bit by bit and use the squeegee to remove air bubbles from under the film moving from the centre outwards.
 Step 3
You can use a hair dryer to stick the film easily around the edges of your wooden bench. It’s best to heat the film slightly with a normal hair dryer and then carefully pull it around the edges.
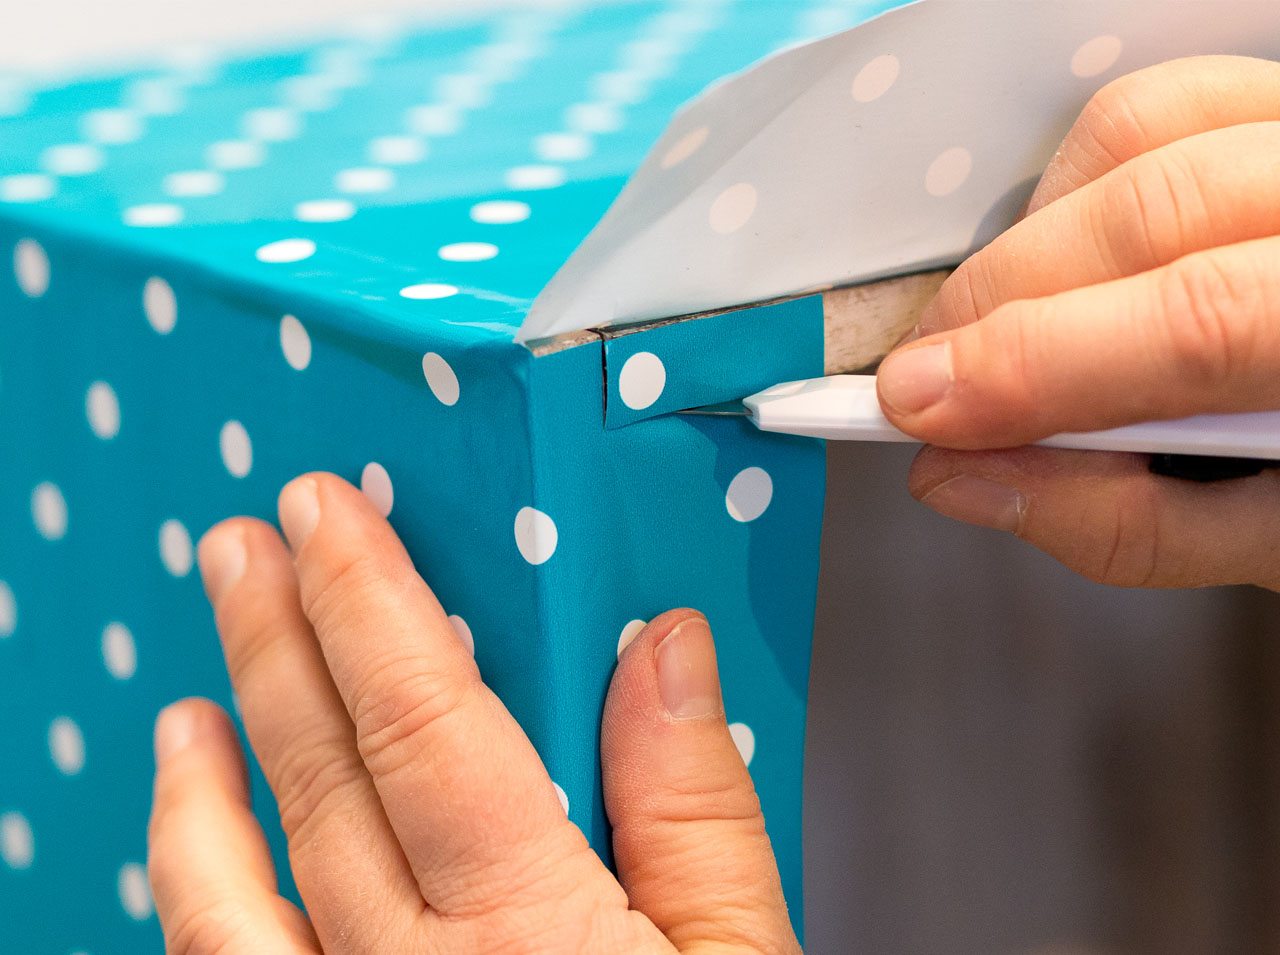
Step 4
Cut the film carefully on the corners of your bench and stick this down to match the film.
Step 5
You can round off the maritime look of your newly designed living room bench with a roll of d-c-floor comfort (Design Nizza).
You’re done

Post A Comment
EXPERT ADVICE
DIY expert tip: Transform old into new! Your living room bench will gleam with a new look in just a few steps!
Preparation time
3 min
Execution
45 min
Difficulty level
Advanced
Costs
medium
No Comments